Table of Contents
Advertisement
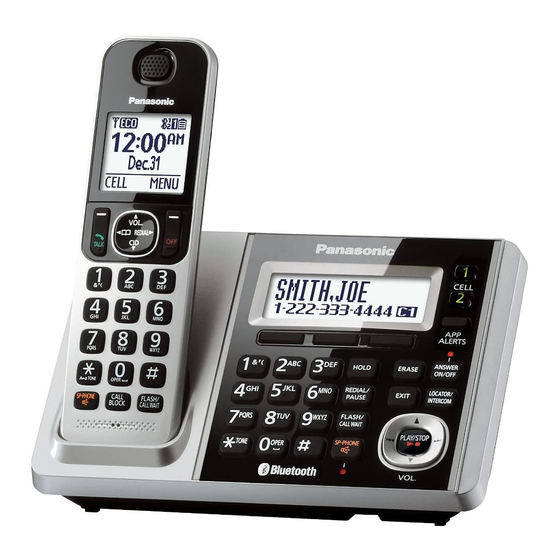
Digital Cordless Phone with Answering Machine
Model shown is KX-TG175SK.
Before initial use, see "Getting Started"
on page 10.
Thank you for purchasing a Panasonic product.
Please read these operating instructions before using the unit and save them for
future reference.
For assistance, please visit our Support page:
www.panasonic.ca/english/support
TG175CSK(en)_0324_ver011.pdf
Operating Instructions
Model No.
1
and Link2Cell Feature
KX-TGF372C
KX-TGF373C
KX-TG175CSK
2016/03/24
9:06:18
Advertisement
Table of Contents

Related Manuals for Panasonic KX-TGF370 Series


Summary of Contents for Panasonic KX-TGF370 Series
- Page 1 Model shown is KX-TG175SK. Before initial use, see “Getting Started” on page 10. Thank you for purchasing a Panasonic product. Please read these operating instructions before using the unit and save them for future reference. For assistance, please visit our Support page: www.panasonic.ca/english/support...
-
Page 2: Table Of Contents
Table of Contents Introduction Phonebook Model composition ........3 Phonebook ..........34 Accessory information ........3 Speed dial ..........37 Graphical symbols for use on equipment and Programming their descriptions ..........5 Menu list .............39 Important Information Alarm ............48 For your safety ..........6 Night mode ..........49 Important safety instructions ......7 Baby monitor ..........49 For best performance ........7... -
Page 3: Introduction
The desk stand/wall mounting adaptor comes attached to the base unit. See page 4 for replacement battery information. The handset cover comes attached to the handset. Additional/replacement accessories Please contact your nearest Panasonic dealer for sales information. For assistance, visit www.panasonic.ca/english/support TG175CSK(en)_0324_ver011.pdf 2016/03/24... - Page 4 Replacement batteries may have a different capacity from that of the supplied batteries. By registering the key detector (4 max.) to a Panasonic Digital Cordless Phone and attaching it to an easy-to-lose item in advance, you can locate and find the mislaid item to which the key detector is attached.
-
Page 5: Graphical Symbols For Use On Equipment And Their Descriptions
R BlackBerry is owned by Research In Motion Limited and is registered in the United States and may be pending or registered in other countries. Panasonic is not endorsed, sponsored, affiliated with or otherwise authorized by Research In Motion Limited. -
Page 6: Important Information
R The AC adaptor is used as the main waves emitted from this product may cause disconnect device. Ensure that the AC such devices to malfunction resulting in an outlet is installed near the product and is accident. easily accessible. For assistance, visit www.panasonic.ca/english/support TG175CSK(en)_0324_ver011.pdf 2016/03/24 9:06:18... -
Page 7: Important Safety Instructions
Failure to follow these instructions may Base unit location/avoiding noise cause the batteries to swell or explode. Attention: The base unit and other compatible Panasonic units use radio waves to communicate with each other. R For maximum coverage and noise-free communications, place your base unit: –... -
Page 8: Other Information
R Do not use benzine, thinner, or any abrasive powder. Other information CAUTION: Risk of explosion if battery is replaced by an incorrect type. Dispose of used batteries according to the instructions. For assistance, visit www.panasonic.ca/english/support TG175CSK(en)_0324_ver011.pdf 2016/03/24 9:06:18... -
Page 9: Specifications
Maximum: Approx. 4.5 W Charger: Standby: Approx. 0.1 W Maximum: Approx. 1.8 W R Operating conditions: 0 °C – 40 °C (32 °F – 104 °F), 20 % – 80 % relative air humidity (dry) For assistance, visit www.panasonic.ca/english/support TG175CSK(en)_0324_ver011.pdf 2016/03/24 9:06:18... -
Page 10: Getting Started Setting Up
(RJ11C) until you hear a click. A DSL/ADSL filter (not supplied) is required if you have a DSL/ADSL service. Note: R Use only the supplied Panasonic AC adaptor PNLV226. R Follow the directions on the display to set up the unit. - Page 11 However, during a cellular call, R Use the supplied rechargeable batteries. For replacement, we recommend using the is not displayed even though this Panasonic rechargeable batteries noted on feature is activated. page 4, 7. R Eco mode is turned off when the clarity booster is activated (page 22).
-
Page 12: Controls
Headset jack Dial keypad (*: TONE) MZN (SP-PHONE: Speakerphone) Microphone Receiver Charge contacts Display Speaker MOFFN Display MFLASHN MCALL WAITN MHOLDN MCALL BLOCKN MREDIALN MPAUSEN Charge contacts MFLASHN MCALL WAITN MZN (SP-PHONE: Speakerphone) For assistance, visit www.panasonic.ca/english/support TG175CSK(en)_0324_ver011.pdf 2016/03/24 9:06:18... -
Page 13: Display Icons/Indicators
(page 49) The call is put on hold. R When flashing rapidly: An In use Answering system is being incoming call is now being used by another handset or received. the base unit. For assistance, visit www.panasonic.ca/english/support TG175CSK(en)_0324_ver011.pdf 2016/03/24 9:06:18... - Page 14 A Bluetooth headset is (page 18). connected to the base unit. It is ready for use. A Bluetooth headset is in use. In use Answering system is being used by the handset. For assistance, visit www.panasonic.ca/english/support TG175CSK(en)_0324_ver011.pdf 2016/03/24 9:06:19...
-
Page 15: Language Settings
2 digits for each. Example: July 12, 2016 07 12 16 MOKN Enter the current hour and minute (12-hour clock format) by selecting 2 digits for each. Example: 9:30 09 30 *: Select “AM” or “PM”. For assistance, visit www.panasonic.ca/english/support TG175CSK(en)_0324_ver011.pdf 2016/03/24 9:06:19... -
Page 16: Link To Cell
Bluetooth device such as a Bluetooth For CELL 1: MMENUN#6111 headset is connected to your cellular phone. For CELL 2: MMENUN#6112 Base unit: Press and hold MCELL 1N or MCELL 2N for a few seconds. For assistance, visit www.panasonic.ca/english/support TG175CSK(en)_0324_ver011.pdf 2016/03/24 9:06:19... -
Page 17: Link To Cell Settings
The following settings are available: – “Off”: Turn this feature off to use the ringer tones of the handset and base unit. Caller information is announced depending on the Talking Call Display setting (page 43). For assistance, visit www.panasonic.ca/english/support TG175CSK(en)_0324_ver011.pdf 2016/03/24 9:06:19... - Page 18 If you want to use it again, the cellular line selection (page 19, reconnect the cellular phone to the base unit. 26). R Once you set this mode, the following features cannot be used: For assistance, visit www.panasonic.ca/english/support TG175CSK(en)_0324_ver011.pdf 2016/03/24 9:06:19...
- Page 19 MSAVEN MMENUN#634 MOFFN MbN: Select the desired setting. a MSAVEN Proceed with the operation for your unit. Handset: MOFFN Base unit: MEXITN After the Bluetooth device is paired, the device name is displayed. For assistance, visit www.panasonic.ca/english/support TG175CSK(en)_0324_ver011.pdf 2016/03/24 9:06:19...
-
Page 20: Making/Answering Calls Using The Handset
When you finish talking, press MOFFN. list Note: The last 5 phone numbers dialed are stored in R To switch back to the receiver, press MZN/ the redial list (each 48 digits max.). MEN REDIAL For assistance, visit www.panasonic.ca/english/support TG175CSK(en)_0324_ver011.pdf 2016/03/24 9:06:19... -
Page 21: Answering Calls
MFLASHN allows you to use the special Press MDN or MCN repeatedly to select the features of your host PBX such as transferring desired volume while ringing. an extension call, or accessing optional telephone services. For assistance, visit www.panasonic.ca/english/support TG175CSK(en)_0324_ver011.pdf 2016/03/24 9:06:19... - Page 22 R This feature is not available while using the displayed. However, during a cellular call, speakerphone. is not displayed even though the R When both the “Equalizer” setting and feature is activated. noise reduction are activated, shown on the display. For assistance, visit www.panasonic.ca/english/support TG175CSK(en)_0324_ver011.pdf 2016/03/24 9:06:19...
- Page 23 MSELECTN The other 2 parties can continue the R The call is transferred to the handset. conversation. R To put the outside call on hold: MMENUN a MbN: “Hold” a MSELECTN For assistance, visit www.panasonic.ca/english/support TG175CSK(en)_0324_ver011.pdf 2016/03/24 9:06:19...
-
Page 24: Power Backup Operation For Landline
However, When you finish talking, press MOFFN. some functions such as Call Display and phonebook are available only when using a handset other than the handset supplying For assistance, visit www.panasonic.ca/english/support TG175CSK(en)_0324_ver011.pdf 2016/03/24 9:06:19... - Page 25 R Speakerphone is turned on. When you finish talking, press MOFFN. n When 2 or more handsets are registered: When the unit rings, use a handset which is not supplying power to the base unit. For assistance, visit www.panasonic.ca/english/support TG175CSK(en)_0324_ver011.pdf 2016/03/24 9:06:19...
-
Page 26: Making/Answering Calls Using The Base Unit
When storing a calling card access number The last 10 phone numbers dialed are stored and/or PIN in the phonebook, a pause is also in the redial list (each 48 digits max.). needed (page 37). MREDIALN For assistance, visit www.panasonic.ca/english/support TG175CSK(en)_0324_ver011.pdf 2016/03/24 9:06:19... -
Page 27: Answering Calls
– only 1 cellular phone is paired. To switch between calls, press MCALL – a specific line is set to make WAITN. cellular calls (page 19). To release hold on the landline: Press MZN. For assistance, visit www.panasonic.ca/english/support TG175CSK(en)_0324_ver011.pdf 2016/03/24 9:06:19... - Page 28 Press MCELL 1N or MCELL 2N. MINTERCOMN to return to the outside call. To hang up the 2nd call and return to the 1st call (landline call), press MZN 2 times. To complete the transfer: Press MZN. For assistance, visit www.panasonic.ca/english/support TG175CSK(en)_0324_ver011.pdf 2016/03/24 9:06:19...
- Page 29 To answer the 2nd call: MZN, MCELL 1N, or MCELL 2N To hang up the 2nd call and return to the 1st call (cellular call), press MZN, then press MCELL 1N or MCELL 2N. For assistance, visit www.panasonic.ca/english/support TG175CSK(en)_0324_ver011.pdf 2016/03/24 9:06:19...
-
Page 30: Intercom
– To page all handsets, press 0 or wait for a few seconds. When you finish talking, press MZN. Answering an intercom call Handset Press M N to answer the page. When you finish talking, press MOFFN. For assistance, visit www.panasonic.ca/english/support TG175CSK(en)_0324_ver011.pdf 2016/03/24 9:06:19... -
Page 31: Call Block
MbN: “Yes” a MSELECTN block list. – “Block range of numbers” /“Block Edit the phone number if necessary (24 digits max.). : The unit blocks calls that range of #” For assistance, visit www.panasonic.ca/english/support TG175CSK(en)_0324_ver011.pdf 2016/03/24 9:06:19... - Page 32 MbN: “Block a single number” a MSELECTN MSELECTN MbN: Select the desired setting. a MMENUN a MbN: “Add” a MSELECTN MSAVEN a MOFFN Enter the phone number (24 digits max.). Base unit MSAVEN a MOFFN MMENUN #240 For assistance, visit www.panasonic.ca/english/support TG175CSK(en)_0324_ver011.pdf 2016/03/24 9:06:19...
- Page 33 MEDITN a Edit the number. a MSAVEN a MOFFN To erase a number: MERASEN a MbN: “Yes” a MSELECTN a MOFFN Base unit MMENUN#217 MbN: “Block a single #” or “Block range of #” a MSELECTN For assistance, visit www.panasonic.ca/english/support TG175CSK(en)_0324_ver011.pdf 2016/03/24 9:06:19...
-
Page 34: Phonebook
Phone numbers of up to 24 digits can be stored in the phonebook. Character Handset & ’ n When a cellular phone is paired: – MEN REDIAL MbN: Select the desired phone number. a MMENUN MbN: “Save” a MSELECTN For assistance, visit www.panasonic.ca/english/support TG175CSK(en)_0324_ver011.pdf 2016/03/24 9:06:19... - Page 35 MbN: “Edit” a MSELECTN MbN: Select the desired group. a Press MEDITN repeatedly until the MSELECTN phone number is shown in the R If you selected “Home”, “Cell 1”, or “Cell 2”, go to step 5. For assistance, visit www.panasonic.ca/english/support TG175CSK(en)_0324_ver011.pdf 2016/03/24 9:06:19...
- Page 36 Proceed with the operation for your unit. MbN: Select the desired entry. Handset: MFN W Base unit: MWN Editing entries MbN: Select the desired entry. Handset Find the desired entry (page 36). For assistance, visit www.panasonic.ca/english/support TG175CSK(en)_0324_ver011.pdf 2016/03/24 9:06:20...
-
Page 37: Speed Dial
This feature allows you to dial phone numbers digits max.). a MOKN in the phonebook while you are on a call. This MSELECTN a MOFFN feature can be used, for example, to dial a For assistance, visit www.panasonic.ca/english/support TG175CSK(en)_0324_ver011.pdf 2016/03/24 9:06:20... - Page 38 Press and hold the desired speed dial key (1 to 9). MCELLN R The unit starts dialing when: – only 1 cellular phone is paired. – a specific line is set to make cellular calls (page 19). For assistance, visit www.panasonic.ca/english/support TG175CSK(en)_0324_ver011.pdf 2016/03/24 9:06:20...
-
Page 39: Programming
Viewing the caller list. #213 Main menu: “Answering device” Sub-menu 1 Sub-menu 2 Settings Code Play new message – – #323 Play all message – – #324 Erase all – – #325 message For assistance, visit www.panasonic.ca/english/support TG175CSK(en)_0324_ver011.pdf 2016/03/24 9:06:20... - Page 40 <On> #310 – – #327 Answer on – – #328 Answer off Main menu: “Voicemail access” Operation Code Listening to voicemail messages. #330 Main menu: “Intercom” Operation Code Paging the desired unit. #274 For assistance, visit www.panasonic.ca/english/support TG175CSK(en)_0324_ver011.pdf 2016/03/24 9:06:20...
- Page 41 – Alert tone <Tone 2> #6042 Pair – #6241 #6242 Unpair – #6111 #6112 Phonebook – – #618 transfer Headset – #621 Add new device – #622 Connect Disconnect Pair – #621 Unpair – #612 For assistance, visit www.panasonic.ca/english/support TG175CSK(en)_0324_ver011.pdf 2016/03/24 9:06:20...
- Page 42 Date and time Memo alarm Alarm1–3 Once #720 Daily Weekly <Off> *1, *9 – <Caller ID auto> #226 – Time adjustment Manual Main menu: “Speed dial” Operation Code Viewing the speed dial entry. #261 For assistance, visit www.panasonic.ca/english/support TG175CSK(en)_0324_ver011.pdf 2016/03/24 9:06:20...
- Page 43 – 2:Add new device #6564 Detector4 (for Detector2) Registration – #6571 – – 3:Add new device #6572 (for Detector3) – 4:Add new device #6573 (for Detector4) #6574 Deregistration – #6581 – #6582 #6583 #6584 For assistance, visit www.panasonic.ca/english/support TG175CSK(en)_0324_ver011.pdf 2016/03/24 9:06:20...
- Page 44 Level 1–4 <2> #145 – LCD contrast (Display contrast) Handset name – – #104 Display name – #105 <Off> Auto intercom – #273 <Off> – <On> #165 – Key tone – #200 Auto talk <Off> For assistance, visit www.panasonic.ca/english/support TG175CSK(en)_0324_ver011.pdf 2016/03/24 9:06:20...
- Page 45 Main menu: “Customer support” Operation Code Displaying customer support Web address. #680 – Main menu: “Baby monitor” Sub-menu 1 Sub-menu 2 Settings Code On/Off – #268 <Off> Sensitivity level – #269 <Middle> High For assistance, visit www.panasonic.ca/english/support TG175CSK(en)_0324_ver011.pdf 2016/03/24 9:06:20...
- Page 46 – Cellular phone 1 #6282 – Cellular phone 2 <On> #6101 Alert settings – Alert On/Off #6102 <On> #6031 Alert settings – Voice alert #6032 Cell line – #634 <Cellphone 1> Cellphone 2 For assistance, visit www.panasonic.ca/english/support TG175CSK(en)_0324_ver011.pdf 2016/03/24 9:06:20...
- Page 47 The preset melodies in this product (“Tone 3” - “Melody 10”) are used with permission of © 2009 Copyrights Vision Inc. The preset melodies in this product (“Tone 1” and “Tone 2”) are used with permission of © 2013 Copyrights Vision Inc. For assistance, visit www.panasonic.ca/english/support TG175CSK(en)_0324_ver011.pdf 2016/03/24 9:06:20...
-
Page 48: Alarm
Turns alarm off. Go to step 10. outside calls. “Once” MbN: Select the desired snooze setting. An alarm sounds once at the set time. a MSAVEN For assistance, visit www.panasonic.ca/english/support TG175CSK(en)_0324_ver011.pdf 2016/03/24 9:06:20... -
Page 49: Night Mode
Enter the desired hour and minute you wish to end this feature. This feature allows you to listen in on a room *: Select “AM” or “PM”. where another handset is located, allowing For assistance, visit www.panasonic.ca/english/support TG175CSK(en)_0324_ver011.pdf 2016/03/24 9:06:20... - Page 50 MbN: “On” a MSELECTN R “Baby monitor” will be displayed. MbN: Select the desired unit’s number to Note: monitor with. a MSAVEN R The registered name/number is displayed. R “Baby monitor” will be displayed. For assistance, visit www.panasonic.ca/english/support TG175CSK(en)_0324_ver011.pdf 2016/03/24 9:06:20...
-
Page 51: Other Programming
The default handset name is “Handset 1” to R This feature cannot be set during a “Handset 6”. You can customize the name monitoring call. of each handset (“Bob”, “Kitchen”, etc.). This is For assistance, visit www.panasonic.ca/english/support TG175CSK(en)_0324_ver011.pdf 2016/03/24 9:06:20... -
Page 52: Registering A Unit
The supplied handset and base unit are pre-registered. If for some reason the handset is not registered to the base unit, re-register the handset. Handset: MMENUN#130 Base unit: Press and hold MLOCATORN for about 5 seconds. For assistance, visit www.panasonic.ca/english/support TG175CSK(en)_0324_ver011.pdf 2016/03/24 9:06:20... -
Page 53: Call Display Service
– A handset is replaced on the base unit R Please contact your phone service provider or charger. for details and availability of this service in – Pressing MOFFN on a handset. your area. – Pressing MEXITN on the base unit. For assistance, visit www.panasonic.ca/english/support TG175CSK(en)_0324_ver011.pdf 2016/03/24 9:06:20... -
Page 54: Caller List
Important: service provider. You must subscribe to R Make sure the unit’s date and time setting voicemail service to use is correct (page 15). this function. For assistance, visit www.panasonic.ca/english/support TG175CSK(en)_0324_ver011.pdf 2016/03/24 9:06:20... - Page 55 R The number edited will not be saved in the R If the entry has already been viewed or caller list. answered, “ ” is displayed. indicates the caller information was received from the cellular line. For assistance, visit www.panasonic.ca/english/support TG175CSK(en)_0324_ver011.pdf 2016/03/24 9:06:20...
- Page 56 Handset: MOFFN Base unit: MEXITN Erasing all caller information Handset / Base unit Proceed with the operation for your unit. Handset: MCN CID Base unit: MCIDN MERASEN a MbN: “Yes” a MSELECTN Handset: MOFFN For assistance, visit www.panasonic.ca/english/support TG175CSK(en)_0324_ver011.pdf 2016/03/24 9:06:20...
-
Page 57: Using Bluetooth® Devices
MbN: Select “Auto” or “Manual”. a prefix used when you make an international MSELECTN call. “Auto”: Download all entries from the – “Country code”: Your country code for cellular phone automatically. Go to step 5. international calls. For assistance, visit www.panasonic.ca/english/support TG175CSK(en)_0324_ver011.pdf 2016/03/24 9:06:20... -
Page 58: Link To Cell App
Phone Settings instructions on web page listed above. Using your paired Android phone, you can R To use this feature, the following settings program your Phone Settings for the are required. following features: For assistance, visit www.panasonic.ca/english/support TG175CSK(en)_0324_ver011.pdf 2016/03/24 9:06:21... -
Page 59: Text Message (Sms) Alert
– Handset or base unit: “Alert On/ You can turn on/off the voice alert. Off” must be turned on (page 59). – “On” (default): The handset and/or base unit notify you by voice announcement. For assistance, visit www.panasonic.ca/english/support TG175CSK(en)_0324_ver011.pdf 2016/03/24 9:06:21... -
Page 60: Using A Bluetooth Wireless Headset (Optional) For Landline Calls
R Make sure that the headset is turned on. R Your Bluetooth wireless headset must Handset support the HeadSet Profile (HSP) specification. To connect/disconnect: R 1 headset can be paired to the base unit. MMENUN#622 For assistance, visit www.panasonic.ca/english/support TG175CSK(en)_0324_ver011.pdf 2016/03/24 9:06:21... - Page 61 – during a landline call with the base unit speakerphone. – during an intercom call between the base unit and handset. – while listening to messages recorded on the base unit answering system. For assistance, visit www.panasonic.ca/english/support TG175CSK(en)_0324_ver011.pdf 2016/03/24 9:06:21...
-
Page 62: Answering System For Landline
Press MANSWER ON/OFFN to turn on/off the is set to “Greeting only”, callers’ answering system. messages are not recorded and the unit plays a different pre-recorded greeting message asking callers to call again. For assistance, visit www.panasonic.ca/english/support TG175CSK(en)_0324_ver011.pdf 2016/03/24 9:06:21... -
Page 63: Listening To Messages
N on the base unit flashes. Using the handset – “New message” is displayed. Press M N (PLAY). When new messages have been recorded, R During playback, M N on the base unit “New message” is displayed. lights. For assistance, visit www.panasonic.ca/english/support TG175CSK(en)_0324_ver011.pdf 2016/03/24 9:06:21... - Page 64 If pressed within the first 5 seconds of a MSELECTN message, the previous message is played. To resume playback: Erasing all messages MbN: “Playback” a MSELECTN MMENUN#325 You can also erase as follows: For assistance, visit www.panasonic.ca/english/support TG175CSK(en)_0324_ver011.pdf 2016/03/24 9:06:21...
-
Page 65: Advanced New Message Alerting Features
MMENUN a MbN: “Edit” a MSELECTN Edit the name if necessary (16 characters max.). a MOKN Edit the phone number if necessary (24 digits max.). a MOKN a MSELECTN a MOFFN For assistance, visit www.panasonic.ca/english/support TG175CSK(en)_0324_ver011.pdf 2016/03/24 9:06:21... -
Page 66: Remote Operation
R The entered remote access code is deleted. n When the remote access code is set to “Activate”: Enter the remote access code (page 66) during the announcement. Press 4 to play the new message. For assistance, visit www.panasonic.ca/english/support TG175CSK(en)_0324_ver011.pdf 2016/03/24 9:06:21... -
Page 67: Answering System Settings
You can change the number of times the End remote operation phone rings “Ring count” before the unit (or hang up) answers calls. You can select 2 to 7 rings, or “Toll saver”. For assistance, visit www.panasonic.ca/english/support TG175CSK(en)_0324_ver011.pdf 2016/03/24 9:06:21... - Page 68 – Change the number of rings of the voicemail service so that the answering system can answer the call first. To do so, contact your phone service provider. For assistance, visit www.panasonic.ca/english/support TG175CSK(en)_0324_ver011.pdf 2016/03/24 9:06:21...
-
Page 69: Useful Information
The default setting is “On”. password as necessary. Contact your phone service provider for the required Handset pause time. MMENUN#332 MbN: Select the desired setting. a MSAVEN a MOFFN For assistance, visit www.panasonic.ca/english/support TG175CSK(en)_0324_ver011.pdf 2016/03/24 9:06:21... -
Page 70: Wall Mounting
The base unit can be mounted on a wall by changing the wall mounting adaptor’s position. Note: R Make sure that the wall and the fixing method are strong enough to support the weight of the unit. For assistance, visit www.panasonic.ca/english/support TG175CSK(en)_0324_ver011.pdf 2016/03/24 9:06:21... - Page 71 (2 types). 83 mm (3 inches) 102 mm (4 inches) Fit the slots of the unit onto the corresponding wall phone plate tabs for ( ) and ( ) respectively. For assistance, visit www.panasonic.ca/english/support TG175CSK(en)_0324_ver011.pdf 2016/03/24 9:06:21...
-
Page 72: Error Messages
– Someone is using a cellular line or headset. Try again later. – Make sure that the cellular phone or headset is not connected to other Bluetooth devices. For assistance, visit www.panasonic.ca/english/support TG175CSK(en)_0324_ver011.pdf 2016/03/24 9:06:21... -
Page 73: Troubleshooting
R Unplug the base unit’s AC adaptor to reset the unit. Reconnect the adaptor and try again. R The handset has not been registered to the base unit. Register the handset (page 52). For assistance, visit www.panasonic.ca/english/support TG175CSK(en)_0324_ver011.pdf 2016/03/24 9:06:21... - Page 74 R If your cellular phone is already registered on another Panasonic DECT phone, this function will not work properly. We strongly recommend that you remove the registration of this phone on both your cellular phone and on the other Panasonic DECT phone.
- Page 75 Store your area code in order to automatically add it a cellular line. to the beginning of the 7-digit phone number when making cellular calls (page 19). For assistance, visit www.panasonic.ca/english/support TG175CSK(en)_0324_ver011.pdf 2016/03/24 9:06:21...
- Page 76 Caller information is displayed R Depending on your phone service provider, the unit may or announced late. display or announce the caller’s information at the 2nd ring or later. R Move closer to the base unit. For assistance, visit www.panasonic.ca/english/support TG175CSK(en)_0324_ver011.pdf 2016/03/24 9:06:21...
- Page 77 After subscribing, you may need to contact your phone service provider again to activate this specific service, even if you already subscribed to both Call Display and Visual Call Waiting services. For assistance, visit www.panasonic.ca/english/support TG175CSK(en)_0324_ver011.pdf 2016/03/24 9:06:21...
- Page 78 AC adaptor to the base unit. Wait a feature. few seconds and try again. R The headset has not connected to the base unit yet, even though you performed the connecting procedure setting. Wait a few seconds and try again. For assistance, visit www.panasonic.ca/english/support TG175CSK(en)_0324_ver011.pdf 2016/03/24 9:06:22...
- Page 79 (page 66). R The answering system is turned off. Turn it on (page 67). R You cannot operate the answering system when calling a cellular phone paired to the base unit. For assistance, visit www.panasonic.ca/english/support TG175CSK(en)_0324_ver011.pdf 2016/03/24 9:06:22...
- Page 80 Insert the batteries and charge fully before use. If the unit does not work properly, contact an authorized service centre. Caution: R To avoid permanent damage, do not use a microwave oven to speed up the drying process. For assistance, visit www.panasonic.ca/english/support TG175CSK(en)_0324_ver011.pdf 2016/03/24 9:06:22...
-
Page 81: Innovation, Science And Economic Development Canada Notices And Other Information
(2) this device must accept any interference, including interference that may cause undesired operation of the device. Privacy of communications may not be ensured when using this telephone. For assistance, visit www.panasonic.ca/english/support TG175CSK(en)_0324_ver011.pdf 2016/03/24 9:06:22... -
Page 82: Warranty
The warranty ALSO DOES NOT COVER damages which occurred in shipment, or failures which are caused by products not supplied by Panasonic Canada Inc., or failures which result from accidents, misuse, abuse, neglect, mishandling, misapplication, alteration, faulty... -
Page 83: Index
Index Display Contrast: 44, 47 Index Language: 15 Eco mode: 11 3-way conference: 23, 28 Equalizer: 22 Additional handset: 52 Error messages: 72 Alarm: 48 Flash: 21, 27, 45 Answering calls: 21, 27 Groups: 35 Answering system Call screening: 67 Handset Erasing messages: 63, 64, 67 Deregistration: 52... - Page 84 Index Time adjustment: 43 Transferring calls: 23, 28 Troubleshooting: 73 Visual Call Waiting: 22 VM (Voicemail): 69 Voice guidance language: 15 Voicemail: 68, 69 Volume Receiver: 20 Ringer (Base unit): 27, 46, 47 Ringer (Handset): 21, 41, 43 Speaker: 20, 26 Wall mounting: 70 TG175CSK(en)_0324_ver011.pdf 2016/03/24...
- Page 85 Notes TG175CSK(en)_0324_ver011.pdf 2016/03/24 9:06:22...
- Page 86 Notes TG175CSK(en)_0324_ver011.pdf 2016/03/24 9:06:22...
- Page 87 Notes TG175CSK(en)_0324_ver011.pdf 2016/03/24 9:06:22...
- Page 88 Date of purchase (found on the bottom of the base unit) Name and address of dealer Attach your purchase receipt here. 5770 Ambler Drive, Mississauga, Ontario L4W 2T3 © Panasonic System Networks Co., Ltd. 2016 Printed in Malaysia *PNQX6719ZA* *PNQX6719ZA* PNQX6719ZA TT0316MG0 TG175CSK(en)_0324_ver011.pdf...
Need help?
Do you have a question about the KX-TGF370 Series and is the answer not in the manual?
Questions and answers
We have discontinued our land line and have two mobile numbers. After the change we can receive mobile lines but cannot dial any phone numbers from the hand sets. It looks like cell phones are properly paired to the base unit. Tried to follow manual instructions for KX-TGF370 and online.
To resolve dialing issues after discontinuing a landline on the Panasonic KX-TGF370 Series, follow these troubleshooting steps:
1. Activate “Cell line only mode”:
- Press {MENU}(157.
- Select “On” → {SELECT}.
- Select “Yes” → {SELECT}.
2. Disconnect the telephone line cord from the base unit. The mode cannot be activated if the cord remains connected.
3. When making calls, press {CELL} or {C}/{s} on the handset.
These steps ensure the phone uses only the cellular line for calls.
This answer is automatically generated
I was given a used Panasonic KX-TGF370C phone set with no user manual. I have looked it up online to set the message recording. It instructs to press message, then the # sign and then press 302. This is not working
To set the message recording on a Panasonic KX-TGF370C phone:
1. Press MANSWER ON/OFFN on the base unit to turn the answering system on.
2. To use your own greeting, press MSELECTN, wait for the beep, hold the handset about 20 cm (8 inches) away, and speak clearly into the microphone (maximum 2 minutes). Press MSTOPN when done.
3. If no custom greeting is recorded, the unit will use a pre-recorded greeting.
4. If the message recording time is set to “Greeting only,” callers’ messages will not be recorded.
Message recording settings may be adjusted in the menu.
This answer is automatically generated
how do i tell how old this model of phone is?
You can determine the age of the Panasonic KX-TGF370 Series phone model by referring to the document version date listed as "2016/03/24" in the manual. This suggests the model was released or documented around March 24, 2016.
This answer is automatically generated
How do I access my voicemail messages on my KX-TGF370C when I am calling in from another source?
To access voicemail messages on the Panasonic KX-TGF370C from another phone, use the voicemail service provided by your phone service provider. Dial your voicemail access number, enter any required pauses, and then input your password. Contact your phone service provider if you need help with the voicemail access number or password.
This answer is automatically generated
After many years of no problems suddenly when someone calls me it does not go to voicemail but instead advises the caller that I am not set up for messages. Using Bell Canada voicemail.
The Panasonic KX-TGF370 Series phone may inform callers that voicemail is not set up due to the following reasons:
1. Answering system is off: The base unit’s answering system may be turned off. Turn it on using the ANSWER ON/OFF button.
2. Greeting only mode: The message recording time may be set to “Greeting only,” which plays a message asking callers to call again without recording messages.
3. No personal greeting recorded: If no personal greeting is recorded, the unit plays a pre-recorded message, which may state that voicemail is not set up.
4. Voicemail service settings: If the phone service provider’s voicemail is not properly set up or the number of rings is set incorrectly, the call may not be forwarded to voicemail.
5. Ring count conflict: The number of rings for the answering system may be set too high, allowing the phone provider’s voicemail to answer first or not at all. Adjust the ring count so the answering system picks up before the provider’s voicemail.
This answer is automatically generated
How to unblock a number on KX-TGF370C phone
To unblock a number on the Panasonic KX-TGF370C phone, use the following procedure:
1. Press the Menu button.
2. Enter the call block menu using code #217.
3. Select the number or range of numbers you want to unblock.
4. Follow the prompts to delete or unblock the selected entry.
This removes the number from the call block list, allowing calls from that number.
This answer is automatically generated
how do you turn on call blocker
To turn on the call blocker on the Panasonic KX-TGF370 Series, you can use the following steps:
1. Press the "CALL BLOCK" button during an incoming call, a recorded call, or an active outside call to add the number to the call block list.
2. To block unknown callers (calls with no phone number), use the setting “Block unknown CID” with code #240.
3. You can block a single number using code #217 or block a range of numbers using code #218.
The call block list can store up to 250 numbers. Once a number is added, calls from that number will be blocked.
This answer is automatically generated
how to clear a voicemail notification
To clear a voicemail notification on the Panasonic KX-TGF370 Series, press and hold the # key until the unit beeps. If the notification remains, you may need to delete all messages from your voice mailbox, depending on your phone service provider.
This answer is automatically generated
How do you get rid of voicemail messages sign when there are no messages
To remove the voicemail message indicator on the Panasonic KX-TGF370 Series, press and hold the "#" key until the unit beeps. Depending on your phone service provider, you may also need to delete all messages from your voice mailbox to clear the notification.
This answer is automatically generated
how to set number of rings before answer machine picks up
To set the number of rings before the answering machine picks up on the Panasonic KX-TGF370 Series:
1. Press MMENUN on the handset.
2. Enter #310.
3. Use the MbN (up/down) button to select the desired number of rings (2 to 7 rings or "Toll saver").
4. Press MSAVEN to save the setting.
The default setting is 4 rings. "Toll saver" answers after 2 rings if there are new messages or after more rings if there are none.
This answer is automatically generated