
Subscribe to Our Youtube Channel
Related Manuals for Detecto MedVue MV1

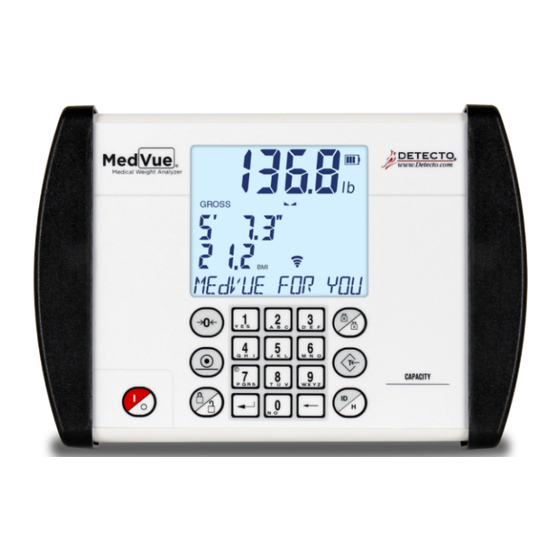
Summary of Contents for Detecto MedVue MV1
- Page 1 Model MV1 Medical Weight Analyzer Owner’s Manual 8555-M512-O1 Rev E MedVue MV1 Owner’s...
- Page 2 8555-M512-O1 Rev E MedVue MV1 Owner’s...
- Page 3 Purchased From ____________________ ___________________________________ ___________________________________ ___________________________________ RETAIN THIS INFORMATION FOR FUTURE USE PRECAUTIONS Before using the weight analyzer, read this manual and pay special attention to all "NOTIFICATION" symbols: ELECTRICAL STATIC IMPORTANT WARNING SENSITVE 8555-M512-O1 Rev E MedVue MV1 Owner’s...
- Page 4 CAUTION: RISK OF EXPLOSION IF BATTERY IS REPLACED BY AN INCORRECT TYPE. DISPOSE OF USED BATTERIES ACCORDING TO THE INSTRUCTIONS. ATTENTION: RISQUE D'EXPLOSION SI LA BATTERIES EST REMPLACE'E PAR UN TYPE INCORRECT. REJETEZ LES BATTERIES UTILISE'ES SELON LES INSTRUCTIONS. 8555-M512-O1 Rev E MedVue MV1 Owner’s...
-
Page 5: Table Of Contents
Height Rod Option – Detecto DHR ....... . Page 5... -
Page 7: Specifications
Any application affected by vibration or movement on ® the scale platform can benefit using StableSENSE 8555-M512-O1 Rev E MedVue MV1 Owner’s... -
Page 8: Site Preparation Requirements
On installations requiring 240 VAC power, it is the responsibility of the customer to have a qualified electrician install the proper power adapter plug that conforms to national electrical codes and local codes and ordinances. 8555-M512-O1 Rev E MedVue MV1 Owner’s... -
Page 9: Installation
Should your MedVue Model MV1 Medical Weight Analyzer come already installed on a scale, the following installation information does not apply to you. Battery Cover Thumb Screw Battery Cover Swivel Mount Rubber Ball Optional Ethernet Figure No. 1 8555-M512-O1 Rev E MedVue MV1 Owner’s... -
Page 10: Mounting
NOTE: The top plate mounting configuration varies depending on the model of your scale and may be different than the one shown in Figures No. 2 and 3. Refer to Appendix A for the various top plate mounting configurations. 8555-M512-O1 Rev E MedVue MV1 Owner’s... -
Page 11: Interconnections
Height Rod – Detecto DHR (Digital Height Rod) Option The optional Detecto DHR (Digital Height Rod) connects to the MV1 by a snap-in modular connector socket. Insert the modular connector of the DHR cable into the socket on the rear of the MV1 it locks in place (a clicking sound will be heard when it is locked in place). -
Page 12: Serial I/O Port
The MVIP Ethernet option requires the purchase of the optional Ethernet Interface Option. Once installed, connections to the MV1 are by CAT 5 or equivalent cable. Consult your network administrator for the proper procedure to terminate and connect the cable. 8555-M512-O1 Rev E MedVue MV1 Owner’s... -
Page 13: Batteries
When no bars on shown on the battery status symbol, press the ON/OFF key to turn the MV1 off, remove the discharged batteries and replace with fully charged ones. Place the discharged batteries in an external charger to recharge. 8555-M512-O1 Rev E MedVue MV1 Owner’s... -
Page 14: Battery Installation/Replacement
9. If display turns on, batteries have been installed correctly. If not, remove the panel and check for one or more improperly positioned batteries. 10. Return the MV1 to the mounting bracket. 11. The MV1 is now ready for operation. Figure No. 6 8555-M512-O1 Rev E MedVue MV1 Owner’s... -
Page 15: Weighing Units Selection
6. Press the ENTER key to save the kg (kilograms) weighing units setting. 7. The scale is now ready for operation. 8555-M512-O1 Rev E MedVue MV1 Owner’s... -
Page 16: Keypad Functions
If displaying gross weight, only the gross weight is printed. If displaying net weight, the gross, tare, and net weights are printed. If the ID and BMI features are used, their data is printed along with the weight data. 8555-M512-O1 Rev E MedVue MV1 Owner’s... -
Page 17: Body Mass Index Functions
(ID) and allow the entry of a new ID. The identification (ID) can be up to 14 alphanumeric characters. To recall the stored tare weight from the memory location, press the ID/HEIGHT key, input a number between 1 and 99, and then press the TARE key. 8555-M512-O1 Rev E MedVue MV1 Owner’s... -
Page 18: Ncontrol Feature
For more information on nControl, refer to the xxx.xuu N nControl Fast Start Guide. NOTE: If the ID/HEIGHT key is disabled, the SAMPLE TICKET appropriate field will be left out when printing a ticket. 8555-M512-O1 Rev E MedVue MV1 Owner’s... -
Page 19: Annunciators
Pressing the LOCK/RELEASE key a second time (or dropping below the Auto Lock reset value) will unlock the display and turn off the annunciator. NOTE: The lock feature (Hold Mode) must be enabled during Calibration Setup. 8555-M512-O1 Rev E MedVue MV1 Owner’s... - Page 20 BMI (Body Mass Index) The BMI annunciator is turned on when displaying the calculated body fat. Wi-Fi RS232 Ethernet NOTE: These annunciators are turned on when optional hardware is installed and in use. 8555-M512-O1 Rev E MedVue MV1 Owner’s...
-
Page 21: Operation
1. Remove all material from scale platform, and then press the TARE key. 2. Press the ZERO key. 3. This will clear the tare weight and return the MV1 to the Gross weight mode. 8555-M512-O1 Rev E MedVue MV1 Owner’s... - Page 22 1. Remove all material from scale platform, and then press the TARE key. 2. Press the ZERO key. 3. This will clear the tare weight and return the MV1 to the Gross weight mode. 8555-M512-O1 Rev E MedVue MV1 Owner’s...
-
Page 23: Tare Storage And Recall
6. If tare weight displayed is acceptable, press the ENTER key to save it. 7. Otherwise, press the ZERO key to clear the tare weight and return the MV1 to the Gross weight mode. 8555-M512-O1 Rev E MedVue MV1 Owner’s... -
Page 24: Basic Operation With Id
11. When weight is stable (STABLE annunciator will turn on), read weight display. 12. If a printer is connected to scale, press the PRINT key to print a ticket. 13. Assist patient off scale. 8555-M512-O1 Rev E MedVue MV1 Owner’s... - Page 25 11. When weight is stable (STABLE annunciator will turn on), read weight display. 12. If a printer is connected to scale, press the PRINT key to print a ticket. 13. Assist patient off scale. 8555-M512-O1 Rev E MedVue MV1 Owner’s...
-
Page 26: Body Mass Index (Bmi) Operation
12. Assist patient off scale. 13. If a printer is not connected to scale, the BMI display will clear when the patient is assisted off scale, and the weight returns to zero. 8555-M512-O1 Rev E MedVue MV1 Owner’s... -
Page 27: Body Mass Index (Bmi) Operation With Dhr
14. If Tare operation was performed, press the NET/GROSS key to return to Gross weight mode. 15. Press the ZERO key. This will reset tare weight to zero. 16. BMI display will clear when weight returns to zero. 8555-M512-O1 Rev E MedVue MV1 Owner’s... -
Page 28: Body Mass Index (Bmi) Operation With Id And Dhr
18. If Tare operation was performed, press the NET/GROSS key to return to Gross weight mode. 19. Press the ZERO key. This will reset tare weight to zero. 20. BMI display and ID will clear when weight returns to zero. 8555-M512-O1 Rev E MedVue MV1 Owner’s... -
Page 29: Calibration Setup (Protected Setup Parameters)
TIME SETTINGS is displayed will return you to SYSTEM. If at the parameter level, the exact item this takes you to may depend on a [parameter condition]. 8555-M512-O1 Rev E MedVue MV1 Owner’s... - Page 30 Medical Weight Analyzer with Wi-Fi and Bluetooth, 8555-0550-0M. ETHERNET Ethernet Configuration. (Displayed if the MVIP option is present). Refer to the Model MVIP Ethernet Option Operation Manual, 8555-M520-O1. TIME SETTINGS Time and Date Configuration. Proceed to the Year parameter. 8555-M512-O1 Rev E MedVue MV1 Owner’s...
- Page 31 The sample rate may be set from a minimum of 1 sample per second to a maximum of 100 samples per second in one sample per second intervals. Allowable values are 1 through 100. 8555-M512-O1 Rev E MedVue MV1 Owner’s...
- Page 32 Allowable values are 0 through 18 (1 to 9 divisions by 0.5 divisions). For example, 1 = .5 grads, 2 = 1 grad, 3 = 1.5 grads, etc... NOTE: Entering 0 (zero) will disable zero tracking. 8555-M512-O1 Rev E MedVue MV1 Owner’s...
- Page 33 The display will show FILTER VALUE and the current setting. If the value displayed is acceptable, press the ENTER key to save it. Otherwise use the numeric keys to enter a new value, and then press the ENTER key to save it. Allowable values are 1 through 16. 8555-M512-O1 Rev E MedVue MV1 Owner’s...
- Page 34 ENTER key to save it. Otherwise use the numeric keys to enter a new value, and then press the ENTER key to save it. Allowable values are 1 or 2. 1 = Single Calibration Point 2 = Multi-Point Calibration 8555-M512-O1 Rev E MedVue MV1 Owner’s...
- Page 35 3. The display will change to show PLEASE WAIT and starting at the left and proceeding right, a series of dashes will appear on the display, and then starting at the right and proceeding left, disappear. 4. Next, the display will change to show the GRAVITY ENAbLE prompt. 8555-M512-O1 Rev E MedVue MV1 Owner’s...
- Page 36 3. The display will change to show PLEASE WAIT and starting at the left and proceeding right, a series of dashes will appear on the display, and then starting at the right and proceeding left, disappear. 4. Next, the display will change to show the GRAVITY ENAbLE prompt. 8555-M512-O1 Rev E MedVue MV1 Owner’s...
- Page 37 The display will show OP GRAVITY and the current setting. If the value displayed is acceptable, press the ENTER key to save it. Otherwise use the numeric keys to enter a new value, and then press the ENTER key to save it. Allowable values are 0 through 99,999. 8555-M512-O1 Rev E MedVue MV1 Owner’s...
- Page 38 The display will show HOLd bANd and the current setting. If the value displayed is acceptable, press the ENTER key to save it. Otherwise use the numeric keys to enter a new value, and then press the ENTER key to save it. Allowable values are 0 through 99. 8555-M512-O1 Rev E MedVue MV1 Owner’s...
-
Page 39: Calibration Setup (Non-Protected Setup Parameters)
ENTER key to save it. Allowable values are YES or no. YES = The MV1 beeps each time a no = MV1 does not beep when a key key is pressed. is pressed. 8555-M512-O1 Rev E MedVue MV1 Owner’s... - Page 40 1/YES to select a new setting, and then press the ENTER key to save it. Allowable values are YES or no. YES = ID Enabled, uses ID no = ID Disabled, uses Transaction Storage Mode Storage Mode 8555-M512-O1 Rev E MedVue MV1 Owner’s...
- Page 41 1/YES to select a new setting, and then press the ENTER key to save it. Allowable values are YES or no. YES = Body Mass Index is Enabled no = Body Mass Index is Disabled and and MV1 performs BMI calculations the MV1 performs basic weight calculations only 8555-M512-O1 Rev E MedVue MV1 Owner’s...
- Page 42 Otherwise, after selecting the value for the High-Resolution mode parameter, press the ENTER key to save the selection and advance to the SERIAL PORT, RS232 MOdE (RS232 Port Output Mode) parameter to continue Calibration Setup. 8555-M512-O1 Rev E MedVue MV1 Owner’s...
- Page 43 The display will show End OF PRINT and the current setting. If the value displayed is acceptable, press the ENTER key to save it. Otherwise use the numeric keys to enter a new value, and then press the ENTER key to save it. Allowable values are 0 through 9. 8555-M512-O1 Rev E MedVue MV1 Owner’s...
- Page 44 The display will show End OF PRINT and the current setting. If the value displayed is acceptable, press the ENTER key to save it. Otherwise use the numeric keys to enter a new value, and then press the ENTER key to save it. Allowable values are 0 through 9. 8555-M512-O1 Rev E MedVue MV1 Owner’s...
- Page 45 The display will show SECONd [0-59] and the current setting. If the value displayed is acceptable, press the ENTER key to save it. Otherwise use the numeric keys to enter a new value, and then press the ENTER key to save it. Allowable values are 0 through 59. 8555-M512-O1 Rev E MedVue MV1 Owner’s...
- Page 46 The Calibration Setup process has been completed. The MV1 will reset and return to the weight mode. Press the ON/OFF key to turn the MedVue off. Re-install the end cap and secure with the two (2) screws removed earlier. The MV1 is now ready for normal operation. 8555-M512-O1 Rev E MedVue MV1 Owner’s...
-
Page 47: Setup Review
Enable or Disable Body Mass Index (BMI) calculation feature HI RESOLUTION Enable High-Resolution Weight Mode feature NOTE: HEIGHT UNITS and bOdY MASS IdX will only be shown if USE HEIGHT is set to YES. 8555-M512-O1 Rev E MedVue MV1 Owner’s... - Page 48 Select to use 24-hour time format (3PM displays 15:00) Setup Review Is Complete The setup review process has been completed. The MV1 will reset and return to the weight mode. The MV1 is now ready for normal operation. 8555-M512-O1 Rev E MedVue MV1 Owner’s...
-
Page 49: Weight On Demand Formats
M = Motion bit (‘M’ = Motion, ‘ ‘ = Settled) ^ = Space DDDDDDDDDD = Weight with decimal point if necessary UUU = Units (e.g. ‘lb ‘, ‘kg ‘, ‘ton’, etc.) <CR> = Carriage return (hex 0D) 8555-M512-O1 Rev E MedVue MV1 Owner’s... -
Page 50: Serial And Usb Device Port Commands
NOTE: In order for the computer to communicate to the indicator using the USB Device port, the remote computer requires the USB driver (MedVue.inf, available on the Detecto Dealer Web Site) and the USb MOdE parameter must be set to 3 = Printer. - Page 51 = Carriage Return (hex 0D) lf = Line Feed (hex 0A) NOTE: Recalling the data queue does not delete the current data. The separate delete command must be sent to clear the queue. 8555-M512-O1 Rev E MedVue MV1 Owner’s...
- Page 52 (see <LF>W<CR> above), Height, BMI, ID<CR> NOTE: If the MedVue weight analyzer has been set to continuous mode of outputting weight, it will output the weight in the format listed above for <LF>W<CR> every 500 milliseconds. 8555-M512-O1 Rev E MedVue MV1 Owner’s...
-
Page 53: Error And Status Displays
The digital height rod was not in its “starting position” before turning on the MV1. The inner sliding tube must be completely down inside outer stationary tube and headpiece folded flat against stationary tube prior to turning on the MV1. 8555-M512-O1 Rev E MedVue MV1 Owner’s... -
Page 54: Care And Cleaning
Use a cloth dampened with mineral spirits and apply only to areas that are contaminated. Follow up the use of this mild solvent with detergent cleaning and rinsing. 8555-M512-O1 Rev E MedVue MV1 Owner’s... -
Page 55: Security Seal Installation
NOTE: In order to install the lead and wire security seal, the two screws securing the left end cap (as viewed from the MV1 front) MUST be replaced with two drilled screws. They are available from the Cardinal/Detecto Parts Department. The part number is MVSK (MEDVUE SEALING KIT). -
Page 56: Parts Identification
8555-0528-08 FRONT PANEL 8555-0529-08 BATTERY COVER 8555-B461-0A CABLE: BATTERY 8555-B510-08 RUBBER BALL 8555-C213-08 END CAP 8555-D501-0A PCB ASS’Y MEDVUE CONTROLLER 8555-0549-08 KEYPAD : MEDVUE MV1PWR OPTIONAL AC ADAPTER 110-240VAC/12VDC @ 1 AMP NOT SHOWN 8555-M512-O1 Rev E MedVue MV1 Owner’s... - Page 57 PARTS IDENTIFICATION, CONT. 8555-M512-O1 Rev E MedVue MV1 Owner’s...
-
Page 58: Appendix A (Top Plate Mounting Configurations)
Uses Front Mounting Hole Center Mounting Hole Front Mounting Hole Models using “Type One” Models using “Type Three” 6495 8430 6437 8430M 6437DHR 8431 6437KGDHR 8431M 6438 8437 6439 6439KG 6439M 6447 6449 6449M 8555-M512-O1 Rev E MedVue MV1 Owner’s... - Page 59 DESKTOP PLATE Models using “Desk/Wall Mount” 6500 BRW1000 CD-1000D CR-500D FHD-133-II FHD-143-II FHD-144-II FHD-164-II GP-400-MV1 GP-600-MV1 GP-600-RP 2.0” WALL MOUNTING Mount using two (2) #10 screws placed 2.00 inches (51 mm) apart in the wall. 8555-M512-O1 Rev E MedVue MV1 Owner’s...
-
Page 60: Appendix B (Connecting To A Welch Allyn Cvsm Device)
BMI information. Pressing the PRINT key will clear the current height and BMI. If it becomes necessary to retransmit the information, it will be necessary to enter the height again. 8555-M512-O1 Rev E MedVue MV1 Owner’s... - Page 61 8555-M512-O1 Rev E MedVue MV1 Owner’s...
- Page 62 (2) years from date of shipment. Detecto shall be the sole judge of what constitutes a defect.
- Page 63 This warranty sets forth the extent of our liability for breach of any warranty or deficiency in connection with the sale or use of the product. Detecto will not be liable for consequential damages of any nature, including but not limited to, loss of profit, delays or expenses, whether based on tort or contract.
- Page 64 Cardinal Scale Manufacturing Co. 102 E. Daugherty, Webb City, MO 64870 USA Ph: 417-673-4631 or 1-800-641-2008 Fax: 417-673-2153 Technical Support: 1-866-254-8261 Printed in USA E-mail: tech@cardet.com 8555-M512-O1 Rev E 01/20 8555-M512-O1 Rev E MedVue MV1 Owner’s...
Need help?
Do you have a question about the MedVue MV1 and is the answer not in the manual?
Questions and answers