Table of Contents
Advertisement
Quick Links
Power over the Ethernet
PoE Managed Midspan Solution for
Standard Network Infrastructure
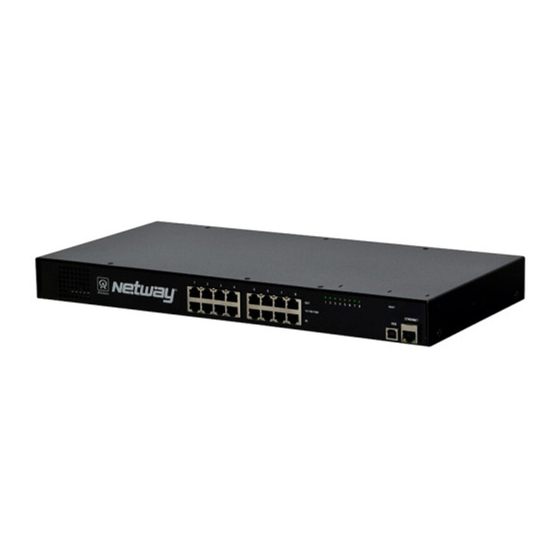
NetWay8GL
- 8-Port Managed Hi-PoE Midspan Injector
- 240W total power
Installation Guide
DOC#: NETGL Rev. 110719
Installing Company: _______________ Service Rep. Name: __________________________________
Address: _____________________________________________ Phone #: __________________
More than just power.
TM
Advertisement
Table of Contents

Related Manuals for Altronix NetWay8GL


Summary of Contents for Altronix NetWay8GL
- Page 1 Power over the Ethernet PoE Managed Midspan Solution for Standard Network Infrastructure NetWay8GL - 8-Port Managed Hi-PoE Midspan Injector - 240W total power Installation Guide More than just power. DOC#: NETGL Rev. 110719 Installing Company: _______________ Service Rep. Name: __________________________________...
- Page 2 NetWay8GL Typical Applications ........
- Page 3 When mounting units in a rack, take care to avoid uneven loading which can cause a hazardous condition. 3. Plug the grounded AC line cord (included) into the IEC 320 connector of the NetWay8GL unit (Fig. 2g, pg. 4). Plug unit into a reliable earth grounded socket. When using multiple units, the sum of the individual name plate ratings should not exceed the supply circuit rating.
- Page 4 Fig. 2 - NetWay8GL NetWay8GL - Front Panel NetWay8GL - Rear Panel OUT 1-8: Structured cable to PoE compliant cameras/edge devices. IN 1-8: Structured cable to ethernet switch or video server. LED(s) 1-8: Port status LEDs. Reset: Restores unit to factory settings.
- Page 5 1. Mount NetWayXT/NetWayXTX in desired location utilizing the mounting hole (Fig. 3, pg. 5). Use a proper fastener and/or wall anchor when securing NetWayXT/NetWayXTX to the wall. 2. Connect structured cable from port marked [OUT] on NetWay8GL to port marked [IN] on the NetWayXT/NetWayXTX (Fig. 3, pg. 5).
- Page 6 1. Set the static IP address for the laptop to be used for programming to the same network IP address as the NetWay8GL. The default address of the NetWay8GL is 192.168.168.168, E.I. 192.168.168.200. 2. Connect one end of the network cable to the network jack on the NetWay8GL and the other to the network connection of the laptop.
- Page 7 Next, click on the button labeled Reboot Server. After rebooting the NetWay8GL will be set in the DHCP mode. The IP address will be assigned by the router when the NetWay8GL is connected to the network. It is recommended to have the assigned IP Address reserved to ensure continued access (see the network administrator).
- Page 8 Six (6) flat head screws for mounting brackets. Rubber Pad Four (4) rubber pads. Altronix is not responsible for any typographical errors. –––––––––––––––––––––––––––––––––––––––––––––––––––––––––––––––––––––––––––––––––––––––––––––––––––––––––––––––– 140 58th Street, Brooklyn, New York 11220 USA | 718-567-8181 | fax: 718-567-9056 website: www.altronix.com | e-mail: info@altronix.com | Lifetime Warranty...
Need help?
Do you have a question about the NetWay8GL and is the answer not in the manual?
Questions and answers