
Related Manuals for Cadel FRAME3


Summary of Contents for Cadel FRAME3
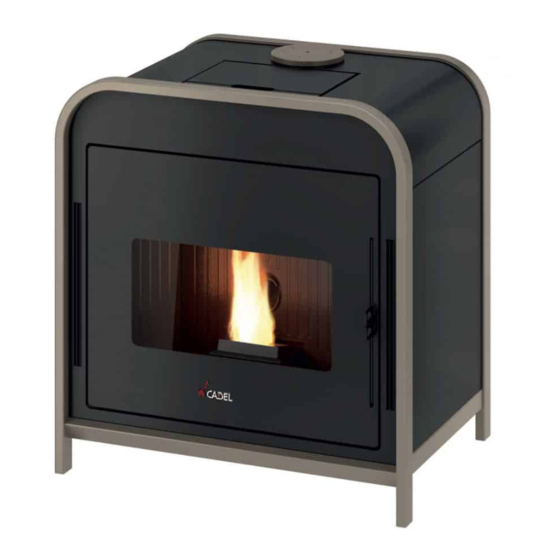
- Page 1 INSTALLER MANUAL Pellet Stove ©2018 CADEL srl | All rights reserved - Tutti i diritti riservati FRAME - FRAME UP - QUASIMODO UP -MODO AIRTIGHT...
-
Page 2: Table Of Contents
5.9 CONNECTION TO THE EXTERNAL THERMOSTAT ..11 5.10 ELECTRIC CONNECTION .........11 5.11 AIR REGULATOR ............11 5.12 FRAME AND QUASIMODO HOT AIR DUCTING (OPTIONAL) ..............12 5.13 MODO AIRTIGHT CONCENTRIC PIPE INSTALLATION 14 5.14 STOVE CALIBRATION DEPRESSION FRAME3 - FRAME3 UP - QUASIMODO3 UP - MODO AIRTIGHT... -
Page 3: Manual Simbology
Fig. 1 - Remove the screws + brackets • Remove the screws of the 2 brackets securing the stove (see Fig. 1). • Then remove the stove from the pallet. FRAME3 - FRAME3 UP - QUASIMODO3 UP - MODO AIRTIGHT... -
Page 4: Stove Handling
• The air inlet must be realized at a height close to the floor with an external grid against birds. In such a way it cannot be ob- structed by any object. • In case of installation with sealed-chamber the air inlet is not necessary. FRAME3 - FRAME3 UP - QUASIMODO3 UP - MODO AIRTIGHT... -
Page 5: Combustible Air Inlet For Sealed-Chamber
In some countries and/or regions the installation with sealed-chamber is obligatory: in case of doubt, please follow the most restrictive regulations. COMBUSTIBLE AIR INLET FOR SEALED-CHAMBER INSTALLATION How to connect to the stove in the sealed chamber with concentric system: FRAME3 - FRAME3 UP - QUASIMODO3 UP - MODO AIRTIGHT... -
Page 6: Installation
53 cm Exhaust fumes d.8 cm 20,3 cm Hole combustion air inlet d.6 cm 15,4 cm Ducting outlet d.8 cm (optional) 16,7 cm Hot air outlet 32x2 cm 36,7 cm FRAME3 - FRAME3 UP - QUASIMODO3 UP - MODO AIRTIGHT... - Page 7 10,6 cm 56,4 cm 17,3 cm 42,5 cm 71,2 cm 60 cm Exhaust fumes d.8 cm 56,4 cm Hole combustion air inlet d.13 cm 47,5 cm Ducting outlet d.8 cm (optional) FRAME3 - FRAME3 UP - QUASIMODO3 UP - MODO AIRTIGHT...
-
Page 8: General Installation
30 cm GENERAL INSTALLATION Fig. 9 - General installation LEGEND Fig. 9 Stove Minimum lateral distance = 200 mm Minimum rear distance = 200 mm Minimum front distance = 1000 mm FRAME3 - FRAME3 UP - QUASIMODO3 UP - MODO AIRTIGHT... -
Page 9: Mounting Modo At And Quasimodo Up Stand
• Set the machine body above the legs and fix it all with the supplied screws (see Fig. 13). REMOVE SIDE PANELS FRAME Proceed as follows to remove the stove side panels: FRAME3 - FRAME3 UP - QUASIMODO3 UP - MODO AIRTIGHT... -
Page 10: Remove Side Panels Modo Airtight / Quasimodo
Fig. 18 - Door adjustment • Open the door. • Loosen the two front screws in the upper hinge and, using the side screw (the one circled in the picture) adjust the door FRAME3 - FRAME3 UP - QUASIMODO3 UP - MODO AIRTIGHT... -
Page 11: Connection To The External Thermostat
The stove is regulated according to the flue data and pellet used, as per the technical features (see FEATURES a pag. 23). If the data does not match, the authorised technician can increase the stove draft by removing/loosening the ring located inside the air inlet pipe (see Fig. 20). FRAME3 - FRAME3 UP - QUASIMODO3 UP - MODO AIRTIGHT... -
Page 12: And Quasimodo 3 Hot Air Ducting
Proceed as follows to assemble the casing to the fan: • Tighten the flange to the fitting (see Fig. 23). • Fix the flange + fitting to the fan (see Fig. 24 and Fig. 25). FRAME3 - FRAME3 UP - QUASIMODO3 UP - MODO AIRTIGHT... - Page 13 • Fix the back to the stove and engage the pipe for the ducting (see Fig. 31). Fig. 29 - Fix the casing + fan to the stove Fig. 30 - Position fitting at 45° Fig. 31 - Back fixing FRAME3 - FRAME3 UP - QUASIMODO3 UP - MODO AIRTIGHT...
-
Page 14: 5.13 Modo Airtight Concentric Pipe Installation
Proceed as follows to connect: • Remove the back of the stove (see Fig. 33). • Unscrew the smoke exhaust (see Fig. 34). • Remove the ring (see Fig. 35). FRAME3 - FRAME3 UP - QUASIMODO3 UP - MODO AIRTIGHT... - Page 15 • Connect the 2 combustion air inlets with the flexible hose (see Fig. 39 and Fig. 40) and secure with the metal clamps. Fig. 39 - 2-inlet connection Fig. 40 - 2-inlet connection FRAME3 - FRAME3 UP - QUASIMODO3 UP - MODO AIRTIGHT...
-
Page 16: Measurement
• If the stove had been using continuously and intensely, the whole system (chimney included), must be cleaned and checked more frequently. • In case of replacement of damaged pieces please ask for the original spare part at the Autorized Retailer. FRAME3 - FRAME3 UP - QUASIMODO3 UP - MODO AIRTIGHT... -
Page 17: Feed Screw Maintenance
Clean every the year the fume fan from ash or dust which can cause a blade unbalance and a greater noise. • Remove the right side panel (see REMOVE SIDE PANELS FRAME3 a pag. 9) and loosen the screw behind the right fan (see Fig. -
Page 18: Fume Conduit Cleaning
• Once thoroughly cleaned, put everything back together. Fig. 54 - Cleaning 1 Fig. 55 - Cleaning 2 FUME CONDUIT CLEANING The exhaust system must be cleaned every season (or every 1500 operation hours). FRAME3 - FRAME3 UP - QUASIMODO3 UP - MODO AIRTIGHT... -
Page 19: Fume Pipes Annual Cleaning
In case of doubts regarding the use of the stove, please contact ALWAYS the Authorized Technician on order to avoi irreparable damages! FRAME3 - FRAME3 UP - QUASIMODO3 UP - MODO AIRTIGHT... - Page 20 Clean the auger. example nails) The auger geared motor is out of Replace the geared motor. order Check if on the display there is an Have the stove checked. "ACTIVE ALARM" FRAME3 - FRAME3 UP - QUASIMODO3 UP - MODO AIRTIGHT...
- Page 21 Not sealed fume and/or for replacing pipes with those in compliance to current pipes regulations. A not sealed fume channelisation can be noxious to health. FRAME3 - FRAME3 UP - QUASIMODO3 UP - MODO AIRTIGHT...
-
Page 22: Technical Datas
For fuse replacement in the electric socket which stands on the back of the stove, extract the fuses to change with the aid of a screwdriver for opening the shutter (see Fig. 58). Fig. 58 - Shutter with fuses to remove FRAME3 - FRAME3 UP - QUASIMODO3 UP - MODO AIRTIGHT... -
Page 23: Features
DISTANCE FROM COMBUSTIBLE MATERIAL (back/side/bottom) 200 / 200 / 0 mm 200 / 200 / 0 mm 200 / 200 / 0 mm DISTANCE FROM COMBUSTIBLE MATERIAL (ceiling/front) 750 / 1000 mm 750 / 1000 mm 750 / 1000 mm FRAME3 - FRAME3 UP - QUASIMODO3 UP - MODO AIRTIGHT... - Page 24 DISTANCE FROM COMBUSTIBLE MATERIAL (back/side/bottom) 200 / 200 / 0 mm 200 / 200 / 0 mm DISTANCE FROM COMBUSTIBLE MATERIAL (ceiling/front) 750 / 1000 mm 750 / 1000 mm FRAME3 - FRAME3 UP - QUASIMODO3 UP - MODO AIRTIGHT...
- Page 25 NOTE...
- Page 26 NOTE...
- Page 27 NOTE...
- Page 28 Rev. 00 - 2021 CADEL srl www.cadelsrl.com 31025 S. Lucia di Piave - TV www.free-point.it Via Foresto sud, 7 - Italy www.pegasoheating.com Tel. +39.0438.738669 Fax +39.0438.73343...
Need help?
Do you have a question about the FRAME3 and is the answer not in the manual?
Questions and answers