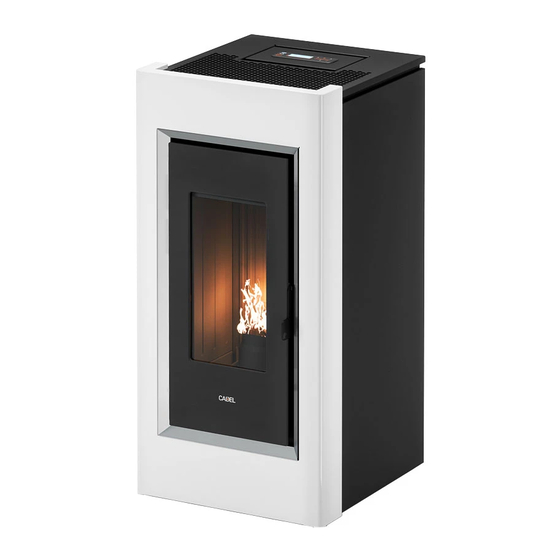
Cadel PRINCE 11 User Manual
Hide thumbs
Also See for PRINCE 11:
- Installer manual (36 pages) ,
- Installer manual (40 pages) ,
- User manual (36 pages)

Subscribe to Our Youtube Channel
Related Manuals for Cadel PRINCE 11


Summary of Contents for Cadel PRINCE 11
- Page 1 USER MANUAL Pellet Stove Original Instructions | ©2022 CADEL srl | All rights reserved - Tutti i diritti riservati PRINCE 11 - KOBE 11 - FENICE 11 PRINCE PLUS 11 - KOBE PLUS 11 - FENICE PLUS 11 SPARK 11- INDACO 11...
-
Page 2: Table Of Contents
8.19 CHIMNEY SWEEP FUNCTION (FOR MAINTENANCE SUMMARY TECHNICIANS ONLY) - SEE SECTION K SETTINGS MENU A 1 MANUAL SIMBOLOGY ........3 PAG. 14 ..............22 2 DEAR CUSTOMER ..........3 9 FUEL ............22 2.1 REVISIONS TO THE PUBLICATION ......4 9.1 FUEL ..............22 2.2 CARE OF THE MANUAL AND HOW TO CONSULT IT ...4 9.2 PELLET SUPPLY .............23 SAFETY REQUIREMENTS ......5 9.3 PELLET REFUELLING TIMER ........23... -
Page 3: Manual Simbology
MANUAL SIMBOLOGY USER AUTHORISED TECHNICIAN (ONLY to interpret or the Stove-manufacturer or the Authorized Technician of Technical Assistance Service approved by the Stove-manufacturer) SPECIALIZED STOVE-REPAIRER CAUTION: READ CAREFULLY THE NOTE CAUTION: DANGER OR IRREVERSIBLE DAMAGE POSSIBILITY • The icons with the stylized figures indicates whom the subject dealt in the paragraph is addressed to (between the User and/ or the Authorized Technician and/or the Specialized Stove-repairer). -
Page 4: Revisions To The Publication
Hereby CADEL S.r.l. declares that the radio equipment type Easy Connect Plus + Navel Stand Alone is in compliance with Directive 2014/53/EU. According to (EU) No. 305/2011 regulation, the " Declaration of Performance" and "Declaration of Conformity" are available online, in the download area, at the web sites: - www.cadelsrl.com... -
Page 5: Safety Requirements
SAFETY REQUIREMENTS • Installation, electrical connection, functional verification and maintenance must only be performed by qualified or authorised personnel. • Live electrical parts: disconnect the product from the 230V power supply before perfor- ming any maintenance operation. Only power the product after completing assembly. •... -
Page 6: Cautions - Warranty Conditions
experience and knowledge must be kept away from packaging. The stove IS NOT a toy. • Childreen must be constantly overseen in order to assure that they do not play with the appliance. • During its running, the stove reaches high temperatures: keep away childreen and animals and for your safety please use appropriate fireproof devices, such as heat-protecting gloves. -
Page 7: Warranty Conditions
WARRANTY CONDITIONS The duration, conditions and limitations of CADEL S.r.l. can be found on the guarantee card enclosed with the device. The company guarantees the product, with the exception of elements subject to normal wear listed below, for a period of 2 (two) years from the date of purchase attested by: •... -
Page 8: Spare Parts
tions and in accordance with the fee in force for the work to be carried out. The user will also be charged for any costs incurred to remedy the incorrect technical interventions, tampering or damage to the appliance, not attributable to original faults. Save for the legal or regulatory limits, the guarantee does not cover the containment of atmospheric and acoustic pollution. -
Page 9: Information For Management Of Electric And
LEGENDA WHERE TO DISPOSE MATERIALS Metal If there is any, to be disposed of separately based on Glass A. OUTER CLADDING the material used: Tiles or ceramics Stone Glass ceramic (fire door): to be disposed of with If there is any, to be disposed of separately based on inert or mixed waste B. - Page 10 DESCRIPTION CODE MATERIAL SYMBOL DIRECTIONS FOR COLLECTION SORTED waste collection - WOOD BED WOOD WOOD - WOOD CAGE FOR 50 Check with the competent body on - WOOD PALLET how to dispose of this packaging at the recycling depot SORTED waste collection - CARDBOARD BOX CORRUGATED CARDBOARD PAPER...
-
Page 11: Wifi - Bluetooth Connection
WIFI - BLUETOOTH CONNECTION (Standard on models : PRINCE 11 - PRINCE PLUS 11 - KOBE 11 - KOBE PLUS 11 - FENICE 11 - FENICE PLUS 11 ) EASY CONNECT PLUS Procedure if only valid for models with EASY CONNECT PLUS Wi-Fi technology. -
Page 12: Navel Stand Alone (Optional)
NAVEL STAND ALONE (OPTIONAL) (Optional on models: SPARK 11 - INDIGO 11) Procedure if only valid for models with NAVEL STAND ALONE Wi-Fi technology. ATTENTION! Installation must ONLY be carried out by specialised personnel. The manufacturer will not be held responsible for injury to persons or damage to property or in the event of failed operation. -
Page 13: Use
INTRODUCTION To have the best performance with the lowest consumption please follow the here descripted instructions. • The lightning of the pellets occurs very easily if the installation is correct and if the chimney flue is efficient. • Switch on the stove at Power 5, for at least 2 hours, in order to enable the materials which make up the boiler and the fireplace to adjust the inner springing stress. -
Page 14: Main Menu
MAIN MENU It is accessed by pressing key 3 (menu). The items that are accessed are: • Time and Date • Timer • Sleep (only with the stove on) • Settings • Info Date and time setting To set the date and time act as follows: •... - Page 15 c - Screw Loading To select “Screw loading” (only when the boiler is switched off) act as follows: • Press the “menu” button. • Scroll to “Settings” using the arrows • Press “menu” to confirm. • Scroll to “Screw loading” using the arrows. •...
-
Page 16: Info Menu
• Press “menu” to confirm. • Modify the % with the + - keys. • Press “menu” to confirm and “esc” to exit i - Smoke Fan rpm To change the parameter act as follows: • Press the “menu” button. •... -
Page 17: Failed Ignition
pre-heating starts. After some seconds the feed screw loads pellets and the resistance pre-heating continues. When the tem- perature is high enough (after about 5-8 minutes), ignition is considered to be completed. • Once the ignition step is complete, the stove moves into operating mode and shows the selected heat output, the ambient temperature and the big flame (see Fig. - Page 18 Set Room T. - this function allows setting the desired temperature in the room where the stove is installed, starting from a mi- nimum of 5°C up to a maximum of 35°C. When this condition is met, the stove reaches the minimum consumption values (flame and hot air fan speed at minimum values) and then goes back to theset values when the ambient temperature goes below the set threshold (see Fig.
-
Page 19: Programmed Mode (Timer) - Main Menu
8.11 PROGRAMMED MODE (TIMER) - MAIN MENU Setting the current day and time is essential for the proper operation of the timer. There are six TIMER programmes, for each one the user can decide the start-up and shutdown time as well as the day of the week in which it is active. -
Page 20: Auto Eco Mode
• In the boiler on and timer active condition, press the OFF key and the boiler will switch off, it will switch on automatically at the next time set on the timer. • In the boiler off and timer active condition, press the ON key and the boiler will switch on, it will switch off at the time set on the active timer. -
Page 21: Pellets Recipe
Caution, before changing the stove’s programming : • It is recommended to change the factory settings under the supervision of an authorised technician. • Before installation, ensure the flue has been installed and certified by suitable personnel according to the legal provisions in force. -
Page 22: Smoke Rpm Variation
8.18 SMOKE RPM VARIATION (SEE SECTION I SETTINGS MENU A PAG. 14) Changes to be made with the support of the authorised technician. Activates only with the Easy Set function disabled, "SET: 0" ! If the installation presents difficulties for smoke evacuation (no draught or no pressure in the duct), the smoke and ash expulsion speed can be increased. -
Page 23: Pellet Supply
PELLET SUPPLY Fig. 24 - Wrong opening of the pellets bag Fig. 25 - Right opening of the pellets bag It is necessary to avoid to fill the hopper with the pellet when the stove is running. • Do not get the bag of pellet in contact with hot stove surfaces. •... -
Page 24: Remote Control (Optional)
Fig. 29 - Do not cover air slits REMOTE CONTROL (OPTIONAL) • The stove can be operated through a remote control (optional) • Operation requires 1 CR 2025 (3Volt) Lithium battery • Operating temperature 0 °C / 50 °C • 38 khz infrared signal Used batteries contain metals which are harmful for the environment;... -
Page 25: Safety Devices And Alarms
SAFETY DEVICES AND ALARMS The product is supplied with the following safety devices 12.1 PRESSURE SWITCH • It controls pressure in the fume duct. It blocks the pellet feed screw in the following instances: • clogged exhaust • Significant negative (wind) •... -
Page 26: Alarm Reset
PANEL ALERT TYPE OF PROBLEM SOLUTION Check whether the brazier is clean / level of pellets in the hopper. Check pellet level in the tank. Check that the burning pot is correctly positioned in its case and does not contain deposits or unburned material. The fire does not ignite. -
Page 27: Before Each Start-Up
13.2 BEFORE EACH START-UP Clean the ash and any deposits in the brazier that could clog the air passage holes. If the pellets in the hopper finish, unburned pellets may accumulate in the brazier. Always empty the residue in the brazier before startingup. -
Page 28: Hopper Cleaning
Fig. 35 - Burning pot box cleaning Fig. 36 - Cleaning with a brush • Clean and drain away the burning pot box and ash tray box from ash which has accumulated in its inner (see Fig. 35). • Clean also the hole for pellet drop with a brush (see Fig. 36). •... -
Page 29: Gasket Replacement
13.9 GASKET REPLACEMENT In case of deterioration of fire door, hopper or fume chamber gaskets, it is necessary to replace them by an autorized technician in order to guarantee the good running of the stove. Use exclusively original spare parts. 13.10 GLASS CLEANING The glass-ceramic of the fire door is able to stand till 700°C but not to thermal shocks. -
Page 30: In Case Of Anomaly
USER/TECHNICIAN PARTS/FREQUENCY 1 DAY 2-3 DAYS 7 DAYS 1 YEAR Brazier UNDER THE USER'S RESPONSIBILITY Ash compartment ** Glass Upper exchanger Lower exchanger BY THE QUALIFIED TECHNICIAN Smoke duct Gaskets Door closure operation ** Emptying of the ash compartment depends on various factors (pellet type, stove power, stove use, type of installation...); the exact emptying time will be suggested by experience. - Page 31 PROBLEM CAUSE SOLUTION INTERVENTION Empty hopper Full the hopper. Open fire door or Close fire door and pellet door and check that there are no pellet open pellet door grains at the gasket level. Clogged stove Fume chamber cleaning Pellets do not reach the combustion Auger blocked by a chamber...
- Page 32 PROBLEM CAUSE SOLUTION INTERVENTION Faulty fume tempe- Replace the fume probe. The exchanger fan rature probe continues to turn even though the stove has just cooled Faulty mother board Replace the mother board. Faulty or out of order Replace the gaskets. door gaskets Ash remains along Contact an expert stove-repairer who will immediately provide for...
-
Page 33: Technical Documentation For Local Space Heaters According To Commission Regulations (Eu) 2015/1185 - (Eu) 2015/1186 (Product Fiche)
COMMISSION REGULATIONS (EU) 2015/1185 - (EU) 2015/1186 (PRODUCT FI- CHE) Manufacturer CADEL srl - Via Foresto Sud 7 - 31025 Santa Lucia di Piave (TV) - Italy Trademak: model identifier CADEL: PRINCE 11 T1 - KOBE 11 T1 - FENICE 11 T1... - Page 34 COMMISSION REGULATIONS (EU) 2015/1185 - (EU) 2015/1186 (PRODUCT FI- CHE) Manufacturer CADEL srl - Via Foresto Sud 7 - 31025 Santa Lucia di Piave (TV) - Italy CADEL: PRINCE PLUS 11 T1 - KOBE PLUS 11 T1 - FENICE PLUS 11 T1 Trademak: model identifier...
- Page 35 KOBE - FENICE - SPARK - INDACO - PRINCE...
- Page 36 Rev. 00 - 2022 CADEL srl www.cadelsrl.com 31025 S. Lucia di Piave - TV www.free-point.it Via Foresto sud, 7 - Italy www.pegasoheating.com Tel. +39.0438.738669 Fax +39.0438.73343...
Need help?
Do you have a question about the PRINCE 11 and is the answer not in the manual?
Questions and answers