
Related Manuals for Havis DS-PAN-300 Series


Summary of Contents for Havis DS-PAN-300 Series
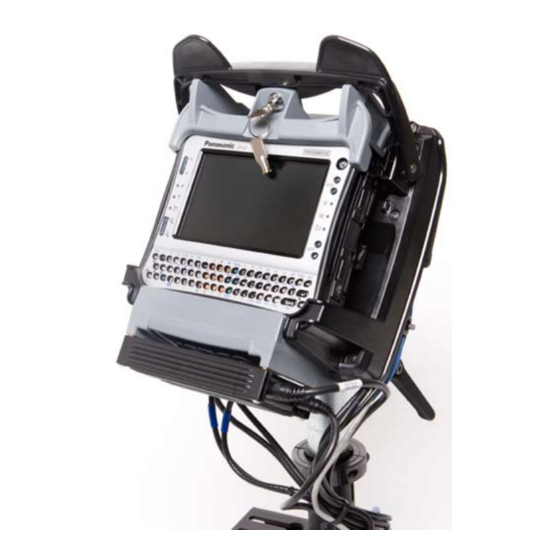
- Page 1 DS-PAN-300 Series Havis Rugged Mobile Docking Station For Panasonic Toughbook U1 www.havis.com 1-800-524-9900...
-
Page 2: Table Of Contents
Before Beginning Havis is pleased to provide these set-up instructions to aid in the proper installation of its DS-PAN-300 Series Docking Station. For questions regarding the set-up of the DS-PAN-300 Series Docking Station please contact Havis at 1.800-524-9900 or visit www.havis.com for additional product support and information. -
Page 3: Hardware Kit
Hardware Kit The hardware kit should include: 1. Motion Mounting Bracket 2. Strain Relief Cleats (2) 3. Mounting Screws (4) 4. Wall Mount Bracket (2) 5. Zip Tie (8) 6. Strain Relief Cleat Screws (2) 7. M3 x 6mm Screws (4) FIG. -
Page 4: Step 1: Mount Ds-Pan-300 Series Bracket To Motion Device
Step 1: Mount DS-PAN-300 Series Bracket to Motion Device If mounting your Dock to motion equipment, place the supplied motion mounting bracket onto the mounting device, aligning for best fit of holes. Be sure to get the top of the bracket oriented to the top of the mount. -
Page 5: Step 3: Install Cable Cleats To Mounting Bracket
Step 4: Installing External Power Supply with Cables If the Toughbook approved Havis Power Supply (Part # LPS-102) is used it can be mounted directly to the DS-PAN-300 Series Dock using the #6-32 x 1-1/4 screws supplied with the power supply. FIG. G... -
Page 6: Step 5: Installing And Strain Relieving Usb Cables
The right angle power cable dictates that the cable route to the right. Routing as shown in FIG. K will provide the cleanest install. Strain relieve power cable at the VGA cable cleat, as shown. FIG. K www.havis.com • 1-800-524-9900... -
Page 7: Step 6: Bundling And Routing The Cables
Step 6: Bundling and Routing the Cables Bundle cables and tie together in neat bundles, as shown. Size of each bundle must be small enough to pass thru exit in cable cover installed in FIG. L. FIG. L Tie-off/strain relieve bundles to strain relief cleats, previously installed to mounting brackets, as shown. -
Page 8: Step 8: Ensure Range Of Motion And Secure Cables
Adjust size of cable bundle loop so that cables will never get “yanked” during use/position adjustment as this can damage cables and Dock. FIG. P Once loop size is set, tie-off, as shown in FIG. Q, with a large cable tie. FIG. Q www.havis.com • 1-800-524-9900... -
Page 9: Step 9: Install Cable Cover
Step 9: Install Cable Cover Install cable cover using supplied M3 x 6mm screws. Install top two screws first. Torque screws to 6 inch-pounds. FIG. R FIG. S... -
Page 10: Step 10: Install Stylus
Step 10: Install Stylus The DS-PAN-300 Series Dock has an integrally molded cleat on each side of the upper housing that gives you the option of storing your stylus with the Dock. To use the cleat, pass the stylus string thru the cleat as shown, and pull it all the way thru as in FIG. -
Page 11: Integrally Strain Relieved Cables
Integrally Strain Relieved Cables If using integrally strain relieved USB cables, use a thin flat blade screw driver and thread directly into plug box. Tighten finger tight. Do not over tighten. FIG. W... - Page 12 DS-PAN-300-OMN_0310...
Need help?
Do you have a question about the DS-PAN-300 Series and is the answer not in the manual?
Questions and answers