Table of Contents
Advertisement
Quick Links
Advertisement
Table of Contents

Related Manuals for Proceq Zehntner ZRM 6006


Summary of Contents for Proceq Zehntner ZRM 6006
- Page 1 ZRM 6006 Retroreflectometer R Instruction Manual from Firmware v.1.3...
-
Page 3: Table Of Contents
Index Exclusion of liability ........... Error! Bookmark not defined. 1 Description of device ...................6 2 Safety information ....................7 2.1 Symbols used ....................7 2.2 Safety notes and hints ...................7 3 Delivery of device ....................8 3.1 Damages during carriage ................8 3.2 Shipment .......................8 3.3 Standard delivery ..................9 3.4 Carrying case .................... - Page 4 9.2 Cleaning ..................... 26 10 Errors ........................ 27 11 Graphical illustration of the measuring principles ..........28 11.1 Night visibility R ..................28 11.2 Day visibility ....................28 12 Technical specification ..................29 Glossary ......................... 30...
-
Page 5: Exclusion Of Liability
Illustrations, descriptions as well as the technical specifications conform to the instruction manual on hand at the time of publishing or printing. However, Proceq SA policy is one of continuous product development. All changes resulting from technical progress, modified construction or similar are reserved without obligation for Proceq SA to update. -
Page 6: Description Of Device
Description of device The Retroreflectometer ZRM 6006 is a portable budget priced user-friendly entry level retroreflectometer with one button operation for measuring night (R ) and day (Qd) visibility of road markings. In particular, this instrument has the following features: •... -
Page 7: Safety Information
It is strictly forbidden to open the housing of the ZRM 6006. If not observed, all the guarantee and liability claims to Proceq SA will be void. The ZRM 6006 is a high quality, state of the art instrument and is safe to operate. -
Page 8: Delivery Of Device
7 days. However, the period could vary depending on the courier. Hence, it is recommended to check the exact time limit when receiving the goods. If there are any damages also inform your authorized Proceq agent or Proceq SA immediately. 3.2 Shipment Should the device be transported again, it must be packaged properly. -
Page 9: Standard Delivery
3.3 Standard delivery Following parts are included in the delivery: ZRM 6006 Retroreflectometer calibration standard universal battery charger (100-240V, 50-60 Hz) certificate of manufacturer certificate of calibration carrying case with wheels... -
Page 10: Carrying Case
3.4 Carrying case The ZRM 6006 is delivered in a transportation case. Whenever you want to transport the instrument, use the case. Nevertheless, please take care that for shipments the case has to be put into a cardboard box and protected with filling material. -
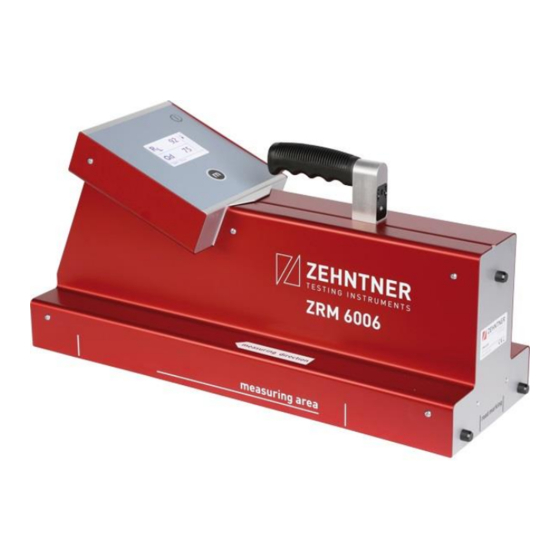
Page 11: Device Overview
Device overview On/off button Display Measuring button Measuring area Handle Port for battery charger... -
Page 12: Setting Up
In this case it is not possible to accept the calibration value. Please contact Proceq SA or your authorized Proceq-agent. For calibration the device must be positioned exactly on the standard. Make sure that the snap-lock mechanism of the... -
Page 13: Calibration Standard
6.2 Calibration standard Always protect the calibration standard from dust, moisture and other environmental factors. It is recommended to keep it stored in the ZRM 6006 case. The standard values measured in the factory as well as the serial number of the corresponding instrument can be found on the sticker on the inside of the standard. -
Page 14: Measure
Measure After switching on the ZRM 6006 a splash screen is displayed, which shows the firmware version. After about 2 seconds the instrument switches to the main screen, displaying the measured values, the temperature and the relative humidity. Additionally the battery and charger status and eventual warnings (BAT LO, BAT CRIT) are displayed. -
Page 16: Measuring Profiled Markings From 5-12 Mm
Ensure that the marking you want to measure is as flat as possible along in the whole range of the measuring instrument. Otherwise, the measuring geometry would be adulterated. Crooked or twisted samples will cause incorrect measuring results. For unevenness from -1 mm up to 5 mm, the given measuring geometry is warranted The procedure for measurement in the laboratory is the same. -
Page 17: Getting Started
7.2.1 Getting started The procedure is shown on the ZRM 6013. The shown procedure is identical for the devices ZRM 6006, ZRM 6013 and ZRM 6013+. Locate the two indicators on the Retroreflectometer “measuring area” and “measuring direction”. Point A is at the end of the arrow: “measuring direction”, Point B is at the end line of the “measuring area”. -
Page 18: Measurements With Profile Distances Under 300 Mm
7.2.2 Measurements with profile distances under 300 mm Place the instrument on the profile whereas Point B is on the middle of the profiled marking, take a measurement. Chosen profile Move the instrument forward for approximately 5 cm and take the next measurement. - Page 19 Move the instrument forward once again, so that Point A is in the middle of the profiled marking and take a measurement. Chosen profile Make the average value of the three measurements. Repeating this procedure on further measuring points ensures a better accuracy.
-
Page 20: Measurements With Profile Distances Over 300 Mm
7.2.3 Measurements with profile distances over 300 mm If the distance between two profiles of the marking is more than 300 mm, a support plate is needed to make sure the device sits even on the marking. The support plate has to have the same height as the profile of the marking to be measured. - Page 21 Chosen profile Move the instrument and the support plate forward for approximately 5 cm and take the next measurement. Chosen profile...
- Page 22 Move the instrument together with the support plate forward once again, so that Point A is in the middle of the profiled marking and take a measurement. Chosen profile Make the average value of the three measurements. Repeating this procedure on further measuring points ensures a better accuracy.
-
Page 23: Explanation Of Profile Measurements
7.2.4 Explanation of profile measurements On the most profiled markings, the face of the profile gives back a higher value than the top of the profile. By moving the device and taking several measurements, you will get back a value that judges the face and the top of the profile. Principle of R measurement: (The testing instruments are built in accordance with this illustration in reduced scale.) -
Page 24: Wet Measurements
7.3 Wet measurements The ZRM 6006 is perfectly suitable for measuring night and day visibility on wet roads and on moistened road markings (e.g. according to the “bucket” method) • Set a timer (e.g. stopwatch) depending on the standards • Moisten the road marking in the required way, e.g. -
Page 25: Built-In Battery And Charging
Built-in battery and charging 8.1 Battery The used Li-Ion-Mn battery has a very high capacity. The capacity is continuously being observed. When the voltage becomes too weak the battery sign appears on the display and the battery has to be charged. In order to prevent a damage of the battery, the instrument switches automatically off before the battery is completely empty. -
Page 26: Maintenance
• Cleaning as described in chapter 9.2 on page 26. All other maintenance and repair work may only be carried out by Proceq SA or your authorized Proceq agent, otherwise all warranty voids. Make sure that the ZRM 6006 is unplugged from power supply and turned off before any maintenance, except for charging. - Page 27 10 Errors In case an error message is shown on the display, please contact Proceq SA and indicate the language code and the number beneath shown on the display. Page 27...
- Page 28 11 Graphical illustration of the measuring principles 11.1 Night visibility R is the coefficient of retroreflected luminance (night visibility) of road markings. The observation angle of 2.29° corresponds to the viewing distance of a vehicle driver of 30 m under normal conditions. The illumination angle is 1.24°. The angle definitions above are valid for EN 1436.
- Page 29 12 Technical specification Observation distance: 30 m, according to CEN-geometry Observation angle: EN 1436: 2.29° ASTM E1710: 1.05° ASTM E2302: 2.29° Illumination angle: : EN 1436: 1.24° : ASTM E1710: 88.76° Qd: diffuse Measuring area: 52 mm x 218 mm Measuring sensor: adapted to V () : 0 - 4‘000 mcd⋅m...
- Page 30 Glossary Accumulator Instrument Capacity ........25 Delivery ........8 Replacing ........26 Description ........6 Status charging ......25 Extent of delivery ......9 Status indication......25 Apparatus Specifications ......29 Maintenance ......... 26 Charging ........25 Cleaning ........26 Battery Measurements Capacity ........
- Page 31 Turning off ........12 Turning-on ........12 Technical specification ....29 Transportation Damages ........8 Wet measurements ......24 Page 31...
- Page 32 Subject to change. Copyright © 2017 by Proceq SA, Schwerzenbach. All rights reserved. www.proceq.com Version 2.0 dated 10.04.2019 82041002E...
Need help?
Do you have a question about the Zehntner ZRM 6006 and is the answer not in the manual?
Questions and answers