
Related Manuals for Proceq Pprofometer 600


Summary of Contents for Proceq Pprofometer 600
- Page 1 ® Operating Instructions Made in Switzerland Made in Switzerland Design Patent Pending...
- Page 2 Scope of Delivery © 2017 Proceq SA...
- Page 3 • • R Rod electrode cable, 1 lead, l=1.5 m (5 ft) • S Tool kit • • Wheel electrode with cables and spare parts • U Four wheel electrode with cables and spare parts • © 2017 Proceq SA...
-
Page 4: Table Of Contents
10.2 Appendix A2: Neighboring Bar Correction .....52 Explorer Document Handling ........43 10.3 Appendix A3: Minimum / Maximum Cover ....52 Ordering Information ..........44 Units .................44 Upgrades .................44 Parts and Accessories ............44 Technical Specifications ..........45 © 2017 Proceq SA... -
Page 5: Safety And Liability
All information contained in this documentation is presented in good faith and believed to be correct. Proceq SA makes no warranties and excludes all liability as to the completeness and/or accuracy of the information. © 2017 Proceq SA... -
Page 6: General Operation
• An optional quick charger (Part No. 327 01 053) can be used to charge a spare battery or to charge the battery outside of the instrument. In this case it takes < 4h for a complete charge. © 2017 Proceq SA... -
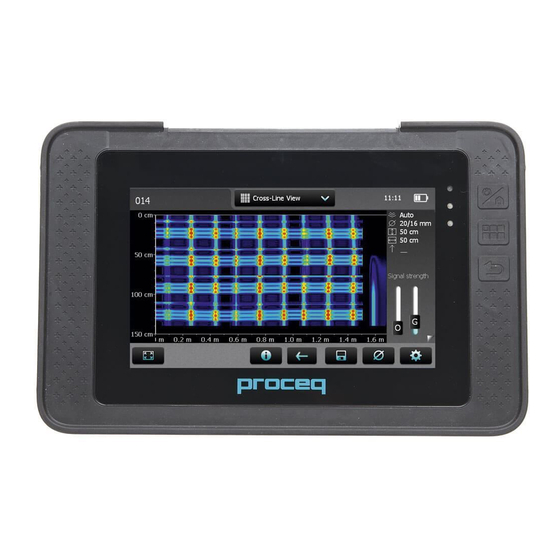
Page 7: Main Menu
USB Host (when a Profometer 630 AI or 650 AI unit is supplied) or can be ordered USB Device anytime after the initial purchase in order to upgrade / unlock to further Ethernet functionalities. Power Supply © 2017 Proceq SA... -
Page 8: Cover Meter And Corrosion Functionalities
When going into the Settings or Explorer menus the user will be prompt- ed whether to access the Cover Meter or Corrosion corresponding sub- menus. The user can disable at any time either feature by going into the System / Features menu and unchecking the corresponding box. © 2017 Proceq SA... -
Page 9: Profometer 6 Cover Meter
NOTE! Remove all metallic objects such as rings and watch- is shown. In the Single-Line Mode the cover curve is shown but es before you start measuring. a rebar is only set up to 90 % of the maximum cover. © 2017 Proceq SA... -
Page 10: Cover Meter Operation
Sphere of influence: Diameter 400 mm / 16 inch Maximum Cover • • • Cover Offset • • • • • • Display Inclined Rebar • • Sharpen • Display Curve Align Rebar • • MC (SLA) Positions Figure 5: Influence sphere © 2017 Proceq SA... - Page 11 If only a or Large/Spot Range is set, then the inch higher than the Minimum Cover. If not, the instrument Neighboring Rebar Correction (only taking into account 1 layer) is automati- will correct it automatically. cally applied. © 2017 Proceq SA...
- Page 12 NOTE! This feature should only be set if the rebars are running parallel to the start line (X- or Y-line). It is not activated during the measurements (activated only when storing the data). © 2017 Proceq SA...
- Page 13 MC LED ously the cursor jumps to the next line lights up. Then the MC is (in Multi-Line, Area-Scan and Cross-Line precisely above a rebar axis. Mode only) Figure 6: Universal Probe overview © 2017 Proceq SA...
- Page 14 CL running vertically and move the probe cart vertically until both rectangles in the probe symbol 12 are green and of equal size. When- ever the coils rectangles 12 are of different size and red, the probe po- © 2017 Proceq SA...
- Page 15 5 minutes in orange, after NOTE! Cover values are only saved for later viewing, if the 10 minutes in red.. diameter was measured and saved. NOTE! Tap on the triangle to perform zeroing. © 2017 Proceq SA...
- Page 16 • Above each rebar, when the red LED of MC C / D lights up, you may measure the rebar diameter and on completion, it will be displayed in 13 Nos. / Measured diameter blue. The measured diameter may be deleted within 5 seconds by tap- 14 Skip distance ping on © 2017 Proceq SA...
- Page 17 Figure 3 but a rebar will only be shown up to 90 % of those limits. New set diameter shown in orange Figure 11: Single-Line View zoomed, showing change of rebar diameter © 2017 Proceq SA...
- Page 18 Specifications”. On rougher surfaces the measured length may be reduced or checked at certain intervals by setting markings on the test surface and comparing with marks set on the display (long push on © 2017 Proceq SA...
- Page 19 5 to 30 cm (2.00 Store measured data to 12.00 inch), activate AI or NRC correction. At the end of the first line a marker (dotted blue line) is set. To proceed with the next line tap 10 © 2017 Proceq SA...
- Page 20 In the Multi-Line View the signal strength spectrum can be seen in addition to the cover and diameter, see “3.2.3 Cover Meter Display Views”. In one measuring sequence a maximum of 62 lines can be scanned and stored in one file. © 2017 Proceq SA...
- Page 21 5 minutes in orange, after 10 minutes in red.. NOTE! Tap on the triangle to perform zeroing. Figure 15: Area-Scan option to mask a field by double-tapping on it © 2017 Proceq SA...
- Page 22 10 Move to next line / Rotate probe 11 Switch from X scan to Y scan and vice versa 12 Zoom to fit the whole scan 13 Actual Cover 14 Distance to the nearest rebar © 2017 Proceq SA...
- Page 23 NOTE! In practice only the cover values and statistical evalu- The actual window is shown on top right (either of scan direction SX or SY) ation of the 1st layer rebars (closer to the surface) is of inter- Figure 18: Statistics View Normal est. © 2017 Proceq SA...
- Page 24 In case the diameter was manually set it is shown in orange. Figure 19: Statistics Views DBV-Evaluation Figure 21 shows a Single-Line with the Signal Strength Curve (dotted © 2017 Proceq SA...
- Page 25 Multi-Line or Area-Scan Mode. It is a plan view, in most cases of the first layer rebars. A Multi-Line View of the second layer – main layer in columns and girders – may also be of interest. Rebars can be © 2017 Proceq SA...
- Page 26 Corrosion measurements. Erroneous or non valid readings can be masked and unmasked (see “3.2.2. Cover Meter Measurement Modes”); a cross will appear into the masked fields and the corresponding cover values will not be taken into account in the Statistical View. © 2017 Proceq SA...
- Page 27 • With the G-slider (Gain) the signal strength resolution is set. The signal strength is accordingly displayed in colors from full color spectrum to part of it only, e. g. blue to violet only. © 2017 Proceq SA...
- Page 28 In multiple layer arrangements (see Figure 30) the deeper rebars may af- • Measure the diameter and use the derived value as setting for cover fect the diameter measurements on the shallow ones, causing the meas- measurement ured values to be overestimated (see Figure 30). © 2017 Proceq SA...
- Page 29 NOTE! The “Standard Range” must be selected. With the of the rebars by rotating the probe slowly and searching for the maximum “Large Range” or “Spot Range” selected, locating of the signal. rebars may be completely wrong. © 2017 Proceq SA...
-
Page 30: Profometer Corrosion
In this case no Cover Offset value the sheet thickness must be set as must be set Cover Offset value. Figure 33: Scanning near to the edge Figure 34: Principle of steel corrosion in concrete with oxygen availability © 2017 Proceq SA... - Page 31 Cu/CuSO reference elec- trode are in the following range (RILEM TC 154-EMC): • water saturated concrete without O2: -1000 to -900 mV • moist, chloride contaminated concrete: -600 to -400 mV © 2017 Proceq SA...
- Page 32 Without checking the actual corrosion state this may lead to misinterpretation of the potential data. Electrical resistivity of the concrete The air permeability of the concrete may be tested with Proceq’s Torrent Low electrical resistivity leads to more negative potentials that can be instrument.
-
Page 33: Profometer Corrosion Operation
The measured resistance should 0.25 x 0.25 m to 0.5 x 0.5m is typically sufficient. not be more than 1 Ω above the resistance of the cable used. © 2017 Proceq SA... - Page 34 • Half-cell Solution This is only possible with the Rod Electrode. Proceq provides an additional sponge that connects to the rod electrode in order to increase the overall surface contact area, to prevent testing immediately above a large aggregate. In the case of the wheel electrode with its continual automatic measure-...
- Page 35 Cumulative Distribution View and it defines the areas displayed in then values have to be acquired manually. In both cases, values > -50mV green in the Chipping Graph View (see “4.2.4. Corrosion Display Views”). have to be acquired by manually. © 2017 Proceq SA...
- Page 36 Interface box connected, current time, battery status. Display of selected Settings: • Probe Type • Grid X Spacing • Grid Y Spacing • Grid Limits (if set) • Coarse Grid Factor © 2017 Proceq SA...
- Page 37 • You can edit or delete the measured value at cursor position by press- on the hard Keys. ing 10; alternatively the value can overwritten by simply positioning the cursor and storing the new measured value. © 2017 Proceq SA...
- Page 38 11 Edit notes / Edit cell values / Reset all values: tap cell to edit already with a number will be incremented on next measurement 12 Probe position and horizontal distance from start based on this last number). © 2017 Proceq SA...
- Page 39 • At the beginning of each line (for the first 100 cm / 40 inch) the default direction defined in the Direction of Next Line setting is displayed on the screen by four flashing arrows. You can manually change the direc- © 2017 Proceq SA...
- Page 40 The cells where no potential value was measured are dis- with the number of measurements and the current interval set with the played in white. You can zoom and scroll to any desired location, change © 2017 Proceq SA...
- Page 41 (more flat). The two points where the gradient changes can be marked on the screen by dragging the two vertical cursors.The red cursor will define the maximum (most positive) potential value expected of the active distribution. © 2017 Proceq SA...
- Page 42 (yellow). You can zoom and scroll to any desired loca- Chipping Graph ASTM tion and add text notes to any cell or group of cells as described in 4.2.3 Corrosion-Scan Measurement Mode. Figure 42: Chipping Graph ASTM © 2017 Proceq SA...
-
Page 43: Explorer Document Handling
• Connect the USB-stick to the USB Device plug on the left side of the Profometer Touchscreen • Click on and confirm with click on The uploaded pdf-files appear on the bottom of the document list. © 2017 Proceq SA... -
Page 44: Ordering Information
330 01 004 Profometer Corrosion four wheel electrode, with 711 10 015 Power supply cable EU 0.5 m (1.7 ft) telescopic handle, encoder, cables, spare parts, tool kit, copper sulphate (250g), citric acid (250g), carrying case © 2017 Proceq SA... -
Page 45: Technical Specifications
ASTM C876, RILEM TC 154-EMC, third party electrodes DGZfP B3, SIA 2006, UNI 10174, JGJ/T 152, JSCE E 601, 327 01 053 Quick Charger (external) CE certification 356 00 082 Display antiglare protection film for touchscreen unit © 2017 Proceq SA... -
Page 46: Maintenance And Support
• Leave for 6 hours, shaking occasionally. • Pour out the citric acid solution (no special disposal procedure is re- quired) and flush out several times with water. • Refill the electrode with copper sulphate solution. (See section “4.2.1. Preliminary Operations”) © 2017 Proceq SA... -
Page 47: Support Concept
Support Concept The USB driver installs a virtual com port which Proceq is committed to providing a complete support service for this is needed to communicate with the Profometer instrument by means of our global service and support facilities. It is Touchscreen Unit. -
Page 48: Connecting To A Profometer Touchscreen Unit
• Between Statistics Normal and DBV. Select one or more measurements and click Settings can be changed except the ones used for measurements like “Download”. Measuring Ranges, Display Inclined Rebars, Return to start on new Line, Line Height and Grid Width. © 2017 Proceq SA... -
Page 49: Viewing Corrosion Data
“unit” the unit can be changed for the marked measurements. By holding the cursor on the information about, hardware, To see more data, drag software and probe is displayed. the slider to the right. © 2017 Proceq SA... -
Page 50: Exporting Data
Click on the measurement object you wish to export. It will be highlighted as shown. In both cases, the preview window shows the effects of the current out- put selection. © 2017 Proceq SA... -
Page 51: Merging Corrosion Scans
“Save project” icon – Allows you to save the current project. “Print” icon – Allows you to print out the project. You may select in the printer dialog, if you want to print out all of the data or selected readings only. © 2017 Proceq SA... -
Page 52: Appendices
10.3 Appendix A3: Minimum / Maximum Cover 1.125 Following covers can be selected: 1.250 Metric, Imperial Imperial 1.375 mm, Japanese inch 1.500 0.40 inch 0.44 inch inch 5.52 inch 5.56 inch up to 190 up to 7.48 inch © 2017 Proceq SA... - Page 53 Ul. Optikov 4 korp. 2, lit. A, Office 410 197374 St. Petersburg Russia Phone/Fax + 7 812 448 35 00 info-russia@proceq.com Subject to change. Copyright © 2016 by Proceq SA, Schwerzenbach. All rights reserved. 82039201E ver 06 2017 Made in Switzerland...
Need help?
Do you have a question about the Pprofometer 600 and is the answer not in the manual?
Questions and answers