Advertisement
Available languages
Available languages
Quick Links
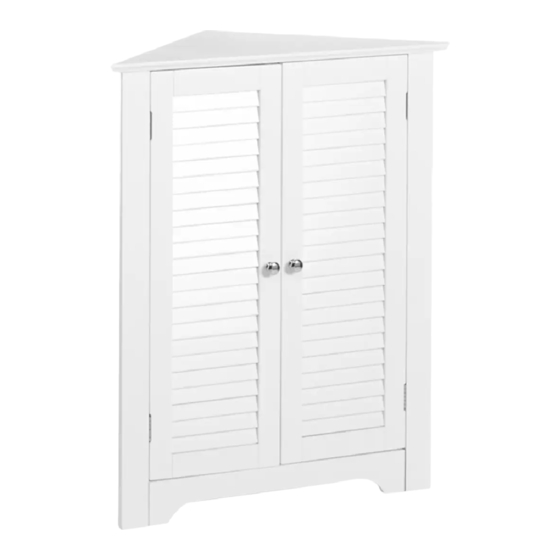
RiverRidge® Ellsworth 3-Shelf Corner Cabinet
This product requires assembly by an adult because of small parts. Care should be
taken in unpacking and assembling this item to keep small parts away from children.
WARNING
Young children can be seriously injured or killed if furniture tips over.
Don't use this item for a TV stand or place heavy objects on top of item.
Always use angle-braces or anchors to secure furniture to the wall.
ASSEMBLY INSTRUCTIONS
ITEM # 06-074
ITEM # 06-075
ADULT ASSEMBLY REQUIRED
SEE FULL WARNING ON PAGE 2
WHITE
ESPRESSO
Advertisement

Subscribe to Our Youtube Channel
Related Manuals for RiverRidge Ellsworth 06-074


Summary of Contents for RiverRidge Ellsworth 06-074
- Page 1 ASSEMBLY INSTRUCTIONS RiverRidge® Ellsworth 3-Shelf Corner Cabinet ITEM # 06-074 WHITE ITEM # 06-075 ESPRESSO ADULT ASSEMBLY REQUIRED This product requires assembly by an adult because of small parts. Care should be taken in unpacking and assembling this item to keep small parts away from children.
- Page 2 Send requests for missing or damaged parts replacements by email to: customer.service@ssi-rr.com or call toll free 1-(844)-223-5201 or order parts on line at www.riverridgehome.com THIS SHELF UNIT WILL HOLD UP TO 25 POUNDS PER SHELF OR A TOTAL OF 75 POUNDS. DO NOT LOAD EACH SHELF WITH MORE THAN 25 POUNDS.
-
Page 3: Parts List
PARTS LIST PARTS DESCRIPTION 4PCS CAM BOLT 4PCS CAM LOCK 12PCS WOOD DOWEL MAGNET 2PCS SCREW 3x14mm 18PCS SCREW 3x10mm 4PCS HINGE 2PCS MAGNET PLATE 13PCS SCREW 4x25mm 2PCS KNOB 2PCS MACHINE SCREW 4x18mm 4PCS PLASTIC HOLDER 2PCS PLASTIC ANCHOR 2PCS SCREW 4x40mm... - Page 4 PARTS DESCRIPTION TOP BOARD LFET SIDE SUPPORT BOARD RIGHT SIDE SUPPORT BOARD LOWER CROSS BAR RIGHT SIDE DOOR LEFT SIDE DOOR ADJUSTABLE SHELF BOTTOM SHELF LEFT SIDE PANEL RIGHT SIDE PANEL TOOLS NEEDED FOR ASSEMBLY: FLAT & PHILIPS SCREWDRIVER (NOT INCLUDED) THE USE OF POWER SCREWDRIVER IS NOT RECOMMENDED...
- Page 5 STEP 1 1. Insert 1 screw (F) through hole on magnet plate (H) and tighten to right side door (5). 2. Insert 4 screws (F) through holes on 2 hinges (G) and tighten to right side door (5). 3. Repeat above steps to assemble magnet plate (H) and 2 hinges (G) to left side door (6).
- Page 6 STEP 3 Attach right side door (5) and left side door (6) to left side support board (2) and right side support board (3) by inserting 8 screws (F) through holes on hinge (G) on left side door (6) and right side door (5) and tighten to left side support board (2) and right side support board (3).
- Page 7 STEP 5 1. Attach left side panel (9) to shelf (8) and left side support board (2) by inserting 4 screws (I) through holes on left side panel (9) and tighten to shelf (8) and left side support board (2). STEP 6 1.
- Page 8 STEP 7 1. Screw 4 cam bolts (A) into pre-threaded holes on top board (1). 2. Attach magnet (D) to top board (1) by inserting 2 screws (E) through holes on magnet (D) and tighten to top board (1). STEP 8 1.
- Page 9 STEP 9 1. Insert 4 cam locks (B) into cam lock holes on left side panel (9) and right side panel (10) and rotate clockwise to lock cam bolts (A) in place. 2. Insert 4 plastic holders (L) into holes on desired position for shelf (7). 3.
- Page 10 Please make sure your item is secured to the wall, per assembly instructions. Thank you for purchasing this RiverRidge® Kids Products item. We hope you enjoy it and consider purchasing other RiverRidge® items. Send requests for missing or damaged parts replacements by email to: customer.service@ssi-rr.com...
-
Page 11: Instrucciones De Ensamblaje
INSTRUCCIONES DE ENSAMBLAJE Gabinete esquinero con 3 repisas Ellsworth RiverRidge® BLANCO ARTÍCULO N.° 06-074 Í É CULO N.° 06-075 ESPRESSO REQUIERE QUE UN ADULTO REALICE EL ENSAMBLAJE Este producto requiere que un adulto lleve a cabo el ensamblaje debido a las piezas pequeñas. - Page 12 Envíe las solicitudes de reemplazos de piezas faltantes o dañadas por correo electrónico a: customer.service@ssi-rr.com o llame sin costo al 1-(844)-223-5201 o bien pida las piezas en línea en www.riverridgehome.com ESTA UNIDAD DE REPISAS PUEDE GUARDAR HASTA 25 LIBRAS POR REPISA O UN TOTAL DE 75 LIBRAS.
-
Page 13: Lista De Piezas
LISTA DE PIEZAS N.° PIEZAS CANT. DESCRIPCIÓN 4 PIEZAS PERNO DE ANCLAJE 4 PIEZAS PESTILLO DE LEVA 12 PIEZAS PASADOR DE MADERA 1 PIEZA IMÁN 2 PIEZAS TORNILLO 3 x 14 mm 18 PIEZAS TORNILLO 3 x 10 mm 4 PIEZAS BISAGRA 2 PIEZAS PLACA DE IMÁN... - Page 14 N.° PIEZAS CANT. DESCRIPCIÓN 1 PIEZA TABLERO SUPERIOR TABLERO DE SOPORTE 1 PIEZA IZQUIERDO TABLERO DE SOPORTE 1 PIEZA DERECHO BARRA TRANSVERSAL 1 PIEZA INFERIOR 1 PIEZA PUERTA DERECHA 1 PIEZA PUERTA IZQUIERDA 1 PIEZA REPISA AJUSTABLE 1 PIEZA REPISA INFERIOR 1 PIEZA PANEL IZQUIERDO 1 PIEZA...
- Page 15 PASO 1 Inserte 1 tornillo (F) a través del agujero de la placa de imán (H) y apriete a la puerta derecha (5). Inserte 4 tornillos (F) a través de los agujeros de las 2 bisagras (G) y apriete a la puerta derecha (5).
- Page 16 PASO 3 Fije la puerta derecha (5) y la puerta izquierda (6) al tablero de soporte izquierdo (2) y al tablero de soporte derecho (3) al insertar 8 tornillos (F) en los agujeros de la bisagra (G) en la puerta izquierda (6) y en la puerta derecha (5) y apretar el tablero de soporte izquierdo (2) y el tablero de soporte derecho (3).
- Page 17 PASO 5 Fije el panel izquierdo (9) a la repisa (8) y el tablero de soporte izquierdo (2) al insertar 4 tornillos (I) a través de los agujeros del panel izquierdo (9) y apriete la repisa (8) y el tablero de soporte izquierdo (2). PASO 6 Fije el panel derecho (10) a la repisa (8), tablero de soporte derecho (3) y panel izquierdo (9) al insertar 7 tornillos (I) a través de los agujeros en el panel derecho (10) y apriete la...
- Page 18 PASO 7 Atornille los 4 pernos de anclaje (A) en los agujeros previamente roscados del tablero superior (1). Fije el imán (D) al tablero superior (1) al insertar 2 tornillos (E) a través de los agujeros en el imán (D) y apriete al tablero superior (1). PASO 8 Inserte los 6 pasadores de madera (C) en los agujeros para los pasadores en el extremo del panel izquierdo (9) y panel derecho (10).
- Page 19 PASO 9 Inserte 4 pestillos de leva (B) en los agujeros de pestillo de leva del panel izquierdo (9), panel derecho (10) y gire los pernos de anclaje (A) hacia la derecha para asegurarlos en su lugar. Inserte 4 sujetadores plásticos (L) en los agujeros en la posición deseada para la repisa (7).
- Page 20 Asegúrese de que su artículo esté fijo a la pared, según las instrucciones de ensamblaje. Gracias por comprar este artículo de los Productos para niños de RiverRidge®. Esperamos que lo disfrute y que considere comprar otros artículos de RiverRidge®. Envíe las solicitudes de reemplazos de piezas faltantes o dañadas por correo electrónico a: customer.service@ssi-rr.com...
Need help?
Do you have a question about the Ellsworth 06-074 and is the answer not in the manual?
Questions and answers