Table of Contents
Advertisement
Available languages
Available languages
Quick Links
Advertisement
Chapters
Table of Contents

Subscribe to Our Youtube Channel
Related Manuals for KNOVA KN CS-3555R


Summary of Contents for KNOVA KN CS-3555R
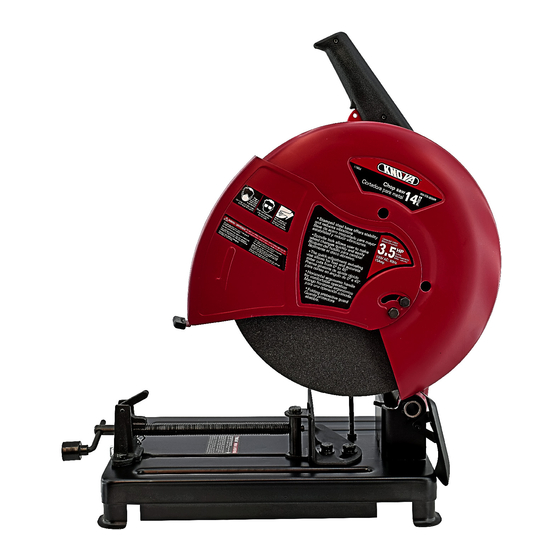
- Page 1 ” Chop saw Cortadora para metal KN CS-3555R...
-
Page 2: Table Of Contents
TABLE OF CONTENTS Product specifications ............1 Assembly ................Warnings ................1 Adjustments ..............Symbols ................1 Operation ................10 Power tool safety ..............2 Maintenance ..............11 Chop Saw Safety ..............3 Troubleshooting guide ............12 Electrical requirements and safety ........5 Parts list and schematic (motor)......... -
Page 3: Power Tool Safety
SYMBOLS WARNING CAUTION WARNING: Indicates a potentially CAUTION: Used without the safety alert hazardou situation which, if not avoided, could result symbol indicates a potentially hazardous situation which, in dead or serious injury. if not avoided, may result in property damage. CAUTION CAUTION: Indicates a potentially hazardou situation which, if not avoided, may result in minor or... -
Page 4: Chop Saw Safety
CHOP SAW SAFETY BEFORE USING THE CHOP SAW, IT IS CRITICAL THAT 2. AVOID INJURY FROM JAMS, SLIPS OR THROWN YOU READ AND UNDERSTAND THESE SAFETY RULES. PIECES (KICKBACKS): • Use this chop saw to cut ferrous material only. WARNING TO AVOID MISTAKES THAT COULD •... - Page 5 CHOP SAW SAFETY 8. AVOID ACCIDENTAL STARTING: CAUTION Make sure the switch is off before plugging the abrasive chop To avoid accidental start-up of your chop saw, always saw into a power source. make sure switch is off and “lock-on” feature is disengaged before connecting to power source.
-
Page 6: Electrical Requirements And Safety
CHOP SAW SAFETY • This chop saw has been designed for cutting metals • Do not attempt to modify this tool or create accessories using reinforced abrasive chop saw wheels only. Do not not recommended for use with this tool. Any such remove the wheel, install a steel blade and attempt to alteration or modification is misuse and could result in a cut other types of materials such as wood, masonry,... -
Page 7: Tools Needed For Assembly
ELECTRICAL REQUIREMENTS AND SAFETY Use a separate electrical circuit for your tools. This circuit MINIMUM GAUGE FOR EXTENSION CORDS (AWG) must not be less than a #12 wire with a 20 A time lag fuse or (When using 120 volts only) a #14 wire with a 15 A time lag fuse. -
Page 8: Know Your Chop Saw
KNOW YOUR CHOP SAW Trigger Lock-on Button Locking Chain Hook Carrying Handle Motor Spindle Lock Vise Clamp Quick-Release Locking Lever Depth Stop Adjustment Bolt Cutting Wheel Wrench Storage Vise Crank Switch Grip Trigger Switch Lower Wheel Guard Abrasive Cutting Wheel Adjustable Fence Fence... -
Page 9: Assembly
ASSEMBLY INSTALLING AND CHANGING THE ABRASIVE CUTTING WARNING Never connect the plug to the power WHEEL (FIG. C, D, E) source outlet until all installations and adjustments are completed and you have read and understood NOTE: Use only recommended reinforced the safety and operational instructions. -
Page 10: Adjustments
ASSEMBLY NOTE: If the cutting depth stop bolt has been adjusted during operation of the old abrasive wheel, reset for the depth for a new 14 in. diameter wheel. (See instructions on page 9) Fig. E ADJUSTMENT ADJUSTING THE CUTTING DEPTH STOP BOLT (FIG. F) the depth stop bolt may require adjustment to provide maximum cutting capacity. -
Page 11: Operation
ADJUSTMENT 1. Loosen the vise crank and back the vise clamp (3) ADJUSTING THE VISE (FIG. G) from the adjustable fence (2). NOTE: The vise of your saw is used to secure the workpiece during cutting operations. 2. Loosen the two bolts (1) on the 1. -
Page 12: Maintenance
OPERATION • Inspect the abrasive cutting wheel before every WARNING • If you have the lock-on feature engaged operation. Check for cracks, chipping and correct speed during use and the power is disconnected to the saw, ratings on the cutting wheel. disengage the lock-on feature immediately. -
Page 13: Troubleshooting Guide
MAINTENANCE 1. To inspect or replace brushes, first unplug the tool. LUBRICATION Remove the black plastic cap (1) on the side of the • Motor and motor (2). cutterhead NOTE: The brush assembly (3) has a spring, so the cap bearings (1) may pop out when loosened. -
Page 14: Parts List And Schematic (Motor)
PARTS LIST AND SCHEMATIC (MOTOR) ORDER ONLY BY MODEL NUMBER AND PART NUMBER I.D. No. D e s c r i p t i o n S i z e Qty. I.D. No. D e s c r i p t i o n S i z e Qty. -
Page 15: Parts List
PARTS LIST ORDER ONLY BY MODEL NUMBER AND PART NUMBER I.D. No. D e s c r i p t i o n S i z e Qty. I.D. No. D e s c r i p t i o n S i z e Qty. -
Page 16: Schematic
SCHEMATIC (355.6 mm) -
Page 17: Especificaciones Del Producto
INDICE Especificaciones del producto ..........16 Ensamblaje ................ 24 Advertencia ................ 16 Ajuste ................25 Símbolos de seguridad ............16 Operación ................27 Reglas de seguridad para herramientas eléctricas .... 17 Mantenimiento ..............28 Reglas de seguridad para cortadora para metal ....18 Guía de solución de problemas .......... -
Page 18: Reglas De Seguridad Para Herramientas Eléctricas
SIMBOLOS DE SEGURIDAD LEA Y ENTIENDA EL MANUAL DE INSTRUCCIONES: PELIGRO PELIGRO: Indica una situación de riesgo Para reducir el riesgo de lesiones, el usuario y todos los inminente que, si no se evita, puede ocasionar espectadores deben leer y comprender el manual de lesiones graves o la muerte. -
Page 19: Reglas De Seguridad Para Cortadora Para Metal
REGLAS DE SEGURIDAD PARA HERRAMIENTAS ELÉCTRICAS 24. NO USE la herramienta eléctrica en presencia de líquidos 20. NUNCA DEJE LA HERRAMIENTA FUNCIONANDO SIN ó gases inflamables. ATENDER. APÁGUELA CON EL INTERRUPTOR “OFF”. No se aparte de una herramienta en funcionamiento hasta 25. - Page 20 REGLAS DE SEGURIDAD PARA LA CORTADORA PARA METAL • Antes de utilizar la sierra circular, limpie la mesa de CUANDO LA SIERRA CORTADORA ESTÁ EN MARCHA: cualquier objeto que no utilice o que no sea necesario PRECAUCION NO PERMITA QUE LA COSTUMBRE para la pieza de trabajo.
-
Page 21: Requisitos Eléctricos Y Seguridad
REGLAS DE SEGURIDAD PARA LA CORTADORA PARA METAL PRECAUCION Para evitar la posible puesta en • NUNCA corte más de una pieza a la vez. marcha de la sierra cortadora, siempre asegúrese • NO APILE más de una pieza de trabajo en la base antes de que el interruptor esté... - Page 22 REQUISITOS ELECTRICOS Y SEGURIDAD Piezas de reemplazo: el circuito de alimentación si el motor no funciona bien. Cuando realice el mantenimiento Verifique en el cuadro de abajo el calibre mínimo para la o reparación de la máquina, longitud de cable que está usando. solo use repuestos idénticos.
-
Page 23: Herramientas Necesarias Para El Ensamblado
HERRAMIENTAS NECESARIAS PARA EL ENSAMBLADO INCLUIDO NO INCLUIDO Llave para disco Navaja para Llave ajustable (perico) cortar cartón Desarmador Phillips CONTENIDOS EN LA CAJA DESEMPACANDO SU SIERRA CORTADORA ADVERTENCIA Si alguna parte se ha perdido o está da- ñada, no trate de montar la sierra cortadora o conectar ADVERTENCIA Para evitar lesiones por un arranque el cable a la corriente hasta que las piezas dañadas... -
Page 24: Conozca Su Cortadora Para Metal
CONOZCA SU CORTADORA PARA METAL Botón de bloqueo del gatillo Gancho para cadena Asa de transporte Motor Bloqueo del eje Prensa sujetadora Palanca de liberación rápida Perno tope de profundidad Almacenaje para llave de disco Manivela de prensa Mango de interruptor Gatillo interruptor... -
Page 25: Ensamblaje
ENSAMBLAJE INSTALACIÓN Y CAMBIO DEL DISCO DE CORTE ADVERTENCIA Nunca se debe conectar la clavija ABRASIVO (FIG. C, D, E) a la fuente de energía, hasta que todos los ajustes NOTA: Use sólo discos abrasivos reforzados recomendados e instalaciones se hayan completado y que usted (3,600 RPM o más). -
Page 26: Ajuste
ENSAMBLAJE NOTA. Si el perno de profundidad del corte ha sido ajustado durante la operación del disco abrasivo viejo, reinicie la profundidad del disco abrasivo nuevo de 14 pulgadas de diámetro. (Ver instrucciones en la página 25). Fig. E AJUSTE AJUSTANDO LA PROFUNDIDAD DE CORTE •... - Page 27 AJUSTE NOTA: Cuando un disco de repuesto esté instalado en la 4.- Coloque una escuadra (5) contra el disco y ajuste la valla unidad, es necesario comprobar la holgura del disco de corte contra la escuadra. con respecto a la base de la máquina antes de operarla 5.- Levante el brazo de corte y asegure la valla en su posición.
-
Page 28: Operación
OPERACIÓN ADVERTENCIA • Para evitar lesiones personales graves, asegúrese Nunca conecte la clavija a la toma siempre que la valla ajustable esté en su posición. de corriente hasta que todas las instalaciones y ajustes se hayan completado y que haya leído y •... -
Page 29: Mantenimiento
MANTENIMIENTO 2.- Saque el ensamble de carbones (3) y sustitúyalo por ADVERTENCIA Nunca ponga lubricantes en el uno nuevo, si es necesario. Las orejas en el extremo disco mientras gira. Para evitar incendios o reacción metálico del ensamble van en las mismas ranuras en tóxica, nunca use gasolina, acetona, thinner o donde las piezas de carbón se ajustan. -
Page 30: Lista De Partes Y Esquema Del Motor
GUÍA PARA SOLUCIÓN DE PROBLEMAS S ÍNTO M A CAUS AS P OS IB L E S AC CI ÓN C ORREC TIVA El motor del cabezal 1. Resorte del eje no se remplazó 1. Llame a servicio a clientes. no levanta completamente. -
Page 31: Lista De Partes
LISTA DE PARTES PEDIDO SOLAMENTE POR NÚMERO DE MODELO Y NÚMERO DE PARTE No. Id. D e s c r i p c i ó n M e d i d a Cant. No. Id. D e s c r i p c i ó n M e d i d a Cant. -
Page 32: Esquema
ESQUEMA (355.6 mm) - Page 33 NOTE / NOTAS...
- Page 34 NOTE / NOTAS...
- Page 35 NOTE / NOTAS...
- Page 36 www.knova.com.mx...
Need help?
Do you have a question about the KN CS-3555R and is the answer not in the manual?
Questions and answers