Table of Contents
Advertisement
Quick Links
Advertisement
Table of Contents

Related Manuals for Electrolux EKG913A2OX


Summary of Contents for Electrolux EKG913A2OX
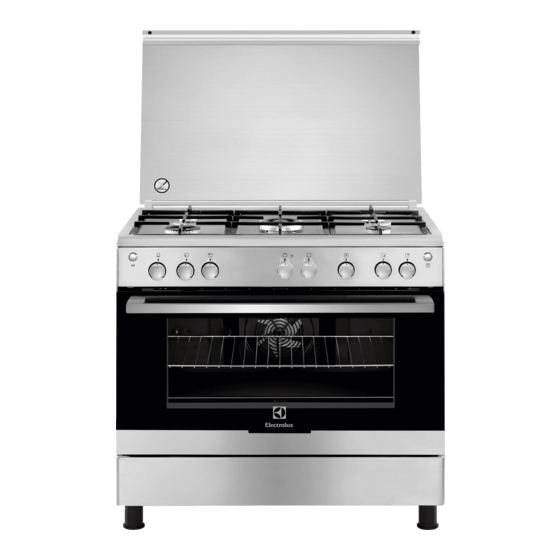
- Page 1 EKG913A2OX Cooker User Manual...
-
Page 2: Table Of Contents
14. INSTALLATION....................24 WE’RE THINKING OF YOU Thank you for purchasing an Electrolux appliance. You’ve chosen a product that brings with it decades of professional experience and innovation. Ingenious and stylish, it has been designed with you in mind. So whenever you use it, you can be safe in the knowledge that you’ll get great results every time. -
Page 3: Safety Information
ENGLISH SAFETY INFORMATION Before the installation and use of the appliance, carefully read the supplied instructions. The manufacturer is not responsible for any injuries or damage that are the result of incorrect installation or usage. Always keep the instructions in a safe and accessible location for future reference. - Page 4 Do not install the appliance behind a decorative door • in order to avoid overheating. Do not install the appliance on a platform. • Do not operate the appliance by means of an external • timer or separate remote-control system.
-
Page 5: Safety Instructions
ENGLISH To remove the shelf supports first pull the front of the • shelf support and then the rear end away from the side walls. Install the shelf supports in the opposite sequence. WARNING: Use only hob guards designed by the •... - Page 6 • Use only correct isolation devices: line • Do not use the appliance as a work protecting cut-outs, fuses (screw type surface or as a storage surface. fuses removed from the holder), earth WARNING! leakage trips and contactors. Risk of fire and explosion •...
- Page 7 ENGLISH • Be careful not to let objects or • Fat and food remaining in the cookware fall on the appliance. The appliance can cause fire. surface can be damaged. • Clean regularly the appliance to • Do not activate the cooking zones prevent the deterioration of the with empty cookware or without surface material.
-
Page 8: Product Description
• Use only lamps with the same • Use original spare parts only. specifications. 2.10 Disposal 2.8 Gas Grill WARNING! WARNING! Risk of injury or suffocation. Risk of fire, explosion and • Contact your municipal authority for burns. information on how to dispose of the •... -
Page 9: Before First Use
ENGLISH 3.2 Cooking surface layout Auxiliary burner Steam outlet - number and position depend on the model Semi-rapid burner Semi-rapid burner Triple Crown burner Rapid burner 3.3 Accessories compartment, lift the lower front door then pull it down. • Wire shelf WARNING! For cookware, cake tins, roasts. -
Page 10: Hob - Daily Use
5. HOB - DAILY USE WARNING! WARNING! Refer to Safety chapters. Do not keep the knob pushed for more than 15 seconds. If the burner does 5.1 Ignition of the hob burner not light after 15 seconds, release the knob, turn it into... -
Page 11: Hob - Hints And Tips
ENGLISH A. Burner cap B. Burner crown C. Ignition candle D. Thermocouple (if applicable) 5.3 Turning the burner off To put the flame out, turn the knob to the off position WARNING! Always turn the flame down or switch it off before you remove the pans from the burner. -
Page 12: Oven - Daily Use
7.4 Pan supports • Use a special cleaner applicable for the surface of the hob. • Wash stainless steel parts with water, The pan supports are not and then dry them with a soft cloth. resistant to washing in a dishwasher. - Page 13 ENGLISH Oven function Application Oven lamp To illuminate the oven interior. Turnspit To spit roasting meat. MIN - Gas Multifunction To cook several different dishes at the same 240°C time. To cook home-made syrup, dry mush‐ rooms or fruit. 8.2 Ignition of the oven gas 2.
-
Page 14: Oven - Clock Functions
Control the flame trough the holes in the knob for the grill to the flame bottom of the oven. position. 3. Hold the knob for the grill pushed for 8.5 Turning off the oven burner approximately 15 seconds. 4. Release the oven control knob. - Page 15 ENGLISH Put the shelf between the guide bars of the shelf support. The front and back bars should be placed upwards. WARNING! The maximum weight permitted on the oven shelf is 24 kg. Avoid putting heavier food on the shelf. Tray: A.
-
Page 16: Oven - Hints And Tips
Refer to "Product description" chapter. 8. Put the front part of the spit on the support hook. 9. Remove the turnspit handle. 10. Light the grill. Refer to "Oven - Daily use" chapter. 11. Press the turnspit button 12. Make sure that turnspit rotates. - Page 17 ENGLISH When you cook frozen food, the trays in • To prevent too much smoke in the the oven can twist during baking. When oven during roasting, add some water the trays become cold again, the into the deep pan. To prevent the distortions are gone.
- Page 18 Food Quantity Tem‐ Time Grill posi‐ Grilling Total Shelf (kg) pera‐ (min) tion time prepara‐ posi‐ ture (min) tion time tion (°C) (min) Duck 2.4 - 3.6 80 - 80 - 90 Goose 5.0 - 6.0 80 - 80 - 90 Rabbit 2.0 - 3.0...
-
Page 19: Oven - Care And Cleaning
ENGLISH Food Quantity (kg) Temperature Time (min) Shelf posi‐ (°C) tion Feter Mshalted 2.5 - 3.0 35 - 40 Salty cake 3.0 - 3.5 50 - 60 Yeast cake 2.5 - 3.0 45 - 50 1) Preheat the oven for 15 minutes. Grilling Food Quantity (kg) Grill position... - Page 20 12.1 Notes on cleaning • Clean the front of the appliance with a soft cloth with warm water and a cleaning agent. • To clean metal surfaces, use a dedicated cleaning agent. • Clean the appliance interior after each use.
- Page 21 ENGLISH the cleaning easier remove the oven door. WARNING! The oven door can close if you try to remove the internal panel of glass when the door is still assembled. Do not loosen the screws. 1. Open the door fully. 3.
- Page 22 Hold the outer door, and push the inner door against the top edge of the door. Lift the inner door. 7. Clean the oven door with water and Make sure the levers are in soap. Clean the inner side of the their original position before door.
-
Page 23: Troubleshooting
ENGLISH 2. Clean the glass cover. The back lamp 3. Replace the lamp with a suitable 300 °C heat-resistant lamp. 1. Turn the lamp glass cover 4. Install the glass cover. counterclockwise to remove it. 13. TROUBLESHOOTING WARNING! Refer to Safety chapters. 13.1 What to do if... -
Page 24: Installation
Problem Possible cause Remedy Steam and condensation You left the dish in the Do not leave the dishes in settle on the food and in oven for too long. the oven for longer than 15 the cavity of the oven. - Page 25 ENGLISH Dimension Frequency 50 - 60 Hz Appliance class Dimension Height 850 - 870 14.2 Technical data Width Depth Voltage 220 - 240 V 14.3 Other technical data Appliance category: II2H3B/P LPG: G30 (3B/P) 28-30 mbar Natural Gas: G20 (2H) 20 mbar 14.4 Bypass diameters BURNER Ø...
- Page 26 14.6 Gas burners for LPG G30 28-30 mbar BURNER NORMAL GAS RATE g/h REDUCED INJECTOR MARK POWER kW POWER kW 1/100 mm Triple 290.9 101o Crown Rapid 218.1 Semi-rapid 1.85 134.5 0.43 Auxiliary 0.95 69.1 0.35 Oven 261.8 Grill 181.8...
- Page 27 ENGLISH 14.9 Adjustment to different 3. Remove the injectors with a socket spanner 7. types of gas 4. Replace injectors with the ones necessary for the type of gas you WARNING! use. Let only an authorized person do the adjustment to different types of gas.
- Page 28 Changing from natural gas to liquid gas 1. Fully tighten the bypass screw. 2. Put the knob back. Changing from liquid gas to natural gas 1. Unscrew approximately one turn the bypass screw position A. 2. Put the knob for the hob back.
- Page 29 ENGLISH 2. Remove the knob for the oven 7. Screw on slowly the bypass screw till functions. If there is no access to the the flame becomes minimum and bypass screw dismount the control stable. panel before adjustment start. 8. Put the knob for the oven functions 3.
- Page 30 14.15 Levelling CAUTION! Remove all the accessories from the oven. CAUTION! The assembly should be made by two people. 1. Open the lid of the appliance and disassemble it. 2. Disassemble the pan supports and all the burner assemblies.
- Page 31 ENGLISH To install all the accessories, do the first step in the opposite sequence. 14.16 Electrical installation WARNING! The manufacturer is not responsible if you do not follow the safety precautions from Safety chapters. This appliance is supplied with a main plug and a main cable.
- Page 32 www.electrolux.com/shop...
Need help?
Do you have a question about the EKG913A2OX and is the answer not in the manual?
Questions and answers