Table of Contents
Advertisement
Quick Links
Advertisement
Table of Contents

Related Manuals for Electrolux EKG9000A4X


Summary of Contents for Electrolux EKG9000A4X
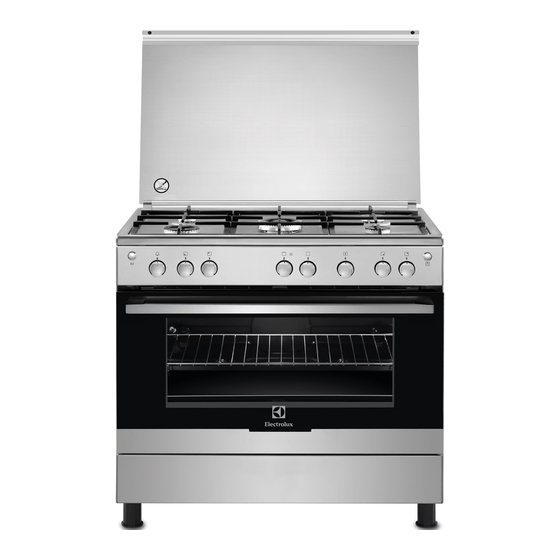
- Page 1 EKG9000A4X Cooker User Manual...
-
Page 2: Table Of Contents
14. INSTALLATION....................23 WE’RE THINKING OF YOU Thank you for purchasing an Electrolux appliance. You’ve chosen a product that brings with it decades of professional experience and innovation. Ingenious and stylish, it has been designed with you in mind. So whenever you use it, you can be safe in the knowledge that you’ll get great results every time. -
Page 3: Safety Information
ENGLISH SAFETY INFORMATION Before the installation and use of the appliance, carefully read the supplied instructions. The manufacturer is not responsible for any injuries or damage that are the result of incorrect installation or usage. Always keep the instructions in a safe and accessible location for future reference. - Page 4 Do not install the appliance on a platform. • Do not operate the appliance by means of an external • timer or separate remote-control system. WARNING: Unattended cooking on a hob with fat or • oil can be dangerous and may result in fire.
-
Page 5: Safety Instructions
ENGLISH the manufacturer of the appliance in the instructions for use as suitable or hob guards incorporated in the appliance. The use of inappropriate guards can cause accidents. 2. SAFETY INSTRUCTIONS • The appliance must be earthed. This appliance is suitable for the •... - Page 6 • Do not let sparks or open flames to adjustment of the appliance are come in contact with the appliance compatible. when you open the door. • Make sure that there is air circulation •...
- Page 7 ENGLISH • Use only the accessories supplied • Glass lid can shatter, when heated (if with the appliance. applicable). • Do not install a flame diffuser on the burner. • This appliance is for cooking purposes only. It must not be used for other purposes, for example room heating.
-
Page 8: Product Description
• Contact your municipal authority for • Remove the door catch to prevent information on how to discard the children or pets from becoming appliance correctly. trapped in the appliance. • Disconnect the appliance from the • Flat the external gas pipes. -
Page 9: Before First Use
ENGLISH 4. BEFORE FIRST USE 1. Set the maximum temperature. WARNING! 2. Let the appliance operate for Refer to Safety chapters. approximately 1 hour. WARNING! 4.1 Initial Cleaning Accessories can become hotter than usual. Remove all accessories from the oven. Refer to "Care and cleaning"... -
Page 10: Hob - Hints And Tips
5.2 Burner overview A. Burner cap B. Burner crown C. Ignition candle D. Thermocouple (if applicable) 5.3 Turning the burner off To put the flame out, turn the knob to the off position WARNING! Always turn the flame down... -
Page 11: Hob - Care And Cleaning
ENGLISH 6.2 Diameters of cookware Burner Diameter of cook‐ WARNING! ware (mm) Use cookware with Semi-rapid 140 - 240 diameters applicable to the size of burners. Auxiliary 120 - 180 Burner Diameter of cook‐ 6.3 Energy saving ware (mm) • If it is possible, always put the lids on Triple Crown 160 - 260 the cookware. -
Page 12: Oven - Daily Use
8. OVEN - DAILY USE WARNING! Refer to Safety chapters. 8.1 Oven Functions Oven function Application Off position The oven is off. MIN - Heat settings Range of temperature adjustment. 240°C Grilling To grill flat food in the middle of the grill. To make toast. -
Page 13: Oven - Clock Functions
ENGLISH 4. When the flame comes on, keep the 1. Open the oven door. knob for the oven functions pushed 2. Ignite the grill burner. on the maximum gas flow position for • For manual ignition hold a flame 15 seconds or less to let the near the grill burner holes. -
Page 14: Oven - Using The Accessories
Turn the knob for the timer as far as it After the time period is completed, an goes, then turn it to necessary time acoustic signal sounds. period. 10. OVEN - USING THE ACCESSORIES 10.2 Using the turnspit WARNING! Refer to Safety chapters. -
Page 15: Oven - Hints And Tips
ENGLISH 6. Use the screws to tighten the forks. 7. Put the tip of the spit into the turnspit hole. Refer to "Product description" chapter. 8. Put the front part of the spit on the support hook. 9. Remove the turnspit handle. 10. - Page 16 Cakes and pastries at different heights To prevent too much smoke in the oven do not always brown equally. There is no during roasting, add some water into the need to change the temperature setting if deep pan. To prevent the smoke an unequal browning occurs.
- Page 17 ENGLISH Meat & Poultry Food Quantity Tem‐ Time Grill po‐ Grilling Total Shelf (kg) pera‐ (min) sition time prepara‐ posi‐ ture (min) tion time tion (°C) (min) Sheep 3.0 - 4.0 90 - 120 max. 90 - 120 90 - 120 Chicken 2.0 - 3.5 90 - 100...
- Page 18 Cakes Food Quantity Tem‐ Time Grill po‐ Grilling Total Shelf (kg) pera‐ (min) sition time prepara‐ posi‐ ture (min) tion time tion (°C) (min) Flat cake 1.2 - 1.5 35 - 40 min. 5 - 10 35 - 40 Sponge 3.0 - 3.5...
-
Page 19: Oven - Care And Cleaning
ENGLISH Revolving frying Food Quantity (kg) Grill position Time (min) Shelf posi‐ tion Sheep on 3.0 - 4.0 max. 100 - 120 Turnspit skewer Chicken on 3.0 - 3.5 max. 100 - 120 Turnspit skewer 12. OVEN - CARE AND CLEANING WARNING! WARNING! Refer to Safety chapters. - Page 20 6. Use a spatula made of wood or plastic (or equivalent) to open the inner door. Hold the outer door, and Avoid placing the levers in push the inner door against the top the vertical position and edge of the door. Lift the inner door.
-
Page 21: Troubleshooting
ENGLISH 12.4 Replacing the lamp Make sure the slot in the hinge A rests on the edge of WARNING! the hinge support B before Risk of electric shock. releasing the oven door. The lamp can be hot. 1. Turn off the oven. Wait until the oven is cold. - Page 22 13.1 What to do if... Problem Possible cause Remedy There is no spark when The hob is not connected Check if the hob is correct‐ you try to activate the to an electrical supply or it ly connected to the electri‐...
-
Page 23: Installation
ENGLISH 13.2 Service data plate is on the front frame of the oven cavity. Do not remove the rating plate If you cannot find a solution to the from the oven cavity. problem yourself, contact your dealer or an Authorised Service Centre. The necessary data for the service centre is on the rating plate. - Page 24 14.4 Bypass diameters BURNER Ø BYPASS 1/100 mm Auxiliary 29 / 30 Semi-rapid Rapid Triple Crown Oven Grill 14.5 Gas burners for NATURAL GAS G20 20 mbar BURNER NORMAL POW‐ REDUCED POWER kW INJECTOR MARK ER kW 1/100 mm...
- Page 25 ENGLISH 14.7 Gas connection • it can not get hotter than room temperature, higher than 30 °C, WARNING! • it is not longer than 1500 mm, Before you connect the gas, • it has no narrowing anywhere, disconnect the appliance •...
- Page 26 14.11 Adjusting the minimum gas level on the hob burner 1. Disconnect the appliance from the electricity. 2. Remove the knob for the hob. If there is no access to the bypass screw dismount the control panel before adjustment start.
- Page 27 ENGLISH 1. Remove the bottom plate of the oven cavity to get access to the oven burner . Assemble the burner in a revers sequence. Replace the gas type sticker near the 2. Carefully remove from the burner the gas supply ramp with the one related to thermocouple A.
- Page 28 Changing from liquid gas to natural gas 1. Unscrew approximately one turn the bypass screw position A. 2. Put the knob for the oven functions back. 3. Connect the appliance to the electricity. WARNING! Put the mains plug into 2.
- Page 29 ENGLISH 5. Tilt the cooker forward 30 degrees and repeat the previous step for the back feet. 3. Tilt the cooker backwards 30 degrees. 6. Carefully lay the cooker on the floor. If the floor is not equally flat, use the adjustable feet on the bottom of the appliance to set a stable position for the appliance.
- Page 30 WARNING! The power cable must not touch the part of the appliance shaded in the illustration. 15. ENVIRONMENTAL CONCERNS appliances marked with the symbol Recycle materials with the symbol with the household waste. Return the Put the packaging in relevant containers product to your local recycling facility or to recycle it.
- Page 32 www.electrolux.com/shop...
Need help?
Do you have a question about the EKG9000A4X and is the answer not in the manual?
Questions and answers