Ubiquiti GBE-LR Quick Start Manual
Hide thumbs
Also See for GBE-LR:
- Quick start manual (35 pages) ,
- Quick start manual (23 pages) ,
- Quick start manual (23 pages)

Related Manuals for Ubiquiti GBE-LR


Summary of Contents for Ubiquiti GBE-LR
- Page 1 Package Contents Dish Main Arm Stabilizer Arms (Qty. 2) Mounting Bracket Screw U-Clamp Create PDF in your applications with the Pdfcrowd HTML to PDF API PDFCROWD...
-
Page 2: Installation Requirements
Flat Washers (Qty. 2) Lock Washers (Qty. 2) Flange Nuts (Qty. 2) Gigabit PoE (24V, 0.5A) with Power Cord Mounting Bracket Installation Requirements Clear line of sight between GigaBeam AP and station Vertical mounting orientation Mounting point: At least 1 m below the highest point on the structure For tower installations, at least 3 m below the top of the tower Outdoor, shielded Category 6 (or above) cabling and shielded RJ45 connectors are required for all wired Ethernet connections. -
Page 3: Hardware Overview
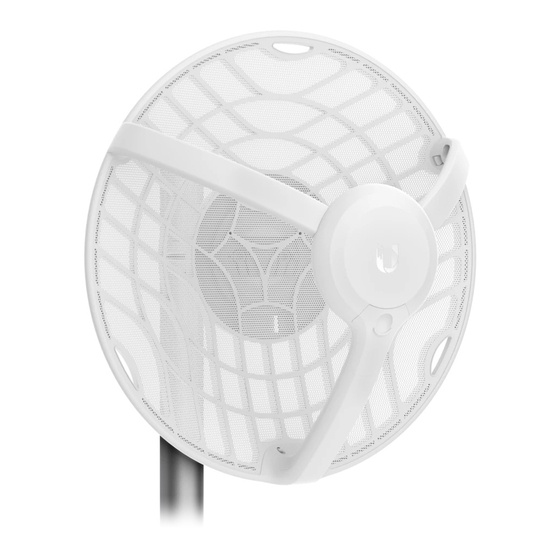
Note: For guidelines about grounding and lightning protection, follow your local electrical regulatory codes. Hardware Overview Create PDF in your applications with the Pdfcrowd HTML to PDF API PDFCROWD... - Page 4 Create PDF in your applications with the Pdfcrowd HTML to PDF API PDFCROWD...
- Page 5 60 GHz LED Lights steady blue when the 60 GHz link is ready. 5 GHz LED Lights steady blue when the 5 GHz link is ready. LAN LED The LED will light steady blue when an active Ethernet connection is made to the Ethernet port and flash when there is activity.
-
Page 6: Installation
Power/Status LED Flashing White Bootup in progress. Ready for use, not connected to Ubiquiti® Network White Management System (UNMS™). See “UNMS Management”. Blue Ready for use, connected to UNMS. Steady Blue with Ready for use, unable to connect to UNMS, check Occasional Flashing connection to UNMS server. - Page 7 Create PDF in your applications with the Pdfcrowd HTML to PDF API PDFCROWD...
- Page 8 OPTIONAL Attach the stabilizer arms for added support. (This is recommended for long-range installations.) Create PDF in your applications with the Pdfcrowd HTML to PDF API PDFCROWD...
- Page 9 Create PDF in your applications with the Pdfcrowd HTML to PDF API PDFCROWD...
- Page 10 Create PDF in your applications with the Pdfcrowd HTML to PDF API PDFCROWD...
- Page 11 Note: The GBE-LR can mount on either side of the pole. This section shows the GBE-LR mounted on the left; the procedure for mounting on the right is similar. Create PDF in your applications with the Pdfcrowd HTML to PDF API...
- Page 12 Left Right Create PDF in your applications with the Pdfcrowd HTML to PDF API PDFCROWD...
- Page 13 Note: Rotate the Mounting Bracket clockwise until it locks into position. Create PDF in your applications with the Pdfcrowd HTML to PDF API PDFCROWD...
- Page 14 Create PDF in your applications with the Pdfcrowd HTML to PDF API PDFCROWD...
- Page 15 Create PDF in your applications with the Pdfcrowd HTML to PDF API PDFCROWD...
- Page 16 (Pole not shown) Create PDF in your applications with the Pdfcrowd HTML to PDF API PDFCROWD...
- Page 17 Create PDF in your applications with the Pdfcrowd HTML to PDF API PDFCROWD...
- Page 18 Create PDF in your applications with the Pdfcrowd HTML to PDF API PDFCROWD...
-
Page 19: Connecting Power
Connecting Power WARNING: The switch port must comply with the power specifications listed in “Specifications”. Create PDF in your applications with the Pdfcrowd HTML to PDF API PDFCROWD... - Page 20 Optional Create PDF in your applications with the Pdfcrowd HTML to PDF API PDFCROWD...
- Page 21 Configuration The device is set to DHCP by default, so it will try to automatically obtain an IP address. If that fails, it will use the default fallback IP address, 192.168.1.20. Proceed to the appropriate section, DHCP or “Fallback IP Address”: DHCP Use one of the following methods:...
- Page 22 3. Select your Country and Language. You must agree to the Terms of Use to use the product. Click Continue. 4. Enter a Username and Password, confirm the Password, and click Save. 5. Click the icon. Create PDF in your applications with the Pdfcrowd HTML to PDF API PDFCROWD...
- Page 23 6. Configure the following settings: a. For one device, enable Access Point mode. For the other device (the Station), keep Access Point disabled. b. Enter a name in the SSID field. This must be the same on both the AP and the Station.
- Page 24 8. Configure each device (AP and Station) with a unique IP address: a. Click the icon. b. Review the Network settings to ensure that each device has a unique IP address. Each can get its IP address via DHCP, or use a static IP address. DHCP By default DHCP client is enabled;...
- Page 25 Fallback IP Address 1. Ensure that your computer (or other host machine) is connected to the same LAN as the GigaBeam. 2. Configure the Ethernet adapter on your host system with a static IP address on the 192.168.1.x subnet. 3. Launch your web browser. Type https://192.168.1.20 in the address field, and press enter (PC) or return (Mac).
- Page 26 5. Enter a Username and Password, confirm the Password, and click Save. 6. Click the icon. Create PDF in your applications with the Pdfcrowd HTML to PDF API PDFCROWD...
- Page 27 7. Configure the following settings: a. For one device, enable Access Point mode. For the other device (the Station), keep Access Point disabled. b. Enter a name in the SSID field. This must be the same on both the AP and the Station.
- Page 28 9. Configure each device (AP and Station) with a unique IP address: a. Click the icon. b. Review the Network settings to ensure that each device has a unique IP address. Each can get its IP address via DHCP, or use a static IP address. DHCP By default DHCP client is enabled;...
- Page 29 Repeat the instructions in the “Configuration” section on the other GigaBeam. UNMS Management You can manage your device using UNMS, which lets you configure, monitor, upgrade, and back up your devices using a single application. Get started at www.unms.com Alignment Tips To accurately align the radios for best performance, you MUST align only one end of the link at a time.
- Page 30 Adjust the elevation: Create PDF in your applications with the Pdfcrowd HTML to PDF API PDFCROWD...
- Page 31 Note: Do NOT make simultaneous adjustments on the AP and Station. Station Visually aim the Station at the AP. To adjust the Station’s position, adjust the azimuth and elevation as described in step 1. 3. Open the Configuration Interface. Select Tools and then select Align Antenna. 4.
-
Page 32: Installer Compliance Responsibility
Note: Maximum signal strength can best be achieved by iteratively sweeping through both azimuth and elevation. 5. Lock the alignment on both radios by tightening all the nuts. 6. Observe the signal level of each radio to ensure that the values remain constant while tightening the nuts. -
Page 33: Specifications
Antenna The 5GHz Output Power field is provided to the professional installer to assist in meeting regulatory requirements. Specifications GBE-LR Dimensions 415 x 415 x 303 mm (16.34 x 16.34 x 11.93") Weight Without Mount 1.4 kg (3.09 lb) Create PDF in your applications with the Pdfcrowd... - Page 34 GBE-LR With Mount 1.8 kg (3.97 lb) Enclosure Aluminum, UV-stabilized Polycarbonate Antenna Gain 5 GHz 11 dBi 60 GHz 38 dBi Networking Interface (1) 10/100/1000 Mbps Ethernet Port Max. Power Consumption Power Method Passive PoE, Pins 4, 5+ and 7, 8- Power Supply 24VDC, 0.5A Gigabit PoE Adapter (Included)
-
Page 35: Safety Notices
Radio 60 GHz 2160 MHz 5 GHz 20/40/80 MHz Operating Frequency (MHz) US/CA U-NII-1 5150 - 5250 U-NII-2A 5250 - 5350 U-NII-2C 5470 - 5725 U-NII-3 5725 - 5850 57,000 - 66,000 Worldwide 5180 - 5875 57,000 - 66,000 Management Radio (MHz) Worldwide 2412 - 2472 US/CA... -
Page 36: Electrical Safety Information
Electrical Safety Information 1. Compliance is required with respect to voltage, frequency, and current requirements indicated on the manufacturer’s label. Connection to a different power source than those specified may result in improper operation, damage to the equipment or pose a fire hazard if the limitations are not followed. - Page 37 Changes or modifications not expressly approved by the party responsible for compliance could void the user’s authority to operate the equipment. This device complies with Part 15 of the FCC Rules and ISED Canada licence-exempt RSS standard(s). Operation is subject to the following two conditions. 1.
- Page 38 This equipment complies with radiation exposure limits set forth for an uncontrolled environment. This equipment should be installed and operated with minimum distance 110 cm between the radiator and your body. This transmitter must not be co-located or operating in conjunction with any other antenna or transmitter.
- Page 39 CE marking on this product represents the product is in compliance with all directives that are applicable to it. Country List BFWA (Broadband Fixed Wireless Access) members noted in blue Note: This device meets Max. TX power limit per ETSI regulations. Note: Fixed service or any restrictions for authorization of use shall follow local country regulations.
-
Page 40: Declaration Of Conformity
Declaration of Conformity Online Resources © 2020 Ubiquiti Inc. All rights reserved. Create PDF in your applications with the Pdfcrowd HTML to PDF API PDFCROWD...
Need help?
Do you have a question about the GBE-LR and is the answer not in the manual?
Questions and answers