Advertisement
INSTALLATION MANUAL
Parts List
2
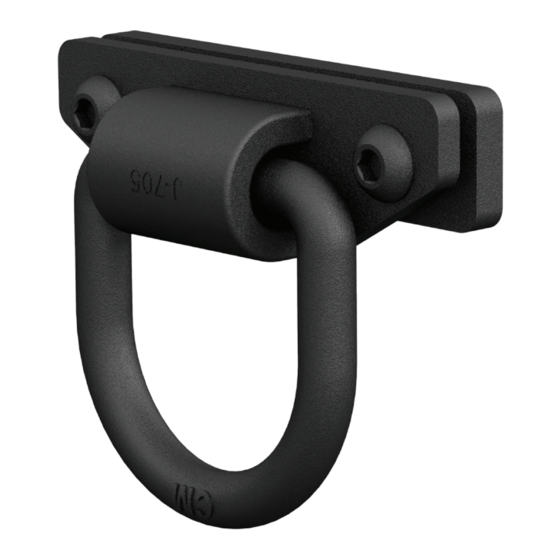
D-ring
4
Button head bolt,
M12 - 1.75mm x 25mm
2
Neoprene rubber rod
2
Back plate
Tools Required
Allen wrench, M8
Torque Specifications
M6 bolt
3 ft.-lbs.
M8 bolt
7 ft.-lbs.
M10 bolt
16 ft.-lbs.
M12 bolt
28 ft.-lbs.
1/4" bolt
3 ft.-lbs.
5/16" bolt
7 ft.-lbs.
3/8" bolt
16 ft.-lbs.
7/16" bolt
20 ft.-lbs.
1/2" bolt
28 ft.-lbs.
Level of Difficulty
Easy
Product Image
Notes and Maintenance
Before you begin installation, read all instructions thoroughly.
Proper tools will improve the quality of installation and reduce the time required.
For black finishes, mild soap may be used to clean the product.
Refer to the table to the left when securing hardware during the
installation process to help prevent damage to the product or vehicle.
PAGE 1 • 2081300-INS-RA • 800.798.0813 • NEED ASSISTANCE?
2081300
Scan
for helpful
install tips
• ARIESAUTOMOTIVE.COM
Advertisement
Table of Contents

Related Manuals for Aries 2081300


Summary of Contents for Aries 2081300
- Page 1 For black finishes, mild soap may be used to clean the product. Refer to the table to the left when securing hardware during the installation process to help prevent damage to the product or vehicle. • ARIESAUTOMOTIVE.COM PAGE 1 • 2081300-INS-RA • 800.798.0813 • NEED ASSISTANCE?
- Page 2 D-ring. Step 4 Adjust and level the D-ring. Tighten hardware to the recommended torque specifications listed on the first page. Congratulations on the installation of your new ARIES D-rings. ARIESAUTOMOTIVE.COM • NEED ASSISTANCE? • 800.798.0813 • 2081300-INS-RA • PAGE 2...
Need help?
Do you have a question about the 2081300 and is the answer not in the manual?
Questions and answers