Advertisement
Quick Links
INSTALLATION MANUAL
Parts List
1
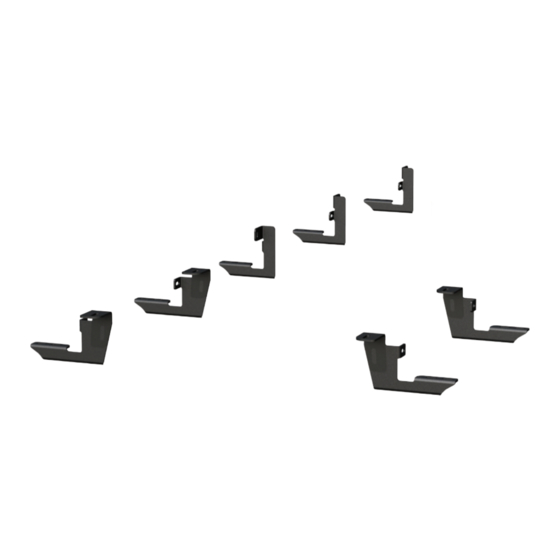
Driver / left running board
1
Passenger / right running board
1
Driver / left
mounting bracket, front
1
Driver / left
mounting bracket, rear
1
Passenger / right side
mounting bracket, front 1
1
Passenger / right side
mounting bracket, front 2
1
Passenger / right side
mounting bracket, middle
2
Passenger / right side
mounting bracket, rear
1
Thread set tool, M8
3
Threaded insert, M8
24
Hex bolts, M8 - 1.25 x 25mm
24
Flat washer, M8
24
Lock washer, M8
10
Clip nuts, M8
2
Plastic bolt retainer, M10
2
Bolt plate, M10 - 1.50 x 35mm
2
Flat washer, M10
2
Lock washer, M10
2
Hex nut, M10
2
Plastic bolt retainer, M12
2
Bolt plate, M12 - 1.75 x 40mm
2
Flat washer, M12
2
Lock washer, M12
2
Hex nut, M12
Tools Required
Torque wrench
Socket, 13mm
Extension
Socket, 16mm
5/16" drill bit
Socket, 18mm
7/16" drill bit
Flathead
screwdriver
Level of Difficulty
Easy
Product Image
RidgeStep™
Passenger side
Notes and Maintenance
Before you begin installation, read all instructions thoroughly.
Proper tools will improve the quality of installation and reduce the time required.
For black finishes, mild soap may be used to clean the product.
Refer to the table below when securing hardware during the
installation process to help prevent damage to the product or vehicle.
Torque Specifications
M6 bolt
M8 bolt
M10 bolt
M12 bolt
--
PAGE 1 • 2055126-INS-RA • 800.798.0813 • NEED ASSISTANCE?
3 ft.-lbs.
1/4" bolt
7 ft.-lbs.
5/16" bolt
16 ft.-lbs.
3/8" bolt
28 ft.-lbs.
7/16" bolt
--
1/2" bolt
2055126
Scan
for helpful
install tips
Rear
Front
Driver side
3 ft.-lbs.
7 ft.-lbs.
16 ft.-lbs.
20 ft.-lbs.
28 ft.-lbs.
• ARIESAUTOMOTIVE.COM
Advertisement

Summary of Contents for Aries 2055126
- Page 1 M8 bolt 7 ft.-lbs. 5/16" bolt 7 ft.-lbs. M10 bolt 16 ft.-lbs. 3/8" bolt 16 ft.-lbs. M12 bolt 28 ft.-lbs. 7/16" bolt 20 ft.-lbs. 1/2" bolt 28 ft.-lbs. • ARIESAUTOMOTIVE.COM PAGE 1 • 2055126-INS-RA • 800.798.0813 • NEED ASSISTANCE?
- Page 2 M10 hex nut. Finish securing the the bracket using an M8 hex bolt, M8 lock washer and M8 flat washer. Snug the hardware, but do not fully tighten. ARIESAUTOMOTIVE.COM • NEED ASSISTANCE? • 800.798.0813 • 2055126-INS-RA • PAGE 2...
- Page 3 Attach the C-shaped track mounting brackets to the mounting brackets using M8 hex bolts, lock washers and flat washers. Snug the hardware, but do not fully tighten. • ARIESAUTOMOTIVE.COM PAGE 3 • 2055126-INS-RA • 800.798.0813 • NEED ASSISTANCE?
- Page 4 Step 10a. Repeat step 9 to install the fourth and fifth mounting brackets. Note: On some vehicles, drilling may be required to install the middle and two rear mounting brackets. ARIESAUTOMOTIVE.COM • NEED ASSISTANCE? • 800.798.0813 • 2055126-INS-RA • PAGE 4...
- Page 5 M8 threaded insert. Thread the M8 insert onto the small end of the tool until it seats the washer against the shoulder between the M10 and M8 threads. • ARIESAUTOMOTIVE.COM PAGE 5 • 2055126-INS-RA • 800.798.0813 • NEED ASSISTANCE?
- Page 6 With the running board in position, it is recommended to tighten all brackets to the vehicle first, followed by the running board connections. For recommended torque specifications, refer to the table on page one. ARIESAUTOMOTIVE.COM • NEED ASSISTANCE? • 800.798.0813 • 2055126-INS-RA • PAGE 6...
- Page 7 To protect your investment, see the 'Notes and Maintenance' section on the first page of this instruction manual. • ARIESAUTOMOTIVE.COM PAGE 7 • 2055126-INS-RA • 800.798.0813 • NEED ASSISTANCE?


Need help?
Do you have a question about the 2055126 and is the answer not in the manual?
Questions and answers