Advertisement
Quick Links
INSTALLATION MANUAL
This is the first of two manuals
required to complete this installation.
The second manual is included with
your side bars / running boards.
Level of Difficulty
Easy
Installation difficulty levels are based on time
and effort involved and may vary depending on
the installer level of expertise, condition of the
vehicle and proper tools and equipment.
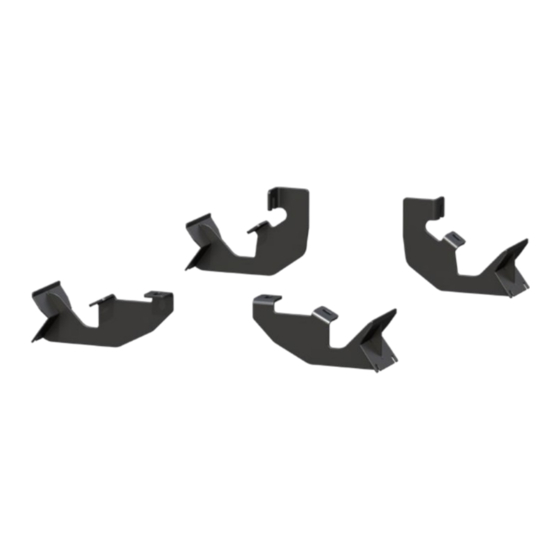
Parts List*
2
Mounting Bracket, front
2
Mounting Bracket, center/rear
8
Hex bolt, M10
8
Flat washer, M10
8
Lock Washer, M10
4
T-rail
8
Lock nut, 5/16
8
Flat washer, 5/16
2
Door sensor
2
Magnet
2
Alcohol wipe
1
Power switch
1
Circuit board
1
Anti-seize
1
Wire loom
1
Wiring harness, two-piece
2
LED light
2
LED light bracket
4
Double-sided foam tape, 3/4" x 3/4"
4
Double-sided tape, 3/4" x 1"
4
Double-sided tape, round
8
Cable tie, 8"
4
Adhesive cable tie base
1
Mounting bracket for rocker switch
* Running boards sold separately
Tools Required
Ratchet
Panel trim
removal tool
Socket, 17mm
Utility knife
Torque Specifications
5/16" bolt
7 ft-lbs.
M10 bolt
16 ft-lbs.
Use above torque setting unless otherwise noted
ARIESAUTOMOTIVE.COM
WARNING
Improper electrical installation may result in personal injury. Unless
you are familiar with the installation and handling of electrical systems,
have this step performed by someone who has that familiarity.
Product Photo
CAUTION
If the step fails to actuate completely (open or closed), do not attempt to force the step open or
close. Applying force in this condition will damage the product and void your warranty. Refer to
the troubleshooting guide on the last page of the instruction manual to resolve potential issues.
NOTICE
Visit www.ariesautomotive.com for a full-color copy of this
instruction manual, as well as helpful videos, guides and much more!
Before you begin installation, read all instructions thoroughly.
Proper tools will improve the quality of installation and reduce the time required.
ActionTrac
battery drain. Switch to the off position if your vehicle is sitting idle for longer than one week.
Periodic inspection of your product should be performed to ensure
all wiring connections, hardware and / or components remain secure.
To help prevent damage to the product or vehicle, refer to the specified
torque specifications when securing hardware during the installation process.
Maintenance
No maintenance required on waterproof harness or water-resistant motors.
If mud or dirt is built up on the steps, simply spray them off and let them air dry.
Mild automotive detergent may be used to clean the product. Do not use dish detergent, abrasive
cleaners, abrasive pads, wire brushes or other similar products that may damage the finish.
Product Registration and Warranty
ARIES stands behind our products with industry-leading warranties. To get copies of the product
warranties, register your purchase or provide feedback, visit: warranty.curtgroup.com/surveys
•
PRODUCT SUPPORT: 877.287.8634
Powered Running Boards feature a transportation mode cutoff switch to prevent
™
•
3025180-INS-RA
•
01/18/2023
3025180
Rear
Front
•
ECN10298
•
PAGE 1
Advertisement

Related Manuals for Aries 3025180


Summary of Contents for Aries 3025180
- Page 1 Socket, 17mm Utility knife Product Registration and Warranty Torque Specifications ARIES stands behind our products with industry-leading warranties. To get copies of the product 5/16" bolt 7 ft-lbs. warranties, register your purchase or provide feedback, visit: warranty.curtgroup.com/surveys M10 bolt 16 ft-lbs.
- Page 2 / rear bracket using two M10 bolts, lock washers and flat washers. Snug the hardware, but do not fully tighten. Repeat steps 2 through 3 on the passenger side of the vehicle. ARIESAUTOMOTIVE.COM • PRODUCT SUPPORT: 877.287.8634 • 3025180-INS-RA • 01/18/2023 • ECN10298 • PAGE 2...
- Page 3 Use a cable tie to secure the wiring harness in place once it is in the desired location. ARIESAUTOMOTIVE.COM • PRODUCT SUPPORT: 877.287.8634 • 3025180-INS-RA • 01/18/2023 • ECN10298 • PAGE 3...
- Page 4 On the passenger side of the vehicle remove only the door seal, and door sill trim panel. NOTICE Remove any other vehicle components that could interfere with the wiring harness. ARIESAUTOMOTIVE.COM • PRODUCT SUPPORT: 877.287.8634 • 3025180-INS-RA • 01/18/2023 • ECN10298 • PAGE 4...
- Page 5 Remove both the driver-side and passenger- side side panels. Note that the passenger side panel has two electrical plugs that need to be disconnected ARIESAUTOMOTIVE.COM • PRODUCT SUPPORT: 877.287.8634 • 3025180-INS-RA • 01/18/2023 • ECN10298 • PAGE 5...
- Page 6 LED light Pink / Brown Actuator Black / Red 18-Pin Passenger-Side FRONT DOOR SENSOR EXTENSION Connector FRONT DOOR SENSOR EXTENSION 14GA BLK Driver-Side 14GA RED 20A FUSE ARIESAUTOMOTIVE.COM • PRODUCT SUPPORT: 877.287.8634 • 3025180-INS-RA • 01/18/2023 • ECN10298 • PAGE 6...
- Page 7 Note: If there are any issues with the step function refer to the 'Troubleshooting' section on the last page of this installation manual. ARIESAUTOMOTIVE.COM • PRODUCT SUPPORT: 877.287.8634 • 3025180-INS-RA • 01/18/2023 • ECN10298 •...
- Page 8 Note: To complete the installation, refer to the manual included with your side bars / running boards. ARIESAUTOMOTIVE.COM • PRODUCT SUPPORT: 877.287.8634 • 3025180-INS-RA • 01/18/2023 • ECN10298 • PAGE 8...
-
Page 9: Troubleshooting
Closing the doors are opened simultaneously and opening them one at a time will reset the board. ARIESAUTOMOTIVE.COM • PRODUCT SUPPORT: 877.287.8634 • 3025180-INS-RA • 01/18/2023 • ECN10298 • PAGE 9...
Need help?
Do you have a question about the 3025180 and is the answer not in the manual?
Questions and answers