Table of Contents

Related Manuals for Dacor Epicure ER36DSCH


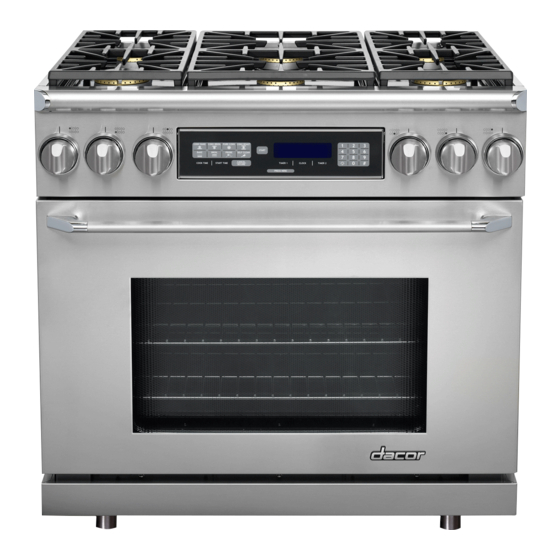
Summary of Contents for Dacor Epicure ER36DSCH
-
Page 1: Installation Instructions
Epicure For use with models: ER36D, ER36D-C, ER48D, ER48D-C THIS APPLIANCE HAS BEEN TESTED IN ACCORDANCE WITH THE LATEST EDITION OF ANSI Z21.1 STANDARD FOR HOUSEHOLD GAS APPLIANCES. Part No. 100843 Rev. S Installation Instructions Range ®... -
Page 2: Table Of Contents
• CUSTOMER: Keep these installation instructions for future reference. Save them for the local electrical inspector’s use. Specifications contained within are subject to change without notice. No liability is assumed by Dacor Table of Contents Installation Instructions ...7-18 Preparing for Installation ...7-9 Electrical Connection ...10-15... -
Page 3: Important Safety Instructions
Use common sense and caution when installing, maintaining or operating this or any other appliance. Always contact the Dacor Customer Service Team about problems or situations that you do not understand. Safety Symbols and Labels... - Page 4 Do not leave children alone or unattended in the area around the range. Do not allow children to play with the controls, pull on the handle or touch other parts of the range. • Do not store items of interest to children on top of or above the range. Children could be burned or injured while climbing on the appliance. •...
-
Page 5: Customer Service Information
Customer Service Information If you have questions or problems with installation, contact your Dacor dealer or the Dacor Customer Service Team. For repairs to Dacor appliances under warranty call the Dacor Distinctive Service line. Whenever you call, have the model and serial number of the appliance ready. -
Page 6: Planning The Installation
(natural gas or LP gas). Also, if operating the range at an altitude above 4000 feet. (1219 m) make sure it is equipped for high altitude operation. Refer to the range data plate and the table on page 3 to determine the correct model. •... -
Page 7: Product Dimensions
When installing an appliance cord on models that are not pre-wired, the hole size must be increased to 1 1/8” (1 3/8” for model ER48D) by removing the conduit bracket inside the range electrical access box. Width: ER36D - 35 7/8”... -
Page 8: Important
• To reduce the risk of personal injury and to reduce accumulated smoke in the room, Dacor strongly recommends installing a range hood. A range hood should project horizontally a minimum of 5 inches beyond the face of the cabinets. -
Page 9: Important
Meat Probe Griddle Wok Ring Stainless Steel Cleaner Use a level to make sure that the range does not tilt front to Pry Stick back or side to side. Readjust the legs if necessary. Literature Kit Install the Anti-Tip Bracket and Foot... -
Page 10: Installing Backguard
Install the backguard before making the range gas and electrical connections. • Dacor recommends that the 24 inch backguard be installed by at least two people. To install a backguard: Remove the thirteen (13) screws on the front and back of the island trim and slide the trim off the unit. -
Page 11: Removing The Oven Door
Installing a Backguard (Continued) Fasten the backguard and the stainless steel trim piece in place with the five (5) existing chrome plated screws. Secure the rear of the backguard to the back of the range with the eight (8) existing hex screws. Backguard Backguard Installation On the 24 inch backguard: Secure the “C”... -
Page 12: Connecting Conduit To The Range
• Wire the range only in compliance with local ordinances. • Improper connection of the electrical wiring can cause an electric shock hazard and damage the appliance. Dacor is not responsible for damages resulting from improper installation. • Connect the ground terminal (or lead) on the appliance to a grounded, metallic, permanent wiring system or grounding conductor. - Page 13 Connecting 4 Wire Conduit to Range L1 Terminal Neutral Terminal Jumper Link L2 Terminal Black Wire White Wire Red Wire Conduit Strain Relief Nut Connecting 3 Wire Conduit to Range - Where Local Code Permits Bare Wire Connections Loop and Spade Terminal Connections...
- Page 14 With the range positioned directly in front of the cabinet cutout, feed the appliance wires into the junction box. Depending upon local codes, utilize one of the three (3) methods shown to connect the appliance to the junction box.
- Page 15 Installation Instructions Junction Box Connection to Separate No. 10 (minimum power supply copper grounding wire Fasten clamp tightly on pipe Wire Nut, 4 Places Connect to appliance (page 10) Junction Box - 4 Wire Connection with External Ground Meter No. 4 copper wire Metal Water Pipe...
- Page 16 Do not connect the green appliance wire to the neutral (white) supply wire unless local building codes permit. Remove the range electrical access cover from the back of the range. If using a 4 wire connection, loosen the grounding screw and remove the neutral to ground jumper link.
-
Page 17: Gas Supply Connection
Gas Supply Connection • Make sure the gas supply valve is off and that the power to the range is turned off at the circuit breaker or fuse box prior to connecting the gas line. • Do not apply excessive pressure when tightening gas connections and fittings. -
Page 18: Final Installation
Peel the protective coating off of the range, including the door. Adjust the legs to the desired height. Carefully slide the range into position in the cut-out. The rear anti-tip leg should engage the anti-tip bracket. Re-installing the Oven Door(s) -
Page 19: Installing The Burner Components
Installation Instructions Installing the Burner Components WARNING Never attempt to operate the cooktop section of the range with any of the burner rings, burner caps or grates removed. • Remove the burner rings, burner caps and grates from their shipping packages. -
Page 20: Installation Instructions
Repeat the above bake test or burner ignition test. If the appliance still does not work, contact Dacor Distinctive Service at (877) 337-3226. Do not attempt to repair the appliance yourself. Be sure to have the model and serial numbers available when you call. - Page 21 Notes...
- Page 22 Notes...
- Page 24 Dacor ● 1440 Bridge Gate Drive, Diamond Bar, CA 91765 ● Tel: (800) 793-0093 ● FAX: (626) 403-3130 ● www.Dacor.com...
Need help?
Do you have a question about the Epicure ER36DSCH and is the answer not in the manual?
Questions and answers