Table of Contents
Advertisement
Quick Links
Advertisement
Table of Contents

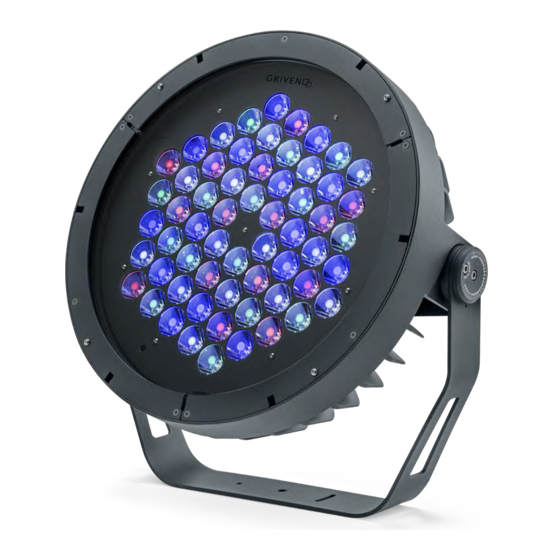
Summary of Contents for Griven Jasper AL4360
- Page 1 Jasper AL4360 Manuale di istruzioni Instructions manual...
-
Page 2: Table Of Contents
INDEX 1.0 Introduction ..........................16 1.1 Safety information...............................16 1.1.1 Protecting against electric shock ..........................16 1.1.2 Installation ................................16 1.1.3 Protection against burns and fire ...........................16 1.1.4 Weather protection..............................16 1.2 Compliance ................................16 2.0 Size ...............................17 3.0 Packaging and transport ......................17 3.1 Packaging ...................................17 3.2 Transport ..................................17 4.0 Installation ...........................18 4.1 Fixing ....................................18... -
Page 3: Introduction
1.0 Introduction 1.1 Safety information Warning! This unit is suitable for professional use only, not for domestic use. 1.1.1 Protecting against electric shock • Disconnect the unit from mains supply before servicing it or performing any other action. • Always ground/earth the unit electrically. •... -
Page 4: Size
• Griven S.r.l. will accept claims for broken or missing goods only within seven days of receipt of the goods. • Returns of equipment will not be accepted without prior authorization granted by Griven S.r.l. and if not duly ac- companied by relevant shipping documents. -
Page 5: Installation
4.0 Installation 4.1 Fixing The unit can be used both rested on floor and fixed onto a structure. The unit can operate in any position. Use the holes Ø10.5 (3/8”) or Ø6.5 (1/4”) in the bracket to fix the unit. 4.2 Adjusting light beam direction 1. -
Page 6: Connection To Mains Power
4.3 Connection to mains power The unit can operate with voltage from 100 to 277Vac and with frequency of 50 and 60Hz. Warning! • Before connecting the unit, verify that power supplies features are compatible with the unit features. • The unit must never be installed if not grounded electrically. •... -
Page 7: Use Of The Unit
5.0 Use of the unit 5.1 Setting operating mode By using the infrared remote control AL1321 it is possible to select one of the following operating mode. • using DMX512 signal control mode Each fixture is controlled from DMX512 signal control. •... -
Page 8: Dmx Functions Rgbw
DMX MODE CHANNELS USED (RGBW) CHANNELS USED (Dynamic white) 5.5 DMX functions RGBW 5.5.1 DMX functions with DMX MODE = 4 channels Channel Function Value Description 0-255 Proportional control 0-100% of the Red color Green 0-255 Proportional control 0-100% of the Green color Blue 0-255 Proportional control 0-100% of the Blue color... -
Page 9: Dmx Functions Dynamic White
5.6 DMX functions Dynamic white Warning! In absence of DMX signal the led will remain ON. 5.6.1 DMX functions with DMX MODE = 2 channels Channel Function Value Description Warm white 100% - Cold white 0% 4-122 Warm white 100% - Cold white from 0% to 100% Dynamic 123-132 Warm white 100% - Cold white 100%... -
Page 10: Master-Slave And Automatic Function (Rgbw E Dw)
6.0 Master-Slave and Automatic function (RGBW and DW) Jasper can operate without DMX signal (in AUTOMATIC mode) and can be set so that a single MASTER unit will command a series of SLAVE units. This function is particularly useful when more units are desired to execute the same programme in synchrony. -
Page 11: Slave Configuration Rgbw
6.2 SLAVE configuration RGBW To set up the unit as SLAVE set the 5 channels DMX mode with address 001. 6.3 SLAVE configuration Dynamic white To set up the unit as SLAVE set the 3 channels DMX mode with address 001. 7.0 Fixed colours mode In the FIXED COLOURS mode, it is possible to manually turn on the LEDs, without the use of a DMX. -
Page 12: Slave Configuration Rgbw
This command is used to identify the projector you want to get access to (the identification happens by swit- ching on at full intensity all the LEDs). • Manufacturer The name of the manufacturer (Griven) is displayed. • Model description The projector model is displayed. -
Page 13: Maintenance
Replace damaged protection shields. 12.0 Spare parts All components of the unit are available as spare parts at Griven dealers. Exploded views, wiring diagrams, electronic layouts and advertising brochures are available on request. To make the job of assistance centres easier, specify serial number and model of the unit which spare parts are requested for. -
Page 14: Disposal
14.0 Disposal The European Directive 2002/96/EC on Waste Electrical and Electronic Equipment (WEEE), requires that old lighting fixtures must not be disposed of the normal unsorted municipal waste stream. Old appliances must be collected separately in order to optimise the recovery and recycling of the materials they contain and reduce the impact on human health and the environment. - Page 15 Via Bulgaria, 16 - 46042 CASTEL GOFFREDO (MN) - Italy Telefono 0376/779483 - Fax 0376/779682 - 0376/779552 http://www.griven.com/ e-mail griven@griven.com http://www.griven.it/ e-mail griven@griven.it User’s manual rel. 1.00...


Need help?
Do you have a question about the Jasper AL4360 and is the answer not in the manual?
Questions and answers