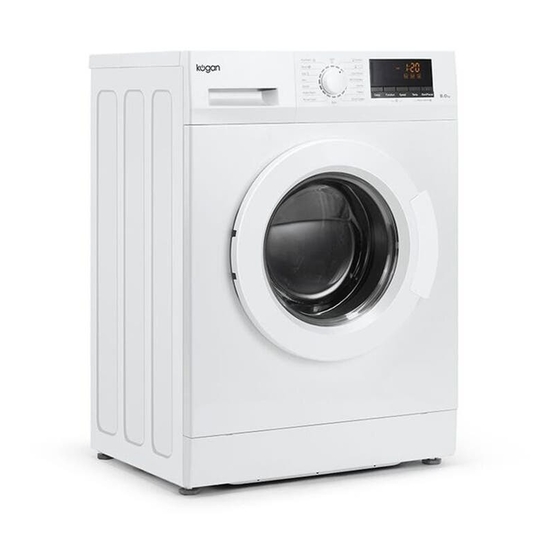
Kogan 7 Series User Manual

Kogan 7 Series User Manual

8kg front load washing machine
Hide thumbs Also See for 7 Series:

Advertisement

8KG FRONT LOAD
WASHING MACHINE
(SERIES 7)
KAGFLWASH8D

Advertisement

Table of Contents
loading

Summary of Contents for Kogan 7 Series

  • Page 1 8KG FRONT LOAD WASHING MACHINE (SERIES 7) KAGFLWASH8D...
  • Page 3: Safety And Warnings

    Otherwise, an electric shock may occur. • Damaged or loose wires or plugs should not be used, turn off the power, cease use immediately, and contact Kogan.com support. • Do not damage the power cable. Do not damage, alter, forcibly bend, pull, twist, or mishandle the cable.
  • Page 4 Please unplug the unit during long periods of inactivity, such as going on holidays. • Contact Kogan.com if the machine requires maintenance or repairs. • If the power cord or supply cord is damaged, the manufacturer or its service agent or similarly qualified person must replace it in order to avoid a hazard.
  • Page 5 COMPONENTS 8kg Front load washing machine (x1) Inlet hose (x1) “U”-piece (x1) Transit bolt caps (x4) User guide (x1)
  • Page 6 OVERVIEW Knob Top cover Drawer (for detergent of fabric softener) Control panel Case body Door glass Door Door seal Drain hose Lower cover Adjustable feet Drain pump filter Note: Unscrew the drain pump filter to let water run out when the machine is not used for a long time.
  • Page 7: Getting Started

    GETTING STARTED Removing packaging • Remove all packaging (including the foam base) or vibration and noise may occur during use. • Dispose all of the wrapping material safely and keep it out of reach from children. Danger of suffocation! • It is normal for water drops appear on the packaging and the door glass.
  • Page 8: Installation Position

    Installation position • A concrete floor is the most suitable installation surface for a washing machine, being far less prone to vibration during the spin cycle than wooden floorboards or a carpeted surface. • The machine must be level and securely positioned. The distance between the machine and wall must be more than 10cm.
  • Page 9 Level adjustment The machine must stand perfectly level on all four feet to ensure safe and proper operation. Incorrect installation may increase electricity and water consumption and may cause the machine to move while in use. To ensure the unit is level: •...
  • Page 10: Installation

    INSTALLATION Drain hose connection 1. Direct into a sink • If the outlet spigot has not been used before, remove any block/plug that may be in place. • Push the drain hose onto the spigot and secure with a clip if required, ensure a loop is formed in the drain hose to prevent waste from the sink entering the washing machine.
  • Page 11 Water inlet connection Connect the inlet hose supplied to the machine to a tap with a 3/4” thread. Do not use any hoses previously used with another washing machine. Installation should comply with local water authority and building regulations' requirements. When there is an inlet valve at the back of the machine, it must be connected to a cold water supply.
  • Page 12: Operation

    OPERATION Control Panel Press this button to start or pause a wash cycle. The door cannot be open once the machine has started. When the washing cycle is finished, the door can be unlocked and released two minutes after being powered off'. Start/Pause ( Time will not be recalculated for restarting.
  • Page 13 Functions: Increase the time of soaking clothes. Soak Add an extra rinse on the selected program. Rinse+ Reduce the wrinkle of clothes during a washing cycle. Once this function is selected, the machine will not execute the last drain unless the “Start/Pause” button is pressed. Anti-Ironing Note: The max running time of this function is 12 hours.
  • Page 14 Mute (“Temp.”) • The function of “Mute” is to disabled all prompt tone and alert sounds. • To enable mute, press and hold the “Temp.” button for 3 seconds. • To cancel when enabled, press and hold the “Temp.” button for 3 seconds again. Program guide Temp Spin Speed(rpm)
  • Page 15 Notes: ‘ ’ is for Standard Cotton program. Standard Cotton at 60°C and 40°C are suitable to clean normally soiled cotton laundry and they are the most efficient programs in terms of combined energy and water consumption for washing that type of cotton laundry; in addition, the actual water temperature may differ from the declared cycle temperature.
  • Page 16 Using the detergent drawer Open the drawer and add adequate detergent into main wash compartment marked “ ” or "II". Add the fabric softener into compartment marked “ ” or “ ”. Do not exceed the maximum level mark (“MAX”). Add the detergent into the pre-wash compartment marked “...
  • Page 17: Rinse+Spin

    Washing Steps Turn on the water tap and connect the power. Open the door and put the cloth into the drum one by one. Close the door and put suitable amount of detergent and fabric softener into the dispenser, then close the drawer. Choose a program you need by turning the knob.
  • Page 18 Note: The machine is fitted with a balance control device, which ensures the machine is stable during the spin. To protect the machine, it will cut in if the laundry is not evenly distributed in the drum. The laundry is redistributed by reverse rotation of the drum. This may happen several times before the unbalance disappears and normal spinning can resume.
  • Page 19: Cleaning And Care

    CLEANING & CARE Cleaning the Exterior • Clean the exterior with a mild non-abrasive cleaning agent or soap and water using a well wrung-out cloth. • Wipe dry with a soft cloth. • Do not use solvents, abrasive cleaners, glass cleaners or all-purpose cleaning agents.
  • Page 20 Cleaning the Drawer Housing Use a bottle brush to remove detergent residues inside the drawer housing. Cleaning the water inlet filter Use pointed nose pliers to withdraw the plastic filter. After cleaning, put back and secure. These filters should be checked every 6 months, or more often if there are frequent interruptions to the water supply.
  • Page 21: Specifications

    SPECIFICATIONS Power 220V-240V~50,Hz Washing / spin capacity 8.0kg Rated power 2100W Water pressure 0.02-0.8MPa Net weight / gross weight 62.70kg/66.17kg Outer dimension (W x H x D) 595 x 845 x 545mm Energy-Efficient Test Program Entrance Guide: Choose the program “ ”, set the washing temperature to “60°C”...
  • Page 22: Troubleshooting

    TROUBLESHOOTING Error Problem Possible Cause Solutions Code 1. The water tap is not open. 1. Open the water tap. The machine 2. The drain hose is put down. 2. Hook up the hose. “E01” fills overtime. 3. The water inlet valve is 3.
  • Page 23 Important: If the machine is exposed to temperatures below 0°C, certain precautions should be taken. Turn off the water tap. Unscrew the inlet hose. Unhook the drain hose from the rear support and position the end of this hose and that of the inlet hose in a bowl.
  • Page 24 Need more information? We hope that this user guide has given you the assistance needed for a simple set-up. For the most up-to-date guide for your product, as well as any additional assistance you may require, head online to help.kogan.com...

This manual is also suitable for:

Kagflwash8d

Table of Contents