Table of Contents
Advertisement
Available languages
Available languages
Quick Links
Advertisement
Chapters
Table of Contents

Related Manuals for JUNO JGIN605F1


Summary of Contents for JUNO JGIN605F1
- Page 1 Gebruik‐ User Manual saanwijzing Afwasauto‐ Dishwasher maat JGIN605F1...
-
Page 2: Table Of Contents
Wijzigingen voorbehouden. GA NAAR ONZE WEBSITE VOOR: Advies over gebruik, brochures, het oplossen van problemen, onderhouds- en reparatie-informatie: www.juno.de/support VEILIGHEIDSINFORMATIE Lees zorgvuldig de meegeleverde instructies voor installatie en gebruik van het apparaat. De fabrikant is niet verantwoordelijk voor verwondingen of schade die voortvloeit uit de onjuiste installatie of het onjuiste gebruik. - Page 3 Houd kinderen en huisdieren uit de buurt van het apparaat • als de deur open is. Kinderen mogen zonder toezicht geen reinigings- en • onderhoudswerkzaamheden aan het apparaat uitvoeren. Algemene veiligheid Dit apparaat is bedoeld voor gebruik in huishoudelijke en •...
-
Page 4: Veiligheidsvoorschriften
VEILIGHEIDSVOORSCHRIFTEN Installatie • Trek niet aan het netsnoer om het apparaat los te koppelen. Trek altijd WAARSCHUWING! Alleen een aan de stekker. erkende installatietechnicus • Dit apparaat is voorzien van een 13 A mag het apparaat installeren. stekker. Als de zekering van de stekker vervangen moet worden, moet een •... - Page 5 Gebruik apparaat. Gebruik uitsluitend originele reserveonderdelen. • Plaats geen ontvlambare producten of • Houd er rekening mee dat zelfreparatie items die vochtig zijn door ontvlambare of niet-professionele reparatie gevolgen producten in, bij of op het apparaat. kan hebben voor de veiligheid en de •...
-
Page 6: Productbeschrijving
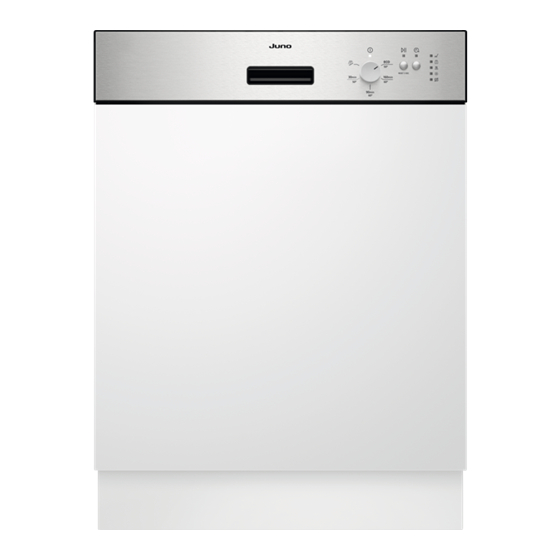
PRODUCTBESCHRIJVING De afbeeldingen hieronder geven alleen een algemeen productoverzicht. Raadpleeg voor meer gedetailleerde informatie andere hoofdstukken en/of documenten die bij het apparaat zijn meegeleverd. Bovenste sproeiarm Glansmiddeldoseerbakje Onderste sproeiarm Vaatwasmiddeldoseerbakje Filters Bestekkorf Typeplaatje Onderste korf Zoutreservoir Bovenste korf Ventilatie... -
Page 7: Bedieningspaneel
BEDIENINGSPANEEL Controlelampje Aan/uit Starttoets Programmawijzer Programmaknop Indicatielampjes Toets startuitstel Indicatielampjes Indicatie‐ Beschrijving lampje Indicatielampje droogfase. Het is ingeschakeld wanneer u een programma selecteert met de droogfase. Het gaat knipperen wanneer de droogfase loopt. Zoutindicatielampje. Dit is aan als het zoutreservoir bijgevuld dient te worden. Dit indicatielampje is altijd uit als het programma in werking is. - Page 8 Programma Type lading Mate van vervui‐ Programmafasen ling • Vaatwerk • Normaal • Voorspoelen • Bestek • Licht aange‐ • Wassen 50 °C • Potten koekt • Tussentijdse spoeling • Pannen • Laatste spoeling 60 °C • Drogen • AirDry •...
-
Page 9: Instellingen
Water Energie Duur Programma (kWh) (min.) 3.4 - 4.2 0.012 - 0.015 1) De druk en temperatuur van het water, de variaties in stroomtoevoer, de opties en de hoeveelheid vaat kan de verbruikswaarden veranderen. 2) Conform verordening 1016/2010 3) Conform verordening 2019/2022 Aanwijzingen voor testinstituten Raadpleeg voor andere vragen betreffende uw vaatwasmachine het... - Page 10 correcte niveau voor de waterontharder in te stellen voor goede wasresultaten. Waterhardheid Duitse hard‐ Franse hard‐ mmol/l Clarke- Wateronthard‐ heid (°dH) heid (°fH) hardheid ingsniveau 47 - 50 84 - 90 8,4 - 9,0 58 - 63 43 - 46 76 - 83 7,6 - 8,3 53 - 57...
- Page 11 heeft geen invloed op de cyclusduur, eerste programma aanduidt. Laat tenzij deze plaatsvindt in het midden van los als de indicatielampjes een programma of aan het einde van een aan/uit gaan knipperen. programma met een korte droogfase. In Het met tussenpozen knipperen van dat geval verlengt de regeneratie de totale duidt op de huidige instelling, bijv.
- Page 12 de programmaschakelaar linksom, LET OP! Probeer de deur van totdat de programma-aanwijzer het het apparaat niet binnen 2 eerste programma aanduidt. Laat minuten na automatisch openen te sluiten. Dit kan het los als de indicatielampjes apparaat beschadigen. aan/uit gaan knipperen. 2.
-
Page 13: Voor Het Eerste Gebruik
VOOR HET EERSTE GEBRUIK 1. Controleer of het ingestelde stand 4. Schud de trechter voorzichtig bij het van de waterontharder juist is voor handvat om de laatste korrels erin te de waterhardheid in uw omgeving. krijgen. Indien niet, stel dan de stand van de 5. -
Page 14: Dagelijks Gebruik
3. Verwijder gemorst glansmiddel met U kunt het schuifje voor de vrij een absorberend doekje om te te geven hoeveelheid (B) voorkomen dat er te veel schuim instellen tussen stand 1 ontstaat. (laagste hoeveelheid) en stand 4. Sluit het deksel. Zorg ervoor dat het 4 of 6 (hoogste hoeveelheid). - Page 15 Het programma annuleren De Auto Off-functie Deze functie verlaagt het energieverbruik Houd ingedrukt totdat het lampje dat bij door het apparaat automatisch uit te de knop hoort, begint te knipperen. schakelen als het niet werkt. Controleer of er vaatwasmiddel in het vaatwasmiddelbakje aanwezig is voordat De functie gaat werken: u een nieuw programma start.
-
Page 16: Aanwijzingen En Tips
AANWIJZINGEN EN TIPS Algemeen – Controleer of het ingestelde stand van de waterontharder juist is voor Volg de onderstaande tips om te zorgen de waterhardheid in uw omgeving. voor optimale schoonmaak- en – Volg de instructies in het hoofdstuk droogresultaten en ook het milieu te "Onderhoud en reiniging". -
Page 17: Onderhoud En Reiniging
Wat moet u doen als u wilt • Doe bestek en kleine items in het stoppen met het gebruik van bestekmand. • Zorg er voor dat de sproeiarmen vrij multitabletten kunnen ronddraaien voordat u een Doe het volgende voordat u begint met programma start. - Page 18 De filters reinigen Het filtersystem bestaat uit 3 delen. 5. Zorg ervoor dat er geen etensresten of vuil in of rond de rand van de opvangbak zitten. 6. Plaats de platte filter terug (A). Zorg ervoor dat het goed onder de 2 1.
- Page 19 LET OP! Een onjuiste plaatsing van de filters kan leiden tot slechte wasresultaten en het apparaat beschadigen. De onderste sproeiarm schoonmaken We raden u aan om de onderste sproeiarm regelmatig schoon te maken om te voorkomen dat vuil de gaten verstopt.
-
Page 20: Probleemoplossing
1. Demonteer het filtersysteem volgens 3. Monteer de filters opnieuw volgens de de instructies in dit hoofdstuk. instructies in dit hoofdstuk. 2. Verwijder alle vreemde voorwerpen met de hand. LET OP! Als u de voorwerpen niet kunt verwijderen, neem dan contact op met een erkend servicecentrum. - Page 21 Probleem en alarmcode Mogelijke oorzaak en oplossing Het apparaat pompt geen water weg. • Verzeker u ervan dat de gootsteenafvoer niet verstopt is. • Het indicatielampje knippert 2 • Controleer of het binnenfiltersysteem niet ver‐ keer met tussenpozen. stopt is. •...
- Page 22 Probleem en alarmcode Mogelijke oorzaak en oplossing Het apparaat stopt en start meerdere • Dat is normaal. Het voorziet in optimale reini‐ keren tijdens de werking. gingsresultaten en energiebesparing. Het programma duurt te lang. • Als de optie uitgestelde start is ingesteld, annu‐ leert u deze functie of wacht u tot het aftellen is voltooid.
- Page 23 De was- en droogresultaten zijn niet naar tevredenheid Probleem Mogelijke oorzaak en oplossing Slechte wasresultaten. • Raadpleeg "Dagelijks gebruik", "Aanwijzingen en tips" en de folder voor het laden van de korf. • Gebruik intensievere wasprogramma´s. • Maak de inspuiters van de sproeiarm en het filter schoon.
-
Page 24: Technische Informatie
Probleem Mogelijke oorzaak en oplossing Er bevinden zich aan het ein‐ • De vaatwastablet raakte klem in het vaatwasmiddeldo‐ de van het programma resten seerbakje en is daardoor niet volledig weggespoeld door van vaatwasmiddel in het het water. vaatwasmiddeldoseerbakje. • Het water kan het vaatwasmiddel niet uit het vaatwas‐... - Page 25 Inhoud Couverts Stroomverbruik Modus aan laten (W) Uit-modus (W) 0.50 1) Zie het typeplaatje voor andere waarden. 2) Als het hete water door een alternatieve, milieuvriendelijkere energiebron geproduceerd wordt (bijv. zonnepa‐ nelen), gebruik dan een heetwatervoorziening om het energieverbruik te verminderen. Link naar de EU-EPREL- product in de EU-EPREL-databank te databank...
-
Page 26: Safety Information
Subject to change without notice. VISIT OUR WEBSITE TO: Get usage advice, brochures, trouble shooter, service and repair information: www.juno.de/support SAFETY INFORMATION Before the installation and use of the appliance, carefully read the supplied instructions. The manufacturer is not responsible for any injuries or damage that are the result of incorrect installation or usage. -
Page 27: Safety Instructions
Children shall not carry out cleaning and user maintenance • of the appliance without supervision. General Safety This appliance is intended to be used in household and • similar applications such as: farm houses; staff kitchen areas in shops, offices and –... - Page 28 • Do not use the appliance before • Before connection to new pipes, pipes installing it in the built-in structure due not used for a long time, where repair to safety manner. work has been carried out or new • Follow the installation instructions devices fitted (water meters, etc.), let supplied with the appliance.
-
Page 29: Product Description
Internal lighting heating elements, including heat pumps, piping and related equipment WARNING! Risk of injury. including hoses, valves, filters and aquastops, structural and interior parts related to door assemblies, printed • Concerning the lamp(s) inside this circuit boards, electronic displays, product and spare part lamps sold pressure switches, thermostats and separately: These lamps are intended... -
Page 30: Control Panel
Upper spray arm Rinse aid dispenser Lower spray arm Detergent dispenser Filters Cutlery basket Rating plate Lower basket Salt container Upper basket Air vent CONTROL PANEL... -
Page 31: Programmes
On/off indicator Start button Programme marker Programme knob Indicators Delay button Indicators Indicator Description Drying phase indicator. It is on when you select a programme with the drying phase. It flashes when the drying phase operates. Salt indicator. It is on when the salt container needs refilling. It is always off while the programme operates. - Page 32 Programme Type of load Degree of soil Programme phases • Crockery • Fresh • Wash 50 °C • Cutlery • Intermediate rinse • Final rinse 50 °C • AirDry • All types of • All degrees of • Prewash loads soil 1) This is the longest programme offering the most efficient use of energy and water consumption for crockery and cutlery with normal soil.
-
Page 33: Settings
SETTINGS Programme selection mode and not, set the programme selection mode user mode the following way: When the appliance is in programme Press and hold until the appliance is in selection mode it is possible to set a programme selection mode. programme and to enter user mode. - Page 34 Regardless of the type of detergent Subsequently, the rinsing of the water used, set the proper water hardness softener that lasts 5 minutes may begin in level to keep the salt refill indicator the same cycle or at the beginning of the active.
- Page 35 the level number. After reaching level 4. To confirm the setting, keep turning 10, the count starts again from level 1. the programme knob until the 3. To confirm the setting, turn the programme marker is back in the programme knob until the programme on/off position.
-
Page 36: Before First Use
2. Turn the knob counterclockwise until 3. Press to change the setting. the programme marker indicates the 4. To confirm the setting, keep turning third programme. the programme knob until the The indicator shows the current programme marker is back in the setting: on/off position. -
Page 37: Daily Use
How to fill the rinse aid 1. Press the release button (D) to open dispenser the lid (C). 2. Fill the dispenser (A) until the rinse aid reaches the marking ''MAX''. 3. Remove the spilled rinse aid with an absorbent cloth to prevent excessive foam formation. -
Page 38: Hints And Tips
• The programme starts. door, the appliance continues from the • The indicator of the washing phase point of interruption. is on. If the door is opened for more • The on/off indicator and start than 30 seconds during the indicator are on. - Page 39 • Load the dishwasher to its full capacity tablets containing no additional to save water and energy. For best agents), rinse aid and salt separately cleaning results, arrange items in the for optimal cleaning and drying results. baskets as instructed in the user •...
-
Page 40: Care And Cleaning
• Use the appliance to wash dishwasher- • The filters are clean and correctly safe items only. installed. • Do not wash in the appliance items • The cap of the salt container is tight. made of wood, horn, aluminium, pewter •... - Page 41 7. Reassemble the filters (B) and (C). 8. Put back the filter (B) in the flat filter (A). Turn it clockwise until it locks. 2. Remove the filter (C) out of filter (B). 3. Remove the flat filter (A). 4. Wash the filters. CAUTION! An incorrect position of the filters can cause bad washing results and...
- Page 42 • Only use neutral detergents. • Do not use abrasive products, abrasive cleaning pads or solvents. Internal cleaning • Carefully clean the appliance, including the rubber gasket of the door, with a soft damp cloth. • If you regularly use short duration programmes, these can leave deposits of grease and limescale inside the 2.
-
Page 43: Troubleshooting
TROUBLESHOOTING to contact an Authorised Service WARNING! Improper repair of Centre. the appliance may pose a Refer to the below table for information on danger to the safety of the possible problems. user. Any repairs must be performed by qualified With some problems, the dedicated personnel. - Page 44 Problem and alarm code Possible cause and solution Malfunction of the water level detection • Make sure that the filters are clean. sensor. • Switch the appliance off and on. • The indicator flashes 4 times in‐ termittently. • The light related to the start button flashes continuously.
- Page 45 Problem and alarm code Possible cause and solution The appliance door is difficult to close. • The appliance is not levelled. Loosen or tighten the adjustable feet (if applicable). • Parts of the tableware are protruding from the baskets. Rattling/knocking sounds from inside •...
- Page 46 Problem Possible cause and solution There are whitish streaks or • The release quantity of rinse aid is too much. Adjust the bluish layers on glasses and rinse aid level to a lower level. dishes. • The quantity of detergent is too much. There are stains and dry water •...
-
Page 47: Technical Information
Problem Possible cause and solution Dull, discoloured or chipped • Make sure that only dishwasher-safe items are washed tableware. in the appliance. • Load and unload the basket carefully. Refer to basket loading leaflet. • Place delicate items in the upper basket. Refer to "Before first use", "Daily use"... - Page 48 156945150-A-222020...
Need help?
Do you have a question about the JGIN605F1 and is the answer not in the manual?
Questions and answers