
Related Manuals for eta Mole E3


Summary of Contents for eta Mole E3
- Page 1 2020-03-18 0000000444 V.002 X.35.11, X.45.0 939070-001 Pellet conveyor Mole E3 Operating Instructions...
- Page 2 ETA Heiztechnik Gewerbepark 1 A-4716 Hofkirchen an der Trattnach Tel: +43 (0) 7734 / 22 88 -0 Fax: +43 (0) 7734 / 22 88 -22 info@eta.co.at www.eta.co.at...
-
Page 3: Table Of Contents
Contents General ................4 Preface. -
Page 4: General
On non-compliance with this safety instruction, there is Copyright a risk of major physical injury. All contents of this document are property of ETA Heiztechnik GmbH and are protected by copyright. Operation only by trained personnel Any reproduction, transfer to third parties or use for other purposes is prohibited without written permission The product may be operated by trained adults only. -
Page 5: Warranty, Guarantee And Liability
General Warranty, guarantee and liability Keep children away from the pellet store Seal the components. The sealant to use is Children must be kept away from the pellet store. It is listed in the respective step. a good idea to lock the door to the pellet store. The door handle on the inside of the pellet store must not Use adhesive to affix the seals, for example. - Page 6 Repair of defects For repairs of defects carried out by the customer or by a third party, ETA shall only bear the costs or remain obligated by warranty if this work was approved in writing in advance by the customer service of ETA Heiztechnik GmbH.
-
Page 7: Description
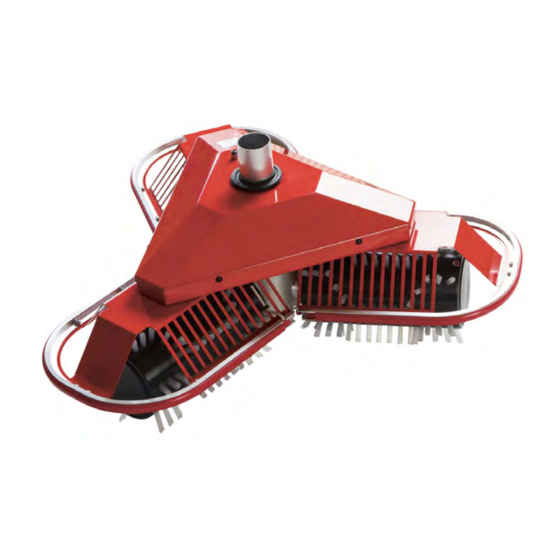
Description Technical data Description Technical data Technical data Mole Weight 14 kg Voltage 24 V DC Current draw 2.5 A Output 60 W (max) Dimensions (W x D x H) 725 x 660 x 340 mm Pellet hose DN 50 Feed rate 9 - 12 kg/min Electrical connection (made via... -
Page 8: Functional Description
The spring balancers guide the suction hose for the mole in the pellet store. For smooth and trouble-free operation, a few points must be noted when positioning them. See the planning notes in chapter 3 "Information for planning". www.eta.co.at... - Page 9 Description Functional description The following graphic shows the clearance/gaps for fastening the spring balancers using cable ties. Fig. 2-2: Clearance/gaps for fastening the spring balancers...
- Page 10 F, G, H: spring balancers for the flexible guidance of the pellet hose (H = first spring balancer, G = second spring balancer, F = third spring balancer) IPM: impact protection mat SS: pellet suction nozzle for the return air during filling FN: pellet filler neck for filling the storeroom www.eta.co.at...
-
Page 11: Information For Planning
50 cm from the ceiling. Therefore, the For special variations of the storeroom, it is best to filling position should be in the vicinity of the filling consult with ETA. pipes, because the material cone is lower there •... -
Page 12: Installation
Fig. 4-1: Wall mount Instead of individual holes, you can also have an opening of about 220 x 80 mm. Fig. 4-3: Mounting the wall bracket Attach the hose clamp for the pellet hose to the wall bracket. Fig. 4-4: Hose clamp www.eta.co.at... - Page 13 Installation Thread the lifting module into the rail. Mounting the spring pulls and lifting module Mark all attachment points for the spring pulls on the ceiling in the pellet store. Mount the eyebolts in the ceiling and hook in the spring pulls. Fig.
- Page 14 Fastening the spring pulls to the pellet hose Attach the cable reel from the lifting module with the Attach the spring pulls to the pellet hose with the hose clamp to the suction tube. detachable cable ties (only hand-tight). Fig. 4-11: Fitting the cable reel www.eta.co.at...
- Page 15 Installation When assembling, pay attention to the sequence of hose is too long in this position, it must be shortened. the spring pulls, which can be seen in their plan. The This is because a pellet hose that is too long can cause distances for the cable ties are shown in diagram Fig.
- Page 16 Thread the return air hose through the cover until the hose protrudes about 100 mm from the wall bracket. Also mark the return air hose for clear association. Fig. 4-16: Securing the pellet suction hose Fig. 4-18: Back air hose www.eta.co.at...
- Page 17 Installation Feed both pellet hoses to the boiler and attach to the For the power supply of the junction box, a 230 V outlet connections with hose clamps. Remove the earthing in the immediate vicinity is required. The connection wires from both pellet hoses and connect to the earth cable is included in delivery.
- Page 18 Apply fire protection acrylate to the cover plate so it completely seals with the wall. Fig. 4-24: Sealing the cover plate Fix the cover plate to the wall with suitable screws. Fig. 4-25: Mount the cover plate www.eta.co.at...
- Page 19 Installation...
-
Page 20: Electrical Connections
There are live parts on the circuit boards. If touched, they can cause injury and property damage. Before beginning any work, isolate the system completely from all power sources, ensure that it cannot be switched back on, and verify that it is safely isolated from supply. www.eta.co.at... - Page 21 Electrical connections Connecting the cables to the connection box Connect the electrical cables to the terminals in the junction box. The allocation is shown in the following diagram. The "white" core from the electric wire to the mole is not used. Insulate this core to prevent a short circuit. Fig.
-
Page 22: Configuration
This function block has already been installed at the factory and configured as pellet conveyor Feed rate [Standard screw]. For the mole E3, the setting [Mole Conv. cycle time E3] must be selected. The following values must be set for these parameters. -
Page 23: Commissioning
Commissioning Commissioning Perform a function test on the lifting module Checking the preload of the spring pulls Check the function of the lifting module in the pellet In the filling position of the mole (i.e., if it hangs from store. To do this, set the switch on the connection box the ceiling), the empty pellet hose must be held by the to the "0"... - Page 24 2 hours of operation the mole absorbs only the pellets in a range of about 1 m² and thereby creates a depression. The surrounding pellets can slip into this depression and thus reduce the cones of material that have formed during the filling of the store. www.eta.co.at...
-
Page 25: Etatouch Controller
ETAtouch controller [Pellet store] function block ETAtouch controller [Pellet store] function block Pellet store overview screen Operating condition and information. A description of the operating conditions can be found in the integrated Help menu by pressing the button. Current pellet stock. This is calculated by the control system and can therefore differ by +/- 15% from the actual pellet supply... -
Page 26: Cleaning And Maintenance
In the filling position (mole on the ceiling), the spring pulls must hold the pellet hose to the ceiling and must not sag. If the pellet hoses sag, the preload must be increased. For more information see chapter "Commissioning". www.eta.co.at... -
Page 27: Troubleshooting
Troubleshooting 10 Troubleshooting Cause of error and error correction Fault Cause Solution The residual voltage from the boiler An additional relay or consumer must ab- The mole moves without a re- (relay or triac) does not separate sorb the residual voltage the boiler emits at quest from the boiler properly the output. - Page 28 If the error occurs again, the lifting module LED in the connection box must be replaced. flashes in a cycle 3x The mole is buried Free the mole from the spill. Restart the lift module with a power interruption of at least 5 seconds. www.eta.co.at...
-
Page 29: Information About Pellet Hoses
Information about pellet hoses 11 Information about pellet hoses Suitable pellet hose DN50 pellet hoses with copper litz wire (for earthing) are required for the suction and return air. Fig. 11-3: Avoid twisting pellet hoses Minimum bending radius: 250 mm The minimum bending radius for pellet hoses is 250 mm. - Page 30 (for example a room in-between) to the boiler room, fire-resistant collars must be fitted over both pellet hoses. In wall ducts, a fire protection sleeve must be mounted on each side, with ceiling ducts only positioned on the ceiling side. Fig. 11-5: Fire-resistant collar www.eta.co.at...
-
Page 31: Dismantling, Disposal
Dismantling, disposal 12 Dismantling, disposal Dismantling Dismantling takes place in reverse order to the instal- lation. Clean the components and properly dismantle them in accordance with the local regulations for workplace safety and environmental protection. Disposal Disposal including all components must be done in an environmentally friendly manner according to waste disposal laws. - Page 32 DOWNLOAD www.eta.co.at...
Need help?
Do you have a question about the Mole E3 and is the answer not in the manual?
Questions and answers