Table of Contents
Advertisement
Quick Links
Advertisement
Table of Contents

Subscribe to Our Youtube Channel
Related Manuals for Barco WePresent WiPG-1000


Summary of Contents for Barco WePresent WiPG-1000
- Page 1 WiPG-1000 User Guide R5906158/03 31/01/2018...
- Page 2 Barco NV Beneluxpark 21, 8500 Kortrijk, Belgium Phone: +32 56.23.32.11 Fax: +32 56.26.22.62 Support: www.barco.com/en/support Visit us at the web: www.barco.com Registered address: Barco NV President Kennedypark 35, 8500 Kortrijk, Belgium Phone: +32 56.23.32.11 Fax: +32 56.26.22.62 Support: www.barco.com/en/support Visit us at the web: www.barco.com...
- Page 3 The period of guarantee begins on the date of transfer of risks, in the case of special systems and software on the date of commissioning, at latest 30 days after the transfer of risks. In the event of justified notice of complaint, Barco can repair the fault or provide a replacement at its own discretion within an appropriate period.
-
Page 5: Table Of Contents
Wall-Mounting the WiPG-1000 ..................... . 41 R5906158 WEPRESENT WIPG-1000 31/01/2018... - Page 6 Table of contents R5906158 WEPRESENT WIPG-1000 31/01/2018...
-
Page 7: Overview
The wePresent WiPG-1000 is a professional wireless presentation gateway. With the revolutionary “interactive” and “wireless” fea- tures, the wePresent WiPG-1000 enables users to deliver presentations wirelessly from a PC, Mac, iPad, iPhone, or any Android device to a projector. It also allows users to use a tablet or smartphone to control the projecting PC/Mac, and to view the presenting... -
Page 8: Usb Token Contents
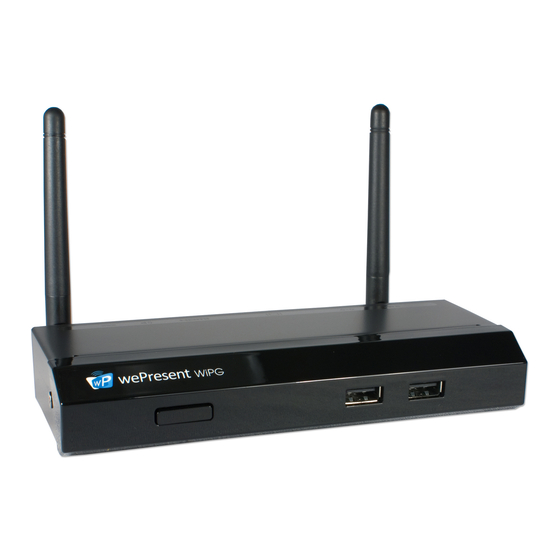
2 USB ports for USB mouse/keyboard/thumb drive Table 1-1 Front Panel Description Rear Panel Image 1-2 Rear Panel Number Item Description USB Port (Rear) USB port for USB mouse/keyboard/thumb drive/IWB device (HID type) Ethernet Port 10/100/1000M RJ-45 port R5906158 WEPRESENT WIPG-1000 31/01/2018... -
Page 9: What You (Might) Need
Ethernet cable (Required if you want to disable the WiFi of the WiPG-1000) • Windows or Mac computer • Apple iPhone, iPad, or iPod touch • Android phone or tablet • Speaker • USB mouse/keyboard • USB HID IWB device R5906158 WEPRESENT WIPG-1000 31/01/2018... - Page 10 1. Overview R5906158 WEPRESENT WIPG-1000 31/01/2018...
-
Page 11: Hardware Installation
3. If WiFi is disabled on the WiPG-1000, the device must be connected to an existing IT network through an Ethernet cable. 4. Connect the speaker to the WiPG-1000 audio jack for audio output. (A speaker is required for audio output when using VGA.) R5906158 WEPRESENT WIPG-1000 31/01/2018... - Page 12 2. Hardware Installation 5. Connect the USB mouse/keyboard/IWB device to the WiPG-1000 front/rear USB port for the OSD (on-screen display) control or remote control. R5906158 WEPRESENT WIPG-1000 31/01/2018...
-
Page 13: Standby Screen Of The Projector/Display
WiFi security information; you can also make a Plug & Show USB token. Image 3-2 Advanced Information The screen saver mode is activated if no sender device is connected. The system returns to the standby status immediately when any sender device is connected. R5906158 WEPRESENT WIPG-1000 31/01/2018... - Page 14 3. Standby Screen of the Projector/Display R5906158 WEPRESENT WIPG-1000 31/01/2018...
-
Page 15: Web Management
Disable the “Smart Screen Filter” in the IE browser; otherwise you might not be able to download the file. Utility Download 1. Select the “Download” function. 2. Select “Utility for Windows” or “Utility for Mac” (and click “Download”). Then, execute the installation program. R5906158 WEPRESENT WIPG-1000 31/01/2018... -
Page 16: Conference Control
2. Enter the password and then click “Login”. [Default password: moderator] Image 4-3 Conference Control Login Screen 3. After login, you can see a user-list on the screen which indicates all the users connected to the WiPG-1000. R5906158 WEPRESENT WIPG-1000 31/01/2018... -
Page 17: Webslides
6. Uncheck the “Allow control from this page only”, and the centralized control will be disabled, allowing users to project the screen to WiPG-1000 freely. WebSlides Starting WebSlides 1. Click the WebSlides button to enter the WebSlides page. 2. Enter the password if necessary. 3. Start to capture the current projecting screen. R5906158 WEPRESENT WIPG-1000 31/01/2018... -
Page 18: Admin
Default Gateway: default gateway Wireless MAC address: wireless MAC address Wire MAC address: wire MAC address • < Connection Status > Projecting Status: “Waiting for projecting” or ”Projecting” Total Users: the number of users logged into the WiPG-1000 device R5906158 WEPRESENT WIPG-1000 31/01/2018... - Page 19 4. Web Management Image 4-6 wePresent Admin System Status Screen Device Setup Click [Device Setup], and the device setting items will be displayed. R5906158 WEPRESENT WIPG-1000 31/01/2018...
- Page 20 Please enter the same login code in the AirPlay password dialog box. • < Cancel > Cancel all changes. Image 4-7 wePresent Admin Device Setup Screen Network Setup Click [Network Setup], and the network setting items will be shown. R5906158 WEPRESENT WIPG-1000 31/01/2018...
- Page 21 Encryption: The default value is “Disable.” (If you choose enable the “Connect to Existing AP” function, you can select “WEP,” “WPA AES,” “WPA2 AES,” “WPA TKIP,” or “WPA2 TKIP.”) Key: If the “Encryption” function is enabled, you have to set the “Key” value according to the encryption mode you selected. R5906158 WEPRESENT WIPG-1000 31/01/2018...
- Page 22 < Apply > Click the “Apply” button, and follow the reboot instructions as they appear on the screen for the modifications to take effect. • < Cancel > Cancel all modifications. Image 4-8 wePresent Admin Network Setup Screen R5906158 WEPRESENT WIPG-1000 31/01/2018...
- Page 23 < Enter New Password >: Enter the new password you want to use for “Admin”. < Confirm New Password >: Confirm the new password by entering it once again. < Apply >: Confirm and save the new password. R5906158 WEPRESENT WIPG-1000 31/01/2018...
- Page 24 < Apply >: Confirm to perform the reset. Image 4-11 wePresent Admin Reset to Default Screen Hard Reset To perform a hard reset to restore your WiPG-1000 device to the factory default settings, please follow the below procedures: R5906158 WEPRESENT WIPG-1000 31/01/2018...
- Page 25 Firmware Upgrade Click [Firmware Upgrade] to import/export the system configuration and upgrade the firmware. • < System Configuration > Export: Export the current system configuration to a configuration file. Import: Import a system configuration file to WiPG-1000. R5906158 WEPRESENT WIPG-1000 31/01/2018...
- Page 26 Image 4-13 wePresent Admin Firmware Upgrade Wait Screen After a few minutes, a message is shown on the screen, telling you the upgrade is complete. R5906158 WEPRESENT WIPG-1000 31/01/2018 Image 4-14 wePresent Admin Firmware Upgrade Complete Screen WiPG-1000 will reboot to complete the upgrade process.
- Page 27 WebSlides users should not exceed the recommended number shown on the WebSlides Setup page (displayed as above) to avoid connection failure or poor projection performance. Reboot System Click [Reboot System], and you can restart the system. R5906158 WEPRESENT WIPG-1000 31/01/2018...
- Page 28 < Reboot >: Reboot the system automatically. Image 4-16 wePresent Admin Reboot system Screen Logout Click [Logout] (on the upper-right corner of the screen), and you can log out of the WiPG-1000. Image 4-17 wePresent Admin Logout R5906158 WEPRESENT WIPG-1000 31/01/2018...
-
Page 29: Using Mirrorop (Sender) To Start Projection
For Mac: click on the MirrorOp icon from the Applications folder to execute the application. 2. The MirrorOp app will automatically search for the WiPG-1000 device. Image 5-1 Image 5-2 MirrorOp Connect—Windows MirrorOp Connect—Mac 3. Click on the WiPG-1000 device and enter the login code shown on the display. R5906158 WEPRESENT WIPG-1000 31/01/2018... - Page 30 5. Using MirrorOp (Sender) to Start Projection Image 5-3 Image 5-4 MirrorOp Passcode—Windows MirrorOp Passcode—Mac 4. Click the “Play” button, and start sharing your screen. Image 5-5 Image 5-6 MirrorOp Start—Windows MirrorOp Start—Mac R5906158 WEPRESENT WIPG-1000 31/01/2018...
-
Page 31: Main User Interface Of Mirrorop (Sender)
Then, click “About” in the menu bar. Image 5-8 About MirrorOp 2. Click “Get Help” on the lower-right corner of the screen, and then you can view the “MirrorOp User’s Manual.” R5906158 WEPRESENT WIPG-1000 31/01/2018... - Page 32 5. Using MirrorOp (Sender) to Start Projection Image 5-9 Get Help R5906158 WEPRESENT WIPG-1000 31/01/2018...
-
Page 33: Use The Sidepad Function With Mirrorop Receiver
(Remote Control) (HDMI/VGA Cable) Using SidePad on a PC or Mac PC/Mac running the MirrorOp (Sender) App 1. Click the “Settings” icon on the upper-left corner of the info panel. Then, click “Preferences” in the menu bar. R5906158 WEPRESENT WIPG-1000 31/01/2018... - Page 34 6. Use the SidePad Function with MirrorOp Receiver Image 6-2 MirrorOp Preferences 2. Check “Allow controlling from tablets/smartphones.” Image 6-3 Allow Controlling from Tablets/Smartphones 3. Set the passcode (default passcode: 1111). R5906158 WEPRESENT WIPG-1000 31/01/2018...
-
Page 35: Using Sidepad On A Tablet Or Smartphone
1. Install the “MirrorOp Receiver” app from the Google Play store. 2. Open the “MirrorOp Receiver” app. Long-press the Menu button on your Android device, and click “Settings”. Image 6-5 Android Settings 3. Check “Search for senders on start”. R5906158 WEPRESENT WIPG-1000 31/01/2018... - Page 36 6. Now you are able to remotely control the Mac/PC from your tablet/smartphone. Tablet/Smartphone running the “MirrorOp Receiver” App—iOS 1. Install the “MirrorOp Receiver” app from the Apple App store. 2. Go to “Settings” on your iOS device, and click “(MirrorOp) Receiver”. R5906158 WEPRESENT WIPG-1000 31/01/2018...
- Page 37 6. Use the SidePad Function with MirrorOp Receiver Image 6-9 Enter Passcode 3. Enable “Search for senders on start”. R5906158 WEPRESENT WIPG-1000 31/01/2018...
- Page 38 4. Open the “MirrorOp Receiver” app. You will see the name of the PC/Mac with the MirrorOp (Sender) app installed. Image 6-11 Choose a Computer—iOS 5. Select which PC/Mac you want to control and enter the passcode you set earlier. R5906158 WEPRESENT WIPG-1000 31/01/2018...
- Page 39 6. Use the SidePad Function with MirrorOp Receiver Image 6-12 Enter Passcode—iOS 6. Now you are able to remotely control the Mac/PC from your tablet/smartphone. R5906158 WEPRESENT WIPG-1000 31/01/2018...
- Page 40 6. Use the SidePad Function with MirrorOp Receiver R5906158 WEPRESENT WIPG-1000 31/01/2018...
-
Page 41: Launch Webslides
1. Connect your PC/Mac to the WiPG-1000 device via WiFi or LAN. Your PC/Mac needs to connect to the WiPG-1000 device via WiFi or LAN. 2. Make sure the WebSlides function is enabled by the MirrorOp Sender app. R5906158 WEPRESENT WIPG-1000 31/01/2018... - Page 42 3. The audience will see the below image on their devices, and they can start to receive the projecting screen/slides. They can save the projecting screen (for note-taking later) by clicking in the menu bar at the top of the screen. R5906158 WEPRESENT WIPG-1000 31/01/2018...
- Page 43 7. Launch WebSlides Image 7-4 Save the Projecting Screen R5906158 WEPRESENT WIPG-1000 31/01/2018...
- Page 44 7. Launch WebSlides R5906158 WEPRESENT WIPG-1000 31/01/2018...
-
Page 45: Wall-Mount Kit
Remember to place the two plastic washers ( ) between the two short screws ( ) and the WIPG-1000. 2. Install the mounting bracket on the wall with the four long screws ( 3. Secure the WiPG-1000 device to the mounting bracket. R5906158 WEPRESENT WIPG-1000 31/01/2018... - Page 46 8. Wall-Mount Kit Image 8-1 WiPG-1000 Wall-Mount Kit WiPG-1000 Wall Short screw (x2) Plastic washer (x2) Detachable antenna Long screw (x4) Mounting bracket R5906158 WEPRESENT WIPG-1000 31/01/2018...
Need help?
Do you have a question about the WePresent WiPG-1000 and is the answer not in the manual?
Questions and answers