Barco CSE-200 Installation Manual
Hide thumbs
Also See for CSE-200:
- User manual (50 pages) ,
- Manual (15 pages) ,
- Installation manuals (118 pages)
Table of Contents
Advertisement
Quick Links
Advertisement
Table of Contents

Related Manuals for Barco CSE-200


Summary of Contents for Barco CSE-200
- Page 1 CSE-200 Installation manual R5900023/02 11/04/2016...
- Page 2 Barco NV President Kennedypark 35, 8500 Kortrijk, Belgium Phone: +32 56.23.32.11 Fax: +32 56.26.22.62 Support: www.barco.com/en/support Visit us at the web: www.barco.com Printed in China...
- Page 3 The period of guarantee begins on the date of transfer of risks, in the case of special systems and software on the date of commissioning, at latest 30 days after the transfer of risks. In the event of justified notice of complaint, Barco can repair the fault or provide a replacement at its own discretion within an appropriate period.
- Page 4 Software, or any portion thereof, (i) that is based on specifications, drawings, models or other data furnished by you or, (ii) that is not provided by Barco or, (iii) that is modified, in spite of the prohibition for you to modify the software or, (iv) to the extent that you continue allegedly infringing activity after having been provided modifications that avoid the alleged infringement, or (v) where the use...
- Page 5 Software, including the U.S. Export Administration Regulations, as well as end-user, end-use, and destination restrictions issued by the U.S. or other governments. 11. Barco shall be entitled to sub-contract all or any of Barco’s obligations hereunder to a third party and/or any of Barco’s affiliated companies.
- Page 6 Barco sees fit, including but not limited to providing services to you / your organization, allowing third party to access to such Functional Information and/or to provide services to you / your organization . You hereby explicitly give consent that Barco may gather, access, preserve, and/or disclose the personal data you provide to us (e.g.
- Page 7 Open Source component Open Source License alsa-plugins http://www.gnu.org/licenses/gpl.html http://www.gnu.org/licenses/lgpl.html avahi http://www.gnu.org/licenses/lgpl.html Bootstrap (3.1.1) https://github.com/twbs/bootstrap/blob/master/LICENSE bootstrap-dialog https://github.com/twbs/bootstrap/blob/master/LICENSE bootstrap-slider.js v2.0.0 http://www.apache.org/licenses/LICENSE-2.0 busybox http://opensource.org/licenses/GPL-2.0 Chart.js https://github.com/nnnick/Chart.js/blob/master/LICENSE.md Datepicker for Bootstrao (1,6,0-dev) http://www.apache.org/licenses/LICENSE-2.0 dropbear http://opensource.org/licenses/mit-license.php fakeroot http://www.gnu.org/licenses/gpl.html coreutils http://www.gnu.org/licenses/gpl.html crda http://opensource.org/licenses/ISC cron http://opensource.org/licenses/ISC Crypto++ http://www.cryptopp.com/License.txt dbus http://www.gnu.org/licenses/old-licenses/gpl-2.0.html dhcpd...
- Page 8 Open Source component Open Source License http://opensource.org/licenses/BSD-3-Clause Jasny Bootstrap (3.1.3) http://www.apache.org/licenses/LICENSE-2.0 jQuery Form Plugin (3.51.0-2014.06.20) https://github.com/malsup/form#copyright-and-license jQuery JavaScript Library (1.11.3) https://jquery.org/license/ jQuery Password Strength plugin for https://github.com/ablanco/jquery.pwstrength.bootstrap/blob/master/GPL-LICENSE.txt Twitter Bootstrap https://github.com/ablanco/jquery.pwstrength.bootstrap/com- mit/19480555e8c7c2f417d78a78dac63056fa221f6a jQuery Upload File Plugin (4.0.8) https://github.com/hayageek/jquery-upload-file jQuery Validation Plugin (1.13.1) https://opensource.org/licenses/MIT kobs-ng http://www.gnu.org/licenses/gpl.html...
- Page 9 Open Source component Open Source License libresample http://www.gnu.org/licenses/lgpl.html libsm6 http://metadata.ftp-master.debian.org/changelogs//main/libs/libsm/libsm_1.2.2-1_copyright libstdc++6 http://www.gnu.org/licenses/gpl.html libswscale http://www.gnu.org/licenses/old-licenses/lgpl-2.1.html libtalloc2 http://www.gnu.org/licenses/lgpl.html libusb http://www.gnu.org/licenses/old-licenses/lgpl-2.1.html libva Copyright (c) 2011, Advanced Micro Devices, Inc. All rights reserved. libX11 http://opensource.org/licenses/MIT libXdamage http://opensource.org/licenses/MIT libXext http://opensource.org/licenses/MIT libXfixes http://opensource.org/licenses/MIT libXinerama http://opensource.org/licenses/MIT libxml2 http://opensource.org/licenses/MIT libXrender http://opensource.org/licenses/MIT...
- Page 10 Open Source component Open Source License pulseaudio http://www.gnu.org/licenses/lgpl.html http://doc.qt.io/qt-5/lgpl.html read-edid Free license Respond.js https://github.com/scottjehl/Respond/blob/master/LICENSE-MIT rockbox-imxtools http://www.gnu.org/licenses/old-licenses/gpl-2.0.html rsync (<3.0.0) http://www.gnu.org/licenses/old-licenses/gpl-2.0.html rsync (>=3.0.0) http://www.gnu.org/licenses/gpl.html rsyslog http://www.gnu.org/licenses/gpl.html splashutils http://www.gnu.org/licenses/gpl.html sprintf-js https://opensource.org/licenses/BSD-3-Clause http://srp.stanford.edu/license.txt sscep https://github.com/certnanny/sscep/blob/master/COPYRIGHT strace http://opensource.org/licenses/BSD-3-Clause sysfsutils http://www.gnu.org/licenses/old-licenses/gpl-2.0.html sysvinit http://www.gnu.org/licenses/old-licenses/gpl-2.0.html tcpdump http://opensource.org/licenses/BSD-3-Clause Timepicker Component for Twitter Bootstrap https://opensource.org/licenses/MIT ttf-arphic-uming...
- Page 11 Radio Frequency (RF) Exposure Information The radiated output power of the Barco Wireless Device is below the Industry Canada (IC) radio frequency exposure limits. The Barco Wireless Device should be used in such a manner such that the potential for human contact during normal operation is minimized.
- Page 12 Informations concernant l’exposition aux fréquences radio (RF) La puissance de sortie émise par l’appareil de sans fil Barco est inférieure à la limite d’exposition aux fréquences radio d’Industry Canada (IC). Utilisez l’appareil de sans fil Barco de façon à minimiser les contacts humains lors du fonctionnement normal.
-
Page 13: Table Of Contents
2. CSE-200 Specifications ................ - Page 14 Table of contents R5900023 CSE-200 11/04/2016...
-
Page 15: Introduction To The Installation Guide
API Guide R5900018 A printed copy of the Safety Guide and an electronic version of the user and installation guide on USB stick is included in the CSE-200 box at purchase. Always check for the latest version of the manual on www.barco.com/clickshare... - Page 16 Menu items are indicated in italic. • Step related notes, tips, warnings or cautions are printed in italic. • Procedure related notes, tips, warnings or cautions are printed in bold between 2 lines preceded by the corresponding icon. R5900023 CSE-200 11/04/2016...
-
Page 17: Cse-200 Specifications
Components CSE-200 set A standard CSE-200 set consists of a Base Unit and 2 Buttons. Depending on the location where you buy the product, the software of the Base Unit is different. If needed, you can buy additional Buttons and a tray to store the Buttons. -
Page 18: Cse-200 Specifications
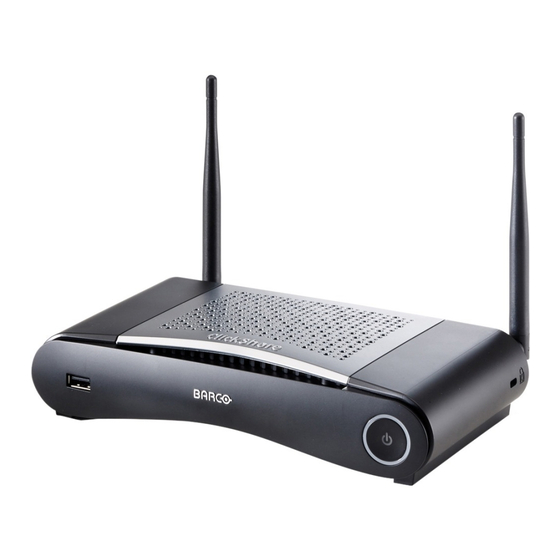
2. CSE-200 Specifications CSE-200 specifications Base Unit Dimensions (HxWxD) 205mm x 115mm x 45mm (excl. antennas) / 8.1” x 4.5” x 1.8” 205mm x 150mm x 135mm (incl. antennas) / 8.1" x 5.9" x 5.3" Power consumption Operation: 6W (typical) / 18W (max) Standby: 2.6W (ECO standby) / 0.4W (Deep standby) -
Page 19: About The Base Unit
firmware are up to date. If not, the Base Unit updates the software and/or firmware. To update the Base Unit software, download the latest version of the software from the Barco website. Copy the file on a USB stick and plug it into the USB port of the Base Unit. - Page 20 2. CSE-200 Specifications Status LED ring The color of the LED at the front of the Base Unit give information on the status of the system. LEDs behavior Explanation static red • receiving content from the Buttons and streaming towards the display.
-
Page 21: About The Button
Usage of antennas other than the ones provided with the unit are allowed within the restrictions on usage of other antennas defined by local regulations. Barco does not take responsibility for damage or disturbance of other devices that may be caused by using a different antenna. -
Page 22: Mobile Device Support
2. CSE-200 Specifications USB connector Button LED ring Table 2-6 USB connector Using the USB connector the Button can be plugged into a laptop (for sharing your screen) or the Base Unit (for pairing the Button to the Base Unit or updating its software). -
Page 23: Ports Used By The Clickshare Base Unit
2. CSE-200 Specifications Used on Logo ClickShare App Android Ports used by the ClickShare Base Unit Overview Sender CSE-200 Base Unit ClickShare Button 6541; 6542; 6543; 6544; 6545 ClickShare Presenter 6541; 6542; 6543; 6544; 6545 5353 WebUI 80; 443 REST API 4000;... - Page 24 2. CSE-200 Specifications R5900023 CSE-200 11/04/2016...
-
Page 25: Getting Started
7. If desired, configure CSE-200 via the Configurator. For more information on the different ways to configure CSE-200, see "CSE-200 Configurator", page 25 For more information on using CSE-200, refer to the CSE-200 User Guide. This manual can be found on Barco’s website www.barco.com/clickshare... - Page 26 3. Getting started R5900023 CSE-200 11/04/2016...
-
Page 27: Cse-200 Installation
4. CSE-200 Installation 4. CSE-200 INSTALLATION Overview • Installation methods for the Base unit • Table mounting • Wall mounting • Recommendations about antenna placement and orientation • Video signal connections to the Base unit • Audio connection • LAN connection •... -
Page 28: Recommendations About Antenna Placement And Orientation
Note: Mounting screws and plugs are not included in the CSE-200 box . The type of screws and plugs depend on the type of wall (stone, wood, plasterboard, ...) you are mounting the Base Unit to. Make sure the head of the screw is not larger than the hole in the bottom plate of the Base Unit (<... -
Page 29: Video Signal Connections To The Base Unit
4. CSE-200 Installation Video signal connections to the Base unit AUTION Make sure the Base Unit is installed properly before connecting. About Video signal connection A single screen can be connected to the Base unit. To connect a display, an HDMI connection should be made between the Base Unit and the display. -
Page 30: Lan Connection
• for maintenance purposes • for network integration of your CSE-200 unit How to connect 1. Insert a network cable with RJ-45 connector into the LAN port. 2. Connect the other side to a LAN. Power connection About power This product is intended to be supplied by a UL Listed Power Unit marked “Class 2”... - Page 31 4. CSE-200 Installation Image 4-5 Image 4-6 Image 4-7 Image 4-8 Image 4-9 Type A Type A Type C Type G Type I 3. Connect the power cable to the wall outlet. R5900023 CSE-200 11/04/2016...
- Page 32 4. CSE-200 Installation R5900023 CSE-200 11/04/2016...
-
Page 33: Preparing The Buttons
To be able to use a Button it should be assigned to the Base Unit you are using. This process is called pairing. By default, the Button(s) delivered with the CSE-200 set are already paired to the specific Base Unit. -
Page 34: Pre-Install Of The Launcher Service
ClickShare application will be run from the Button automatically. There is no need to run the file from the Button. The pre-installer can be downloaded from the Base Unit’s configurator. Where to download the launcher installer? The launcher service (installer) can be downloaded via the technical download section per device from Barco’s website www.barco.com/clickshare. ClickShare launcher installer... - Page 35 In this setup, a user or an IT admin can install the ClickShare launcher using the Windows command prompt. Following is an example of a silent installation (version numbers are only given as example, always check Barco’s web for the latest version): msiexec.exe /i ClickShare_Launcher_01_06_00_0144_Setup_Win.msi ACCEPT_EULA=YES INSTALLDIR=C:\...
- Page 36 5. Preparing the buttons R5900023 CSE-200 11/04/2016...
-
Page 37: Cse-200 Configurator
6. CSE-200 Configurator 6. CSE-200 CONFIGURATOR Overview • Accessing the Configurator • On-Screen Language and Text Size • Meeting room information • Personalisation, wallpaper • Personalisation, Personalized wallpaper • Manage configuration files • Display setup • Audio settings • WiFi settings •... - Page 38 6. CSE-200 Configurator A login screen appears. Image 6-1 Login screen 3. To change the language of the Configurator, click on the drop down next to the current selected language and select the desired language. Image 6-2 Configurator lanuguages R5900023 CSE-200 11/04/2016...
- Page 39 6. CSE-200 Configurator The following languages are possible: Arabic Simplified Chinese Traditional Chinese Danish Dutch English Finnish French German Italian Japanese Korean Norwegian Portuguese Russian Spanish Swedish The Configurator language changes to the selected language. 4. Enter the user name ’admin’ and the password, read and accept the EULA and click OK.
- Page 40 6. CSE-200 Configurator If you cannot find the IP address (e.g. there is no screen available) you should connect to the Base Unit directly with your laptop via an Ethernet crossover cable and access the web interface using the fixed IP address 192.168.1.23.
-
Page 41: On-Screen Language And Text Size
6. CSE-200 Configurator On-Screen Language and Text Size About the on-screen language. The on-screen language can be set independent of the configurator language. The on-screen text size can be changed between small, medium or large. Language selection 1. Log in to the Configurator 2. -
Page 42: Meeting Room Information
6. CSE-200 Configurator 3. Click on the drop down box next to On-screen text size and select the desired font size. The following sizes are possible: Small Medium Large Meeting room information About meeting room settings The following settings are possible: •... -
Page 43: Personalisation, Wallpaper
Personalisation, wallpaper About wallpaper When CSE-200 starts up, a background (wallpaper) is displayed. The display of this background wallpaper can be disabled. By default a general ClickShare and a quick start wallpaper are available. The possibility exists to upload personal backgrounds (wallpapers). -
Page 44: Personalisation, Personalized Wallpaper
6. CSE-200 Configurator You can also add a personal wallpaper, e.g. your company logo. For more information on adding a new wall- paper to the list, see "Personalisation, Personalized wallpaper", page 32. Download wallpaper 1. Hoover with your mouse over the wallpaper to download and click on the download symbol on the upper right corner. - Page 45 6. CSE-200 Configurator Image 6-8 Personalized wallpaper selection A browser window opens. 4. Browse for the desired image, click Open to load the image. The content of the file is checked and when valid (format and size), the file is uploaded. The new wallpaper gets a red border.
-
Page 46: Manage Configuration Files
6. CSE-200 Configurator Image 6-9 Change image 3. Browse for the desired image, click Open to load the image. The content of the file is checked and when valid (format and size), the file is uploaded. The new wallpaper gets a red border. -
Page 47: Display Setup
Display setup Resolution The output resolution to the display is set on Auto. That means that the CSE-200 output resolution is automatically adapted to the resolution of the display. For HDMI displays, a hot plug detection is available. Screen saver setup 1. -
Page 48: Audio Settings
6. CSE-200 Configurator 2. Click Display & Audio → Display & Audio. Image 6-12 Display settings 3. To activate the screen saver, drag the slider bar to the left or to the right until the desired delay time is reached. -
Page 49: Wifi Settings
6. CSE-200 Configurator WiFi settings ARNING It is not allowed to operate the Base Unit outside its intended geographical region. About WiFi A connection with the Base Unit can be made via a wireless connection. A fixed wireless IP address is used to establish the con- nection. -
Page 50: Lan Settings
6. CSE-200 Configurator SSID & passphrase 1. Enter a public name (SSID) for the wireless network. The default SSID is ClickShare-<serial number Base Unit>. 2. If you want to broadcast this SSID, check the checkbox before Enable SSID broadcast. 3. Enter a new WiFi passphrase and confirm that passphrase. -
Page 51: Network Integration, Activation
6. CSE-200 Configurator 3. Click in the input field next to Hostname and enter a host name for the Base Unit. The default host name is ClickShare-<serial number Base Unit>. 4. To select the method, click on the drop down box next to Method and select the Automatic (DHCP) or Manual. - Page 52 6. CSE-200 Configurator the ClickShare Buttons use to connect. These so-called “rogue” APs can become a nuisance in larger installations. Next to that, meeting participants who are sharing content from mobile devices have to switch networks to connect with the ClickShare Base Unit.
- Page 53 The Corporate Network Integration feature is provided “AS IS”, without any liability or obligation (including support) of or on behalf of Barco. Barco cannot guarantee that the feature works in your corporate network. The reliability, quality and stability when sharing using the Corporate Network Integration depends on your network infrastructure.
-
Page 54: Network Integration, Eap-Tls Security Mode
6. CSE-200 Configurator You must repair all the Buttons after completing the setup wizard ! 6.12 Network integration, EAP-TLS security mode About EAP-TLS EAP-TLS (Transport Layer Security) is an EAP method based on certificates which allows mutual authentication between client and server. - Page 55 6. CSE-200 Configurator SCEP implementation is specifically targeted at the Network Device Enrolment Service (NDES) which is part of Windows Server 2008 R2 and Windows Server 2012. No other SCEP server implementations are supported. Image 6-21 About NDES The Network Device Enrolment Service is Microsoft’s server implementation of the SCEP protocol. If you want to enable EAP-TLS using SCEP make sure NDES is enabled, configured and running on your Windows Server.
-
Page 56: Network Integration, Eap-Ttls Security Mode
6. CSE-200 Configurator Image 6-22 Necessary Data to continue: Domain The company domain for which you are enrolling, should match with the one defined in your Active Directory. Identity Identity of the user account in the Active Directory which will be used by the ClickShare Buttons to connect to the corporate network. - Page 57 6. CSE-200 Configurator 2. Click WiFi & Network → Network integration. Click on Change configuraton. 3. Select the radio button next to EAP-TTLS and click Next. Image 6-23 Network integration, EAP-TTLS selected The EAP-TTLS mode window opens. Image 6-24 Necessary Data to continue: Domain The company domain for which you are enrolling, should match with the one defined in your...
-
Page 58: Network Integration, Peap Security Mode
6. CSE-200 Configurator 6.14 Network integration, PEAP security mode About PEAP PEAP (Protected Extensible Authentication Protocol) is an EAP implementation co-developed by Cisco Systems, Microsoft and RSA Security. It sets up a secure TLS tunnel using the servers CA certificate after which actual user authentication takes place within the tunnel. -
Page 59: Network Integration, Wpa2-Psk Security Mode
6. CSE-200 Configurator Password The corresponding password for the identity that you are using to authenticate on the corporate network. Per Base Unit each Button will use the same identity and password to connect to the corporate network. Corporate SSID The SSID of your corporate wireless infrastructure to which the ClickShare Buttons will connect. -
Page 60: Services, Mobile Devices
6. CSE-200 Configurator When having problems connecting the Button to your corporate network, to get feedback from the Button please have a look at the ClickShare Client log. This log can be pressing the holding Shift key when starting the Client executable. Look for the lines “EDSUSBDongleConnection::mpParseDongleMessages”. -
Page 61: Service, Clickshare Api, Remote Control Via Api
6. CSE-200 Configurator Image 6-30 Services, mobile devices 3. To allow sharing content via ClickShare app, check the check box in front of Sharing via ClickShare app. To allow streaming via AirPlay, check the check box in front of Streaming via AirPlay. -
Page 62: Security, Compatibility
6. CSE-200 Configurator Image 6-31 ClickShare API setting 3. Check the check box in front of Remote control via API to enable this function. Checked: remote control via API is allowed. A password can be used to protect the access. -
Page 63: Security, Security Level
6. CSE-200 Configurator Changing the Compatibility setting will require a repairing of the Buttons used with this Base Unit. 6.19 Security, security level About security levels For the use of the ClickShare system, a security level can be set. By default, level 1 is activated. A security level is a predefined set of settings which are automatically set when a level is selected. -
Page 64: Security, Passwords
6. CSE-200 Configurator Image 6-33 Security levels 3. Select the desired security level icon. 4. Click Save changes to apply the setting. 6.20 Security, passwords About passwords To access the Configurator (WebUI) a user name and password is needed. That password can be changed at any time to protect the ClickShare Configuration settings. -
Page 65: Status Information Base Unit
6. CSE-200 Configurator Image 6-34 Passwords 3. Click in the WebUI Password pane in the input field next to Old password and enter the old password. 4. Click in the input field next to New password and enter a new password. -
Page 66: Date & Time Setup, Manually
6. CSE-200 Configurator Image 6-35 3. To restart the Base Unit, click on Restart Base Unit. A ClickShare system reboot message with progress bar is displayed while rebooting takes place. When the reboot is finished, a re-login is necessary. 6.22 Date & Time setup, manually About Date &... -
Page 67: Date & Time Setup, Time Server
6. CSE-200 Configurator 4. Check the radio button in front of Set time and date manually. 5. To change the date, click in the input field next to Date. A calendar window opens. The current date is indicated with a red background. -
Page 68: Energy Savers
6. CSE-200 Configurator Image 6-39 Time server setup The current time is indicated next to Current time. 3. Check the radio button next Use NTP. 4. Enter a NTP server address next to NTP servers. Enter the IP address or server name. -
Page 69: Buttons
6. CSE-200 Configurator Image 6-40 Energy savers How to change the display timeout and standby mode 1. Log in to the Configurator. 2. Click System → Energy Savers. 3. To set a display time out, move the slider to the left or to the right until the desired standby timeout is reached. -
Page 70: Firmware Update
3. Check the check box in front of Update Buttons over Wi-Fi. 6.26 Firmware Update About Software update The software of the Base Unit can be updated via the web interface. The latest version of the software is available on Barco’s website. Image 6-42 Firmware update About automatic firmware updates... -
Page 71: Support & Updates, Troubleshoot, Log Settings
5. Browse to the file with the new software and click Open to start the upload. Note: This should be an nad file. You might have to unzip the file downloaded from Barco’s website. Note: Updating the software to the Base Unit takes several minutes. Progress can be followed on the meeting room display. -
Page 72: Factory Defaults
6. CSE-200 Configurator If the launcher service is running hold down the shift key while connecting the Button to the PC, until logging is started. If the launcher service is not running : hold down the shift key while double clicking the ClickShare application. - Page 73 6. CSE-200 Configurator Image 6-45 Troubleshoot, factory defaults 3. Click Reset to factory defaults. The following message is displayed: “This action will remove all settings of the Base Unit and replace them with the default settings. Are you sure you want to continue?”...
- Page 74 6. CSE-200 Configurator R5900023 CSE-200 11/04/2016...
-
Page 75: Software Updates
USB stick To update the Base Unit software by copying the software on a USB stick 1. Download the latest version of the software from Barco’s website, , www.barco.com/clickshare. Click on Visit the ClickShare product page and go to tab Downloads 2. - Page 76 7. Software updates R5900023 CSE-200 11/04/2016...
-
Page 77: Troubleshooting
Refer to the corresponding chapter of the documentation. • Check the proxy settings Users do not get a CSE-200 drive when • No automatic refresh of drives • Refresh your view on the laptop. inserting the Button in their laptop. - Page 78 Unit cause lowering of the wireless strength and quality. Avoid placing it inside cabinets, false ceiling, below the table, behind a wall, in another room, ..Re-orient he Base Unit antennas Check out the ClickShare White paper on WiFi See www.barco.com/clickshare. R5900023 CSE-200 11/04/2016...
- Page 79 IP address is not within your LAN range. DHCP is not enabled. No WiFi connection with Base Unit SSID not correct Enter the correct SSID Locate the problem you are experiencing in the table below and apply the solution. R5900023 CSE-200 11/04/2016...
- Page 80 8. Troubleshooting R5900023 CSE-200 11/04/2016...
-
Page 81: Environmental Information
(Also called RoHS of Chinese Mainland), the table below lists the names and contents of toxic and/or hazardous substances that Barco’s product may contain. The RoHS of Chinese Mainland is included in the MCV standard of the Ministry of Information Industry of China, in the section “Limit Requirements of toxic substances in Electronic Information Products”. -
Page 82: Production Address
Chinese Mainland, marked with the Environmental Friendly Use Period (EFUP) logo. The number inside the EFUP logo that Barco uses (please refer to the photo) is based on the “General guidelines of environment-friendly use period of electronic information products”... -
Page 83: Importers Contact Information
9. Environmental information Importers contact information Contact To find your local importer, contact Barco directly or one of Barco’s regional offices via the contact information given on Barco’s web site, www.barco.com. R5900023 CSE-200 11/04/2016...
Need help?
Do you have a question about the CSE-200 and is the answer not in the manual?
Questions and answers