Table of Contents
Advertisement
Quick Links
Advertisement
Table of Contents

Related Manuals for Barco WePresent WiPG-1000

Summary of Contents for Barco WePresent WiPG-1000
- Page 1 WiPG-1000 User’s Manual WiPG-1000 User's Manual Version: 07...
-
Page 2: Table Of Contents
WiPG-1000 User’s Manual Table of Contents Overview ..........................3 Package Contents ......................... 4 Physical Details ........................4 What You Might Need ......................7 Hardware Installation ......................7 Standby Screen of the Projector/Display ................. 9 Web Management ....................... 12 Home Page ........................... 12 Download .......................... -
Page 3: Overview
WiPG-1000 User’s Manual Overview wePresent WiPG-1000 is a professional wireless presentation gateway. With the revolutionary “interactive” and “wireless” features, wePresent WiPG-1000 enables users to deliver presentations wirelessly from a PC, Mac, iPad, iPhone or any Android device to a projector, to use a tablet or... -
Page 4: Package Contents
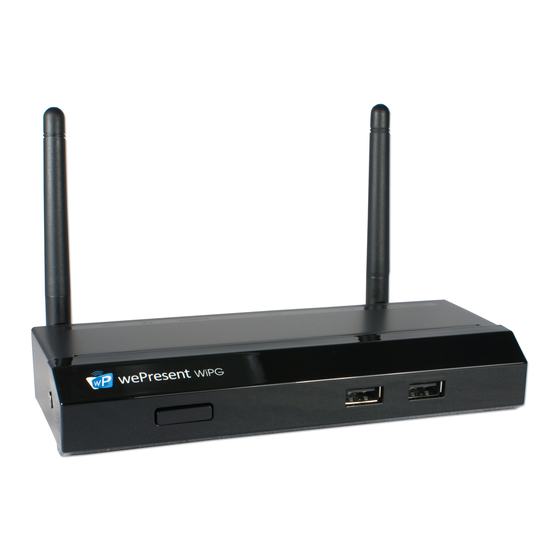
WiPG-1000 User’s Manual Package Contents wePresent WiPG-1000 Base Unit Power Adapter (DC +5V, 2.6A) Two Detachable WiFi Antennas Quick Installation Guide Warranty Card CE DoC and Warning Statement Physical Details Front Panel Power Button/LED Indicator... - Page 5 WiPG-1000 User’s Manual Rear Panel Ethernet Port HDMI Port Power Jack USB Port VGA Port Audio Jack WiFi Antennas Description WiFi Antennas 2 detachable antennas for better WiFi performance USB Port (Rear) USB port for USB mouse/keyboard/thumb drive/IWB device (HID type) Ethernet Port 10/100M RJ-45 port VGA Port...
- Page 6 WiPG-1000 User’s Manual * * *To perform a hard reset to restore your WiPG-1000 device to the factory default settings, please follow the below procedures: 1. Long press the reset button and hold. 2. Turn on the WiPG-1000 and wait for over 10 seconds until the LED indicator turns green.
-
Page 7: What You Might Need
WiPG-1000 User’s Manual What You Might Need Projector/display with VGA/HDMI interface (Required) Ethernet cable (Required if you want to disable the WiFi of the WiPG-1000) Windows or Mac computer Apple iPhone, iPad or iPod touch Android phone or tablet ... - Page 8 WiPG-1000 User’s Manual 3) If you disable the WiFi of the WiPG-1000, you need to connect the device to an existing IT network through an Ethernet cable. 4) Insert the speaker cable to the WiPG-1000 audio jack for audio output. (A speaker is required for audio output when using VGA.) 5) Insert the USB mouse/keyboard/IWB device to the WiPG-1000 front/rear USB port for OSD (On-Screen Display) control or remote control.
-
Page 9: Standby Screen Of The Projector/Display
WiPG-1000 User’s Manual Standby Screen of the Projector/Display 1) The following information will be shown on the standby screen: (a) software download instructions; (b) WiFi network name or SSID [default SSID is WiPG-1000-xxx (xxx are the last three numbers of the MAC ID shown on the bottom side of the WiPG-1000 device)];... - Page 10 WiPG-1000 User’s Manual and you can: (a) find the FW version, resolution, and WiFi security information; (b) make a Plug & Show USB token (click on the “Make PnS Token” to copy the Plug & Show MirrorOp application for Windows and Mac to the attached USB drive).
- Page 11 WiPG-1000 User’s Manual 5) The screen saver mode will be activated if no sender device is connected. The system will return to the standby status immediately when any sender device is connected.
-
Page 12: Web Management
WiPG-1000 User’s Manual Web Management Home Page 1) Make sure your sender device connects to the WiPG-1000 successfully. 2) Open the browser of the sender device, and enter the IP address or hostname of the WiPG-1000 in the address bar (URL bar) of the browser. You can find the IP address and hostname on the standby screen of the projector/display. -
Page 13: Download
WiPG-1000 User’s Manual Download 1) Select the “Download” function. 2) You can choose to download the installed version (full-function version) or portable version of the MirrorOp (Sender) app for Windows (Windows 7/8/10) or Mac (macOS 10.9 and above). If you want to download the installed version for Windows, an internet connection is required. - Page 14 WiPG-1000 User’s Manual 3) After login, you can see a user-list on the screen which indicates all the users connected to the WiPG-1000. 4) There are three columns: “Name”, “Play Control” and “IP Address”. 5) Play Control: There are six buttons – (a) (full screen);...
-
Page 15: 7.4 Webslides
WiPG-1000 User’s Manual (upper-left quadrant of the screen); (c) (upper-right quadrant of the screen); (d) (lower-left quadrant of the screen); (e) (lower-right quadrant of the screen); (stop) 6) Uncheck the “Allow control from this page only”, and the centralized control will be disabled, allowing users to project the screen to WiPG-1000 freely. - Page 16 WiPG-1000 User’s Manual how to install the certificate for the Safari/Chrome browser on macOS or for the Firefox browser, please go to https://www.barco.com/support/knowledge-base/kb8277 a) Download the self-signed certificate file from the Home page of wePresent Configurator. b) The file name is : wePresent_HTTPS_Certificate.der.
- Page 17 WiPG-1000 User’s Manual e) Please note that you should check the option “Place all certificates in the following store” (and click “Browse”), instead of the option "Automatically select the certificate store based on the type of certificate". f) Make sure that you select “Trusted Root Certification Authorities” as the certificate store.
- Page 18 WiPG-1000 User’s Manual g) After the installation is complete, please close and restart your browser. h) Please note that you only need to install the certificate once for all WiPG-1000 devices.
-
Page 19: 7.6 Admin
WiPG-1000 User’s Manual 7.6 Admin 1) Click [Admin], and then enter the password to log in to the web admin page. (Default Password: admin) 7.6.1 System Status Click [System Status], and the current system status will be shown. < Model Name >: WiPG-1000P <... -
Page 20: Device Setup
WiPG-1000 User’s Manual < Date and Time >: “Date”, “Time” and “Time Zone” 7.6.2 Device Setup Click [Device Setup], and the device setting items will be displayed. < Device Setup > Resolution: “Auto Detect (HDMI)" is the default setting ♦ HDMI: 1280x720 (720p), 1920x1080 (1080i), 1920x1080 (1080p), Auto Detect (HDMI) VGA: 800x600 (SVGA), 1024x768 (XGA), 1280x768 (WXGA), 1280x800... - Page 21 WiPG-1000 User’s Manual Time Zone: Specify the time zone ♦ Daylight Saving Time: Enable/Disable ♦ < SharePod Pairing Settings >: Choose “Apply wePresent’s WiFi settings” or “Apply the following WiFi ♦ settings”. (If you choose “Apply the following WiFi settings”, input the SSID to which the SharePod should connect.) Encryption: The default setting is “Disable”.
-
Page 22: Network Setup
WiPG-1000 User’s Manual 7.6.3 Network Setup Click [Network Setup], and the network setting items will be shown. <Note: The network configuration of WiPG-1000 is automatic via DHCP> The default setting of the WiPG-1000 is DHCP client. When the WiPG-1000 is connected to a LAN that already has a DHCP server present, the WiPG-1000 takes an IP address assigned to it by the server. - Page 23 WiPG-1000 User’s Manual DNS Server: The default value is 192.168.100.10 ♦ < Wireless Setup > Wireless LAN: The default value is “Enable”. ♦ Host Name and Domain Name: The default name is ♦ “WiPG-1000-xxx”(xxx are the last three numbers of the MAC ID shown on the bottom side of the WiPG-1000 device).
-
Page 24: Snmp Setup
WiPG-1000 User’s Manual < Apply > Click the “Apply” button, and follow the reboot instructions as they ♦ appear on the screen (for the modifications to take effect). < Cancel > Cancel all the modifications ♦ 7.6.4 SNMP Setup < SNMP V3 > Enable/Disable the SNMPv3 service. -
Page 25: Osd (On-Screen Display) Setup
< Cancel > Cancel all changes. Note: You can download the SNMP MIB file from https://www.barco.com/en/support/wepresent-wipg-1000/drivers 7.6.5 OSD (On-Screen Display) Setup Click [OSD Setup], and you can change the standby image < Change Standby Image > Restore to default: Restore the standby image to the default one. -
Page 26: Change Passwords
WiPG-1000 User’s Manual [The default value is “Enable”] Connection Info: “Enable” (show the overlay connection info) or ♦ “Disable” (hide the overlay connection info) [The default value is “Enable”] Font Color: Adjust the font color of system information [The default ♦... -
Page 27: Reset To Default
WiPG-1000 User’s Manual < Conference Control > <Enter New Password>: Enter the new password you want to use for “Conference Control”. <Confirm New Password>: Confirm the new password by entering it once again. <Apply>: Confirm and save the new password. ... -
Page 28: Firmware Update
WiPG-1000 User’s Manual factory default settings, please follow the below procedures: A. Long press the reset button (on the bottom side of the WiPG-1000) and hold. B. Turn on the WiPG-1000 and wait for over 10 seconds until the LED indicator turns green. C. - Page 29 WiPG-1000 User’s Manual (b) <Manual Firmware Update>: Firstly, you have to get the latest firmware file from your vendor. Then, click “Browse” to select the firmware file you need, and click “Update” to perform the update. (c) <Automatic Firmware Update>: To schedule automatic firmware update, check the checkbox in front of “Check on schedule”...
-
Page 30: Webslides Setup
WiPG-1000 User’s Manual Warning: Do not power off the WiPG-1000 while the firmware update is in progress; otherwise your WiPG-1000 device may crash and you have to return the device to your vendor for repair. 7.6.9 WebSlides Setup Click [WebSlides Setup] to set up the WebSlides function. <... -
Page 31: 7.6.10 Reboot System
WiPG-1000 User’s Manual “60” or “90” seconds refresh interval < Access Password Control >: Choose “Disable”, “Use the same password as Code” or “Use the following Code” Note: It is important to realize that all the WebSlides users consume wireless bandwidth. -
Page 32: Logout
WiPG-1000 User’s Manual 7.6.11 Logout 1) Click [Logout] (on the upper-right corner of the screen), and you can log out of the WiPG-1000. -
Page 33: Using Mirrorop (Sender) To Start Projection
WiPG-1000 User’s Manual Using MirrorOp (Sender) to Start Projection Start the MirrorOp application Windows: 1) Click the MirrorOp icon on the desktop to execute the application. 2) It will start to search for the WiPG-1000 device automatically. - Page 34 WiPG-1000 User’s Manual 3) Click on the WiPG-1000 device and enter the login code shown on the display. 4) Click the “PLAY” button to start the screen sharing. Mac: 1) Click on the MirrorOp icon from the Applications folder to execute the application.
- Page 35 WiPG-1000 User’s Manual 3) Click on the WiPG-1000 device and enter the login code shown on the display.
-
Page 36: Main User Interface Of Mirrorop (Sender)
WiPG-1000 User’s Manual 4) Click the “PLAY” button to start the screen sharing. 8.2 Main User Interface of MirrorOp (Sender) Collapse/Expand the Info Panel Minimize the User Interface Settings Exit/Close the Application Expand/Collapse Device List Full/Split Screen Start/Stop Projection Sound/Mute... -
Page 37: A Complete User's Guide On Mirrorop (Sender)
Then, click “About” in the menu bar. 2) Click “Get Help” on the lower-right corner of the screen, and then you can view the “MirrorOp User’s Manual”. Note: You can also download the User’s Manual for MirrorOp (Sender) from https://www.barco.com/en/product/wepresent-wipg-1000. -
Page 38: Use The Sidepad Function With Mirrorop Receiver
WiPG-1000 User’s Manual Use the SidePad Function with MirrorOp Receiver 1) Introduction: SidePad is a feature that allows controlling the presenting PC/Mac from an iOS/Android device running the MirrorOp Receiver app. Display Tablet/Smartphone HDMI/VGA Cable PC/Mac (Projection) (Remote Control) WiPG-1000 (Projection) 2) How to use the SidePad function: A. - Page 39 WiPG-1000 User’s Manual Check “Allow controlling from tablets” Set the passcode (default passcode: 1111) ...
- Page 40 WiPG-1000 User’s Manual B. Tablet/Smartphone running the “MirrorOp Receiver” app Android Install the “MirrorOp Receiver” app from the Google Play store. Open the “MirrorOp Receiver” app. Long-press the Menu button on your Android device, and click “Settings”. Check “Search for senders on start”. ...
- Page 41 WiPG-1000 User’s Manual Close MirrorOp Receiver and re-open it. You will see the name of the PC/Mac with the MirrorOp (Sender) app installed. Select which PC/Mac you want to control and enter the passcode you set earlier.
- Page 42 WiPG-1000 User’s Manual Now you are able to remotely control the Mac/PC from your tablet/smartphone. Install the “MirrorOp Receiver” app from the Apple App store. Go to “Settings” on your iOS device, and click “(MirrorOp) Receiver”. Enable “Search for senders on start”. ...
- Page 43 WiPG-1000 User’s Manual Open the “MirrorOp Receiver” app. You will see the name of the PC/Mac with the MirrorOp (Sender) app installed. Select which PC/Mac you want to control and enter the passcode you earlier.
- Page 44 WiPG-1000 User’s Manual Now you are able to remotely control the Mac/PC from your tablet/smartphone.
-
Page 45: Launch Webslides
WiPG-1000 User’s Manual Launch WebSlides Introduction: The Webslides function allows the presenter (PC/Mac with the MirrorOp Sender app installed) to broadcast the projecting screen/slides to the audience (multiple login devices) during a presentation, so that the audience can save the slides for note-taking later. - Page 46 WiPG-1000 User’s Manual 2) Audience: • The audience also need to connect to WiPG-1000 via WiFi or LAN. • Open the browser of the audience’s login devices, and enter the IP address of WiPG-1000 in the address bar of the browser. [Default IP address is 192.168.100.10] •...
- Page 47 WiPG-1000 User’s Manual • The audience will see the below image on their devices, and they can start to receive the projecting screen/slides. They can save the projecting screen (for note-taking later) by clicking in the menu bar at the top of the screen...
-
Page 48: Wall-Mount Kit
WiPG-1000 User’s Manual Wall-Mount Kit 1. Insert the two short screws ( ) into the two holes on the bottom side of the WIPG-1000. [Remember to place the two plastic washers ( ) between the two short screws ( ) and the WIPG-1000.] 2. -
Page 49: Frequently Asked Questions
WiPG-1000 User’s Manual Frequently Asked Questions Q: Why can’t I access the WiPG-1000 web UI (user interface) through a web browser? A: This may be because your sender device (PC/Mac/mobile device) and the receiver device (WiPG-1000) are not on the same intranet. In order to troubleshoot this, you can try any of the following: Set the WiPG-1000 as an access point (AP), and connect your sender •... - Page 50 WiPG-1000 User’s Manual They should be identical in the first three sections, and only differ in the last section. For example, the IP address of the sender device is 192.168.100.11 while that of the WiPG-1000 is 192.168.100.10. Q: What can I do if my network does not allow the sender and receiver devices to be on the same subnet? A: This sometimes happens in the network configurations of schools or offices where you just cannot change the settings of the networks you...
- Page 51 WiPG-1000 User’s Manual too far away from the WiPG-1000 and avoid the physical interference (such as wall and other solid objects) in the wireless coverage. If multiple APs on your company/school network use the 2.4GHz • band (note: the WiPG-1000 uses the 2.4GHz band by default), try your best to have them use different WiFi channels.
-
Page 52: Disposal Information
For more information about recycling of this product, please contact your local city office or your municipal waste disposal service. For details, please visit the Barco website at: http://www.barco.com/en/AboutBarco/weee. -
Page 53: Open-Source And Third-Party Software Used In Wipg-1000
WiPG-1000 User’s Manual Open-Source and Third-Party Software Used in WiPG-1000 WiPG-1000 utilizes open-source and third-party software components, which are licensed by their respective owners as indicated below. Open-Source Software Name Version From Licensing Terms Modified / Used busybox 1.1.2 http://www.busybox.net/ GPL 2.0 used bridge-utils...
Need help?
Do you have a question about the WePresent WiPG-1000 and is the answer not in the manual?
Questions and answers