Advertisement
Quick Links
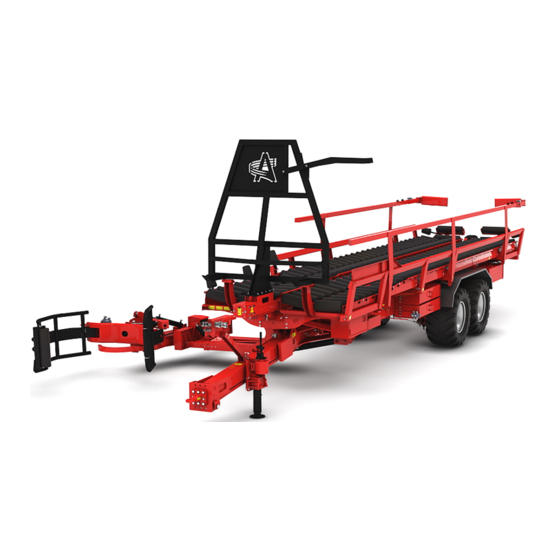
DIAGNOSTIC GUIDE FOR RBMPRO
When navigating the pages you will see buttons that send you to the
corresponding procedures / sections of the troubleshooting table. You can also
use the shortcuts from the table of contents (procedures) to obtain a specific
procedure. At any time you may click on the Anderson logo at the top of any
page to return to this page.
1
Advertisement

Related Manuals for Anderson RBMPRO


Summary of Contents for Anderson RBMPRO
- Page 1 / sections of the troubleshooting table. You can also use the shortcuts from the table of contents (procedures) to obtain a specific procedure. At any time you may click on the Anderson logo at the top of any page to return to this page.
- Page 2 Table of contents First start maintenance guide A-RBM-000 Hydraulic Diagram A-RBM-001 Manual valve levers and functions A-RBM-002 Hydraulic configurations (load sensing) A-RBM-003 Connecting to the tractor (electric) A-RBM-004 Connecting to the tractor (Hydraulic A-RBM-005 Connecting to the tractor (hitch height) A-RBM-006 Solenoid problem A-RBM-007...
- Page 3 Bale carrier Diagnostic procedure Model(s) : RBMPRO RBMPRO 1400 RBMPRO 2000 Hydraulic Computer functions of the issues (black or RBMPRO do not flashing work or hydraulic screen/red light hoses can not be indicator is lit) connected Click here to continue...
- Page 4 Danfoss couple. Controller The RBMPRO is equipped with a « safety valve » that needs to be If an error is shown powered on in order to allow oil flow on the Danfoss to circulate through the valve.
- Page 5 2500 PSI as per the factory setting, which can be modified through the Danfoss touchscreen controller. If you received the “PT_LS” error, it mean the RBMPRO could not built the internal pressure high enough to meet the condition request by the computer.
- Page 6 Bale carrier Diagnostic procedure Model(s) : RBMPRO Error “PT_LS” appearing on screen Determining if the pressure built-in buy the tractor meeting working condition requirement Bring the loading arm down, like if you are collecting bale seating vertically, and hold physically the lever of the valve in order to build up pressure into the hydraulic system.
- Page 7 Avoid sharp turns, abrupt starts and If operating the stops while hooked on the RBMPRO. RBMPRO’s at a steep Use with caution on irregular or slanted angle while releasing ground the bale, use the «...
- Page 8 Bale carrier Diagnostic procedure Model(s) : RBMPRO Problem with loading arm When collecting When the The bales hit The bales hit bales that are sitting grabber the loading arm the loading arm Loading arm is horizontally on the releases the...
- Page 9 Make sure the shown on the The trigger located “automatic loading” controller screen says between the loading mode is engaged on that the RBMPRO is arm grabbers is not the controller fully loaded, but it is functioning not. The controller did not...
- Page 10 Bale carrier Diagnostic procedure Model(s) : RBMPRO When the grabber releases the bales on the main deck, the bales do not roll well to the opposite side (far side from the loading arm) Bales are picked up Bales are picked up...
- Page 11 Bale carrier Diagnostic procedure Model(s) : RBMPRO Plastic tearing on bales Plastic torn or puncture Plastic torn or puncture signs are located on the signs located on the CURVED EDGE of the FLAT END of the bales bales Click here to continue...
- Page 12 CURVED EDGE of the bales During the loading phase, stop from time to time to investigate at what stage the bales are damaged by the RBMPRO (Loading, sliding on the rollers or, Unloading) During Loading While sliding down...
- Page 13 Bale carrier Diagnostic procedure Model(s) : RBMPRO During Loading The bales show signs of damage when dropped on the trailer When the loading arm Make sure you are not The roller beds are set initially makes contact exceeding 3km/h when...
- Page 14 Bale carrier Diagnostic procedure While sliding down the roller bed The plastic seems to tear during its transition from the front to the rear of the platform The in-motion loading The conical roller system’s rail touches the mounted on the loading The roller beds are bales previously loaded arm’s side of the trailer...
- Page 15 Bale carrier Diagnostic procedure Model(s) : RBMPRO During Unloading No damage is seen before unloading, however, damage is seen once unloaded on the ground Inspect unloading platform for Bales are sliding when hitting sharp edges and observe the the ground during unloading...
- Page 16 Bale carrier Diagnostic procedure Computer issues (black or flashing screen/red light indicator is lit) I have an error message The screen turns off (black or appearing on the controller flashing) and then back on again screen, and a red light indicator going back to the main menu is blinking on the controller screen.
- Page 17 PROCEDURE REF# A-RBM-000 First use maintenance and guide to start up General Before using the trailer for the first time, we strongly recommend that a full physical inspection and a first stationary manual operation sequence, is completed in order to avoid any problems in the field (see below for step by step).
- Page 18 PROCEDURE REF# A-RBM-001 (hydraulic diagram)
- Page 19 PROCEDURE REF# A-RBM-002 Manual valve levers and functions DESCRIPTION FUNCTION OPEN ↑ AND CLOSE ↓ THE CLAMP EXTEND ↓ AND RETRACT ↑ PIVOT NO1 OF THE LOADING ARM RAISE ↑ AND LOWER ↓ THE LOADING ARM MOVE FORWARD ↑ AND BACKWARD ↓ ON THE LOADING ARM'S SLIDE EXTEND ↑...
- Page 20 PROCEDURE REF# A-RBM-003 (continued) Connecting to the tractor (hydraulic) coupling chart Hydraulic coupling Product model Number of Hydraulic function North American coupling European coupling referencial hydraulic outlet description required Main valve 3/4" male FASTER: ANV-34-NPT-M pressure line 3/4" female FASTER: ANV-34-NPT-F Main valve return to the tank RBMPRO2000...
- Page 21 PROCEDURE REF# A-RBM-004 Connecting to the tractor (electric) 1. Plug in your 12V power cable (included with the RBMPRO) Directly to the terminal or to the COBO plug inside your tractor’s cabin. This cable powers up the electro-hydraulic control's and the RBMPRO’s computer screen.
- Page 22 (see procedure REF# A-RBM-002 (manual valve levers and functions). To use the RBMPRO trailer, your tractor must be equipped with: Two (2) Double action hydraulic ports/outlet ( a distributor that has an in port and an out port 1/2 with a check valve)
- Page 23 PROCEDURE REF# A-RBM-006 Connecting to the tractor (hitch) Follow diagram above for hitching to the tractor. The pick up arm on the RBM is preset to work under conditions that necicit this configuration.
- Page 24 PROCEDURE REF# A-RBM-007 Security Valve, Pressure reducer valve and Solenoid diagnosis Problem: No movement of a part of the automated functions of the RBMPro in automatic pick up mode and/or in manual mode and/or directly from the lever valve Below are the main component you will have to look at: Security Valve Hydraulic pressure sensor «...
- Page 25 Security Valve diagnosis ▪ To verify if the security valve work, you need to: ▪ Kept Danfoss touchscreen connected to the RBMPRO and powered on ▪ Engage hydraulic flow from the tractor to the RBMPRO ▪ Then disconnect the wire supplying 12V power, and use a voltmeter and check if you have power coming out.
- Page 26 PROCEDURE REF# A-RBM-007 Security Valve, Pressure reducer valve and Solenoid diagnosis Problem: No movement of a part of the automated functions of the RBMPro in automatic pick up mode and/or in manual mode Diagnosis: If you have already tested the manual lever (by putting the machine in Manual function on the Danfoss control and then going to the levers on the side of the trailer) and the function does move then you have a problem with the main valve solenoid.
- Page 27 PROCEDURE REF# A-RBM-009 Loading arm’s initial angle adjustment Access the OPTION screen by pressing Go to the PRESSURE AND ANGLE SETTING screen by pressing The angle can be adjusted by increasing or decreasing the value at the top left of the screen...
- Page 28 PROCEDURE REF# A-RBM-010 Horizontal pick up procedure pick up procedure Tip: When you load your first bale; pause the motion before contact with the bale and observe (by exiting the tractor and estimating where contact will take place). By doing this you may avoid bale sideroll and keep your rows tight.
- Page 29 PROCEDURE REF# A-RBM-013 Adjustment of the clamp’s bale sensor (LS_BA sensor) The LS_BA sensor should be setup in an OFF position while not in use. The sensor needs to activate when the small arm is being pushed and then turn off again. To set this sensor up properly you must first adjust it high enough so that its light does not turn on and slowly press on the small arm so that the sensor gets activated by the small arms bottom corner.
- Page 30 PROCEDURE REF# A-RBM-011 Stand-by mode Press in the loading mode screen to activate the “Stand-by” mode. If loading on sloping ground standby is an absolute must for getting the bale arm to drop the bale correctly on the bed of the trailer. The trailer must be on flat ground when dropping bales on the deck...
- Page 31 PROCEDURE REF# A-RBM-016 Conveyors width adjustment procedure The conveyors allow the bales to move on the trailer’s bed while loading and unloading it. It must be set to the proper bale size before loading your bales. The setting of the conveyors’ width is done directly from the hydraulic controls of the tractor. The conveyors are equipped with a visual indicator for positioning.
- Page 32 PROCEDURE REF# A-RBM-018 Unloading tips There are 2 ways of unloading your bales using the RBMPRO 2000. On the left, you can see the bales being unloaded on their flat side. On the right, they are unloaded on their round side.
- Page 34 PROCEDURE REF# A-RBM-019 Grabber and wrist sensors Grabber arm’s bottom view Adjustments: LS_P2_R : Angle of short arm when picking up bales horizontal on the ground LS_BA: Should be adjusted so there is very little movement of the trigger to activate the sensor...
- Page 35 PROCEDURE REF# A-RBM-020 (Wrist) Arm’s top view from the outside...
- Page 36 PROCEDURE REF# A-RBM-021 (Lift arm and shock arm) Back of the arm from the trailer The arm/trailer joint from the right of the trailer...
- Page 37 PROCEDURE REF# A-RBM-008 (Pusher sensors) Adjusting the pusher stroke: To adjust the pusher stroke move the sensor on its sliding bracket (LS_PO_M1) Side of the trailer from the left...
- Page 38 PROCEDURE REF# A-RBM-023 (Stopper rollers) Back of the trailer (Stopper rollers)
- Page 39 PROCEDURE REF# A-RBM-021 Side rails and rollers adjustment procedure The side rails and rollers prevent the bales from falling to the ground while they are loaded and during transportation. They must be adjusted depending on the dimension of the bales. The setting must be done so that there is 15cm (6 inches) between the side rails or rollers and the bales.
- Page 40 PROCEDURE REF# A-RBM-025 Tripple stack tips When using the triple stack configuration, you should keep your bales as close to each other as you can to keep the top bales sitting firmly on top. To adjust how compact your bales are, you can adjust the sensor LS_PO_M1 and LS_PO_R.
- Page 41 PROCEDURE REF# A-RBM-021 Both of these sensor should be adjusted as far out as possible so that the arm is completely in the home position when picking up a bale Asjustment of wrist sensors LS_P2_R et LS_P2_E...
- Page 42 PROCEDURE REF# A-RBM-007 Transport Safety Lock your loading arm and roller beds before moving on public roads or long distances.
- Page 43 PROCEDURE REF# A-RBM-014 Danfoss controller Home Screen...
- Page 44 PROCEDURE REF# A-RBM-015 Danfoss controller Reset bales loaded Adjust with touch screen...
- Page 45 PROCEDURE REF# A-RBM-027 Fuse location...
- Page 46 PROCEDURE REF# A-RBM-017 Side rails and rollers adjustment procedure The side rails and rollers prevent the bales from falling to the ground while they are loaded and during transportation. They must be adjusted depending on the dimension of the bales. The setting must be done so that there is 15cm (6 inches) between the side rails or rollers and the bales.
- Page 47 PROCEDURE REF# A-RBM-026 Controller Icon listing Icon Meaning Icon Meaning Loading mode Play/Pause Unloading mode Confirm Manual mode Retry Option Go up function Emergency button Go down function Transport mode Next step Bale weight Exit page Bale statistics Camera Bale number Bale size correction Alarm...
- Page 48 PROCEDURE REF# A-RBM-028 Indicator status in on diagnostic page in normal condition – Loading vertical bale seating on flat side When you are positionning the machine as shown on the picture, the diagnostic screen should be as below.
- Page 49 PROCEDURE REF# A-RBM-029 Indicator status in on diagnostic page in normal condition – Loading Horizontal bale seating on their curved edge When you are positionning the machine as shown on the picture, the diagnostic screen should be as below.
- Page 50 PROCEDURE REF# A-RBM-030 Understanding the screen message restriction When controlling the machine in « manual mode » through the Danfoss touchscreen controller, you will receive notification about existing « restriction » that could block you of doing a specific movement. It if important to understand how to read those notification RAISING LOADING ARM IMPOSSIBLE LS_PO_R (ON)
Need help?
Do you have a question about the RBMPRO and is the answer not in the manual?
Questions and answers