Quadra-Fire TREKKERI-MBK Owner's Manual
Hide thumbs
Also See for TREKKERI-MBK:
- Owner's manual (30 pages) ,
- Installation manual (28 pages) ,
- Owner's manual (7 pages)
Table of Contents
Advertisement
Quick Links
INSTALLER: Leave this manual with party responsible for use and operation.
OWNER: Retain this manual for future reference.
Contact your dealer with questions regarding installation, operation or service.
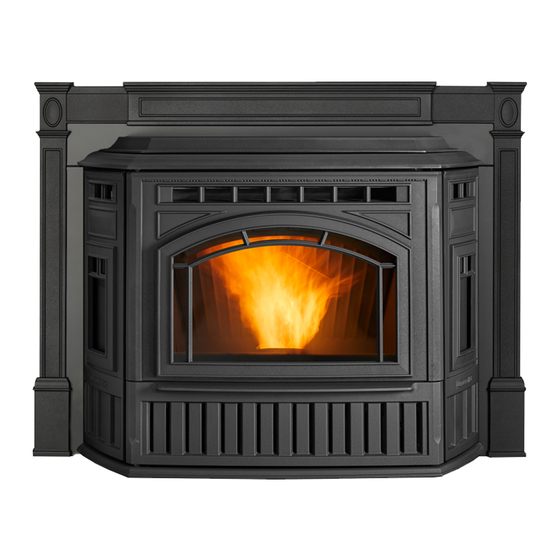
TREKKER INSERT PELLET
APPLIANCE
MODEL(S):
TREKKERI-MBK
TREKKERI-PMH
TREKKERI-TWL
Check building codes prior to installation.
•
Installation MUST comply with local, regional, state
and national codes and regulations.
•
Consult local building, fire officials or authorities
having jurisdiction about restrictions, installation
inspection, and permits.
Installation and service of this appliance should be performed by
qualified personnel. Hearth & Home Technologies recommends
HHT Factory Trained or NFI certified professionals.
For Units Post Serial # HF3166001
1
Owner's Manual
Operation & Care
CAUTION
R
If the information in these instructions is
not followed exactly, a fire could result
causing property damage, personal injury,
or death.
• Do not store or use gasoline or other flammable vapors
and liquids in the vicinity of this or any other appliance.
• Do not over fire - If appliance or chimney connector
glows, you are over firing. Over firing will void
your warranty.
• Comply with all minimum clearances to combustibles
as specified. Failure to comply may cause house fire.
• Do not touch glass until it is cooled
• NEVER allow children to touch glass
• Keep children away
• CAREFULLY SUPERVISE children in same room
as fireplace.
• Alert children and adults to hazards of high temperatures
• High temperatures may ignite clothing or other
flammable materials.
• Keep clothing, furniture, draperies and other flammable
materials away.
Tested and approved for wood pellets only. Burning of
any other type of fuel voids your warranty.
NOTE: To obtain a French translation of this manual,
please contact your dealer or visit
REMARQUE : Pour obtenir une traduction française de
ce manuel, s'il vous plaît contacter votre revendeur ou
visitez
www.quadrafire.com
7082-803B
WARNING
WARNING
HOT SURFACES!
Glass and other surfaces are hot during
operation AND cool down. Hot glass will
cause burns.
CAUTION
www.quadrafire.com
06/21
Advertisement
Table of Contents

Related Manuals for Quadra-Fire TREKKERI-MBK


Summary of Contents for Quadra-Fire TREKKERI-MBK
- Page 1 • Do not store or use gasoline or other flammable vapors MODEL(S): and liquids in the vicinity of this or any other appliance. TREKKERI-MBK • Do not over fire - If appliance or chimney connector TREKKERI-PMH glows, you are over firing. Over firing will void your warranty.
-
Page 2: Sample Of Serial Number / Safety Label
Welcome to the Quadra-Fire Family NOTE: Clearances may only be reduced by means approved by the regulatory authority having jurisdiction A. Sample of Serial Number / Safety Label LOCATION: Behind right cast side panel CAUTION: HOT WHILE IN OPERATION DO NOT TOUCH, KEEP CHILDREN, CLOTHING AND FURNITURE AWAY. -
Page 3: Table Of Contents
V. Thermostat Battery Replacement....17 W. Frequently Asked Questions ....18 Quadra-Fire is a registered trademark of Hearth & Home Technologies. 7082-803B... -
Page 4: Warranty Policy
B. Warranty Policy Hearth & Home Technologies LLC LIMITED LIFETIME WARRANTY Hearth & Home Technologies LLC (“HHT”) extends the following warranty for HHT gas, wood, pellet and electric hearth appliances (each a “Product” and collectively, the “Product(s)”) and certain component parts set forth in the table below (“Component Part(s)”) that are purchased from a HHT authorized dealer or distributor. - Page 5 WARRANTY CONDITIONS: • Because HHT cannot control the quality of any Products sold by unauthorized sellers, this Warranty only covers Products that are purchased through an HHT authorized dealer or distributor unless otherwise prohibited by law; a list of HHT authorized dealers is available on the HHT branded websites.
-
Page 6: Quick Start Guide
C. Quick Start Guide QUICK START GUIDE *Before you plug in this appliance, follow these instructions* 3. Turn DIAL to OFF 4. Plug in the appliance 1. Empty fi re component packet and • Exhaust blower will run for about 45 Seconds (wait for it to stop before any other debris. -
Page 7: Appliance Certification
Important Safety Information A. Appliance Certification B. BTU & Efficiency Specification Emissions Report Model: Trekker Insert Pellet Appliance 0061PS094E Number: Laboratory: OMNI Test Laboratories, Inc. EPA Certification Report No: 061-S-84-2, 0061PS094E Number: 98-17 Number: Solid Fuel Room Appliance, Pellet Fuel EPA Certified Emissions: 0.74 grams per hour Type: Burning Type... -
Page 8: Glass Specifications
C. Glass Specifications WARNING This appliance is equipped with 5mm ceramic glass. Replace glass only with 5mm ceramic glass. Please contact Fire Risk. your dealer for replacement glass. Hearth & Home Technologies disclaims any D. Electrical Rating responsibility for, and the warranty will be voided by, the following actions: 115 VAC, 60 Hz, Start 2.9 Amps, Run 2.45 Amps •... -
Page 9: Operating Instructions
Operating Instructions C. Combustible Materials WARNING Material made of/or surfaced with following materials: - Compressed Paper Fire Risk. - Wood - Plywood/OSB • Do not operate appliance before reading - Sheet Rock (drywall) and understanding operating instructions. - Plastic • Failure to operate appliance properly may - Plant Fibers cause a house fire. -
Page 10: Before Your First Fire
G. User Dial Control Size • Pellets are either 1/4 inch or 5/16 inch (6-8mm) in The appliance has one dial control located on the side of the diameter appliance (behind a drop door) used for changing the heat setting and restarting the appliance. There are five heat •... -
Page 11: Firepot Purge
I. Firepot Purge 3. General maintenance and cleaning. Infrequent or poor general maintenance will result in poorer performance. Purpose: To help remove debris from the firepot and help Indicators for additional maintenance activities include: the unit burn as efficient as possible. - Lazy flame The frequency of the purge cycle is once every 30 minutes - Black-sooted glass... -
Page 12: Restarting The Appliance
M. Restarting the Appliance WARNING Restart Process: Fire Risk 1. When the appliance has run out of fuel and the “empty Do NOT operate appliance: hopper” error code illuminates, add pellet fuel to the • With appliance door open. hopper. •... -
Page 13: Led Color Coding Chart And Explanation
P. LED Color Coding Chart and Explanation The number of flashes between pauses is per one second unless otherwise indicated. No. of Flashes Description Notes Color between pauses Steady ON while Feed Motor is running When priming the feed system and filling the fire pot, DO priming feed tube Green continuously. -
Page 14: Thermostat Controls
Q. Thermostat Controls R. Thermostat Setup Options TEMPERATURE (HEAT / OFF) SWITCH: Setup options for how the thermostat will function are performed using a menu on the display screen. Set this switch to HEAT to control your appliance. The off TO ACCESS THE SETUP MENU: position will disable the appliance. -
Page 15: Thermostat Operation Instructions
ITEM #08 (TEMPERATURE DIFFERENTIAL): TEMPERATURE HOLD: • The thermostat works by turning your heating system on Temperature hold is used for maintaining a fixed set and off whenever the room temperature varies from the temperature; once a HOLD is initiated, the thermostat will desired set-point temperature. -
Page 16: Thermostat Other Features
COPY PROGRAM FEATURE: KEYPAD LOCKOUT: SET TEMPERATURE There is the option to lock the front panel buttons to prevent Using similar instructions as unauthorized tampering of your thermostat settings. PROGRAMS the COPY button will allow a whole day of set program events to be copied to another day. To Lock the Keypad: 1. -
Page 17: Thermostat Battery Replacement
SOFTWARE RESET: CONNECT THERMOSTAT WIRES APPLIANCE: Software reset is used to erase ALL temperature events, and to return all user-adjustable software settings back to There is a 4 screw terminal block located on the back their original factory default settings. lower left corner of the stove directly above the power cord inlet. -
Page 18: Frequently Asked Questions
W. Frequently Asked Questions What causes my glass to become dirty? If the glass has white ash build up it is normal and the glass should be cleaned. If it is a black soot build up airflow through the unit may be restricted. The most often cause is overdue maintenance and cleaning. See Maintaining and Servicing on page 19 and/or make adjustments to the trim control. -
Page 19: Maintenance And Service
Maintenance and Service When properly maintained, your appliance will give you many This pellet heater has a manufacturer-set minimum low years of trouble-free service. Contact your dealer to answer burn rate that must not be altered. It is against federal questions regarding proper operation, troubleshooting regulations to alter this setting or otherwise operate this and service for your appliance. -
Page 20: General Maintenance And Cleaning
C. General Maintenance and Cleaning 2. Cleaning Ash Pan • Frequency: Weekly or every 3-5 bags 1. Cleaning Firepot using Lever • By: Homeowner • Frequency: Daily or as needed* a. Locate the ash pan underneath the firepot. • By: Homeowner b. - Page 21 5. Cleaning Heat Exchanger & Drop Tube • Frequency: Monthly or every ton of fuel (50 bags). • By: Homeowner NOTE: Heavy duty vacuum cleaners may be obtained, specifically designed for solid fuel appliance cleaning. Tools Needed: A Shop Vacuum and generic micro cleaning kit;...
- Page 22 6. Ash Removal System Inspection & Cleaning 8. Cleaning the Glass • Frequency: Monthly or after burning 50 bags • Frequency: See chart on page 19 • By: Homeowner • By: Homeowner a. Be sure the appliance is allowed to cool. a.
-
Page 23: Soot Or Creosote Fire Awareness
10. Cleaning Exhaust System 13. Soot and Fly-ash: Formation & Need for removal in Exhaust Venting System. (Requires No Lubrication) • Frequency: See chart on page 19 • Frequency: See chart on page 19 • By: Qualified Service Technician and/or Homeowner •... -
Page 24: High Ash Fuel Content Maintenance
E. High Ash Fuel Content Maintenance • Frequency: Daily Baffle • By: Homeowner If the ash build-up exceeds the half way point in the fire pot or if clinkers are adhering to the sides of the fire pot, the fire pot floor is not being cycled enough. WARNING Risk of Fire and Smoke! •... -
Page 25: Convection Blower Replacement
H. Convection Blower Replacement I. Combustion/Exhaust Blower Replacement 1. Follow the proper shut down procedures. 1. Follow the proper shut down procedures. 2. Remove the left side panel by loosening the 2 2. Remove the right side panel by loosening the 2 screws using a Phillips head screw driver or wrench screws using a Phillips head screw driver or wrench (Figure 25.1). -
Page 26: Troubleshooting Guide
Troubleshooting Guide A. General Appliance Troubleshooting With proper installation, operation, and maintenance your appliance will provide years of trouble-free service. If you do experience a problem, this troubleshooting guide will assist a qualified service person in the diagnosis of a problem and the corrective action to be taken. - Page 27 Symptom Possible Cause Corrective Action Area where the thermostat is placed Check thermostat proximity to doors and windows affects temperature. Thermostat located in tight spaces Inspect thermostat location and make sure it is not Appliance starts and stops frequently effecting the on/off cycling of the close to a surface that heats and cools quickly.
- Page 28 Symptom Possible Cause Corrective Action Clean appliance including the fire pot, exhaust path, Dirty appliance or venting and venting system Purge old fuel and use higher quality / or brand of Poor fuel quality, high ash content. fuel Large, lazy flame (orange color) with black ash / soot buildup on glass Incorrect air-fuel adjustment Adjust the trim (see trim adjustment section)
-
Page 29: Reference Materials
Reference Materials When describing the location of a component, it is always AS YOU FACE THE FRONT OF THE APPLIANCE. A. Component Functions 1. Exhaust Blower The combustion (exhaust) blower is mounted in the bottom right rear of appliance. The blower is designed to pull the exhaust from the appliance and push it out through the venting system. - Page 30 13. Vacuum Switch The vacuum switch is located on the right side of the appliance under the feed motor, behind right side panel. Its vacuum hose connects to the drop tube. This switch turns the feed system on when vacuum is present in the firebox. The vacuum switch is a safety device to shut off the feed motor if the exhaust or the heat exchanger system is dirty, plugged, or if the firebox door is open.
-
Page 31: Service And Maintenance Log
B. Service and Maintenance Log Date of Service Performed By Description of Service 7082-803B 06/21... -
Page 32: Service Parts List
C. Service Parts List TREKKER INSERT Service Parts Pellet Insert Beginning Manufacturing Date: June 2018 Ending Manufacturing Date: Active Color SKU No. Mfg. Dates Matte Black TREKKERI-MBK 06/18 - Porcelain Mahogany TREKKERI-PMH 06/18 - Sienna Bronze TREKKERI-CSB 06/18 - 05/19 Twilight TREKKERI-TWL 03/19 - Part number list on following pages. - Page 33 TREKKER INSERT Service Parts Beginning Manufacturing Date: June 2018 Ending Manufacturing Date: Active IMPORTANT: THIS IS DATED INFORMATION . Parts must be ordered from a dealer or Stocked Hearth and Home Technologies does not sell directly to consumers distributor. . Provide model number and serial number when requesting service parts from your dealer or distributor.
- Page 34 TREKKER INSERT Service Parts Beginning Manufacturing Date: June 2018 Ending Manufacturing Date: Active #16 Door Assembly #20 Firepot Riser Assembly 20.1 16.1 16.2 20.2 16.3 20.8 20.3 20.4 20.5 20.7 16.4 20.6 IMPORTANT: THIS IS DATED INFORMATION . Parts must be ordered from a dealer or Stocked Hearth and Home Technologies does not sell directly to consumers distributor.
- Page 35 TREKKER INSERT Service Parts Beginning Manufacturing Date: June 2018 Ending Manufacturing Date: Active IMPORTANT: THIS IS DATED INFORMATION. Parts must be ordered from a dealer or distributor. Hearth and Stocked Home Technologies does not sell directly to consumers. Provide model number and serial number when requesting service parts from your dealer or distributor.
- Page 36 TREKKER INSERT Service Parts Beginning Manufacturing Date: June 2018 Ending Manufacturing Date: Active IMPORTANT: THIS IS DATED INFORMATION . Parts must be ordered from a dealer or Stocked Hearth and Home Technologies does not sell directly to consumers distributor. . Provide model number and serial number when requesting service parts from your dealer or distributor.
- Page 37 TREKKER INSERT Service Parts Beginning Manufacturing Date: June 2018 Ending Manufacturing Date: Active IMPORTANT: THIS IS DATED INFORMATION . Parts must be ordered from a dealer or Stocked Hearth and Home Technologies does not sell directly to consumers distributor. . Provide model number and serial number when requesting service parts from your dealer or distributor.
- Page 38 Hearth & Home Technologies 352 Mountain House Road Halifax, PA 17032 Division of HNI INDUSTRIES Please contact your Quadra-Fire dealer with any questions or concerns. For the number of your nearest Quadra-Fire dealer log onto www.quadrafi re.com CAUTION DO NOT DISCARD THIS MANUAL •...
Need help?
Do you have a question about the TREKKERI-MBK and is the answer not in the manual?
Questions and answers