Quadra-Fire TREKKERI-MBK Installation Manual
Trekker insert pellet
Hide thumbs
Also See for TREKKERI-MBK:
- Owner's manual (38 pages) ,
- Owner's manual (30 pages) ,
- Owner's manual (7 pages)
Table of Contents
Advertisement
Quick Links
INSTALLER: Leave this manual with party responsible for use and operation.
OWNER: Retain this manual for future reference.
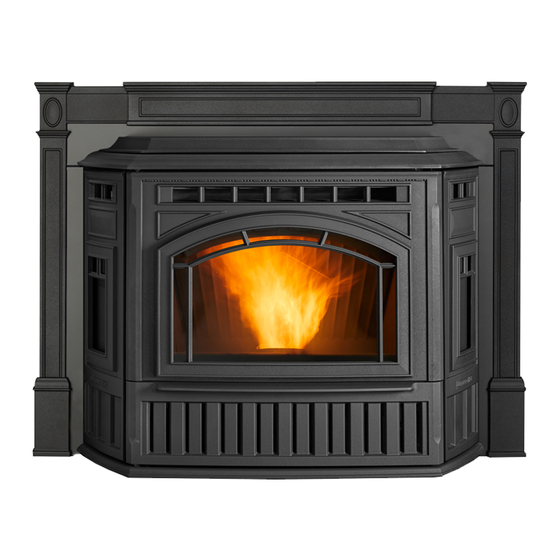
TREKKER INSERT PELLET
APPLIANCE
MODEL(S):
TREKKERI-MBK
TREKKERI-PMH
TREKKERI-TWL
Check building codes prior to installation.
•
Installation MUST comply with local, regional, state
and national codes and regulations.
•
Consult local building, fire officials or authorities
having jurisdiction about restrictions, installation
inspection, and permits.
Installation and service of this appliance should be performed by
qualified personnel. Hearth & Home Technologies recommends
HHT Factory Trained or NFI certified professionals.
1
Installation Manual
Installation & Appliance Set-Up
NOTICE: DO NOT DISCARD THIS MANUAL
CAUTION
R
If the information in these instructions is
not followed exactly, a fire could result
causing property damage, personal injury,
or death.
• Do not store or use gasoline or other flammable vapors
and liquids in the vicinity of this or any other appliance.
• Do not over fire - If appliance or chimney connector
glows, you are over firing. Over firing will void
your warranty.
• Comply with all minimum clearances to combustibles
as specified. Failure to comply may cause house fire.
• Do not touch glass until it is cooled
• NEVER allow children to touch glass
• Keep children away
• CAREFULLY SUPERVISE children in same room
as fireplace.
• Alert children and adults to hazards of high temperatures
• High temperatures may ignite clothing or other
flammable materials.
• Keep clothing, furniture, draperies and other flammable
materials away.
Tested and approved for wood pellets only. Burning of
any other type of fuel voids your warranty.
NOTE: To obtain a French translation of this manual,
please contact your dealer or visit
REMARQUE : Pour obtenir une traduction française de
ce manuel, s'il vous plaît contacter votre revendeur ou
visitez
www.quadrafire.com
7082-153K
WARNING
WARNING
HOT SURFACES!
Glass and other surfaces are hot during
operation AND cool down. Hot glass will
cause burns.
CAUTION
www.quadrafire.com
01/21
Advertisement
Table of Contents

Related Manuals for Quadra-Fire TREKKERI-MBK


Summary of Contents for Quadra-Fire TREKKERI-MBK
- Page 1 MODEL(S): • Do not store or use gasoline or other flammable vapors and liquids in the vicinity of this or any other appliance. TREKKERI-MBK • Do not over fire - If appliance or chimney connector TREKKERI-PMH glows, you are over firing. Over firing will void your warranty.
-
Page 2: Table Of Contents
G. Pipe Selection Chart ......16 Quadra-Fire is a registered trademark of Hearth & Home Technologies. -
Page 3: Important Safety Information
Important Safety Information A. Appliance Certification B. BTU & Efficiency Specification Emissions Report Model Trekker Insert Pellet Appliance 0061PS094E Number: Laboratory OMNI Test Laboratories, Inc. EPA Certification Report Number: 98-17 061-S-84-2 Number: Number. EPA Certified Emissions: 0.74 grams per hour Solid Fuel Room Appliance, Pellet Fuel Type *LHV Tested Efficiency: 83.2%... -
Page 4: Glass Specifications
C. Glass Specifications I. California - Prop65 This appliance is equipped with 5mm ceramic glass. WARNING Replace glass only with 5mm ceramic glass. Please contact your dealer for replacement glass. This product and the fuels used to operate this product (wood), and the products of combustion of such fuels, can expose you to D. -
Page 5: Getting Started
Getting Started A. Design, Installation & Location Considerations Since pellet exhaust can contain ash, soot or sparks, you must consider the location of: NOTICE: Check building codes prior to installation. • Windows • Air Intakes 1. Appliance Location • Air Conditioner •... -
Page 6: Tools And Supplies Needed
C. Inspect Appliance and Components WARNING • Open the appliance and remove all the parts and articles packed inside the Component Pack. Inspect all the parts Risk of Fire! and glass for shipping damage. • Damaged parts could impair safe operation. •... -
Page 7: Install Checklist
D. Install Checklist ATTENTION INSTALLER: Follow this Standard Work Checklist This standard work checklist is to be used by the installer in conjunction with, not instead of, the instructions contained in this installation manual. __________________________________________________________________________ Customer: ______________________________________________________________________ Date Installed: _______________________________________________________________________ Lot/Address: ________________________________________________________________ Location of Appliance:... -
Page 8: Dimensions And Clearances
Dimensions and Clearances A. Appliance Dimensions 32 in [814mm] 32 in [814mm] 32 in [814mm] 23-7/8 in [606mm] 23-7/8 in [606mm] 16-1/4 in 16-3/8 in [413mm] [415mm] 15-1/8 in 15 in 14-1/4 in [384mm] 14-1/8 in [382mm] [361mm] [359mm] 13 in 13-1/8 in [330mm] [333 mm]... -
Page 9: Clearance To Combustibles, Us & Can
B. Clearance to Combustibles, US & CAN Built-in Appliance - Rear Vent 26-7/8 in.** (683 mm) 36 in. (914 mm) 19-3/8 in.* *If interior of chase will be drywalled, add the (572 mm) thickness to this measurement. **From finished floor protection. The size of your floor protector choice must be added to this dimension. -
Page 10: Masonry Chimney And Fireplace Clearances
C. Masonry Chimney and Fireplace Clearances D. Minimum Opening for Masonry & ZC Fireplaces TOP TRIM 18-5/16 in 24-5/16 in (465mm) (618mm) 29-3/4 in (1010mm) Figure 10.3 FLOOR PROTECTION 32 (813mm) 32 (813mm) Minimum Opening Dimensions Inches Millimeters Figure 10.1 A Height 24-3/8 Front Width (Steel Panel Set) -
Page 11: Hearth Extension
E. Hearth Extension WARNING Use a non-combustible ember floor protector, extending beneath the appliance and to the front, and to the sides as THIS FIREPLACE MAY HAVE BEEN ALTERED indicated in Floor Protection below. TO ACCOMMODATE AN INSERT. IT MUST BE RETURNED TO ITS ORIGINAL CONDITION F. -
Page 12: Installation Into A Masonry Fireplace
I. Prefabricated Metal Chimney The chimney can be new or existing, masonry or prefabricated and must meet the following minimum requirements: - Must be minimum 6 inch (152mm) inside diameter of high temperature chimney listed to UL 103 HT (2100°F) or ULC-S628. - Must use components required by the manufacturer for installation. -
Page 13: Vent Information
Vent Safety Information A. Venting Termination Minimum Requirements Electrical Service Inside Corner FIXED FIXED OPEN CLOSED CLOSED OPEN J or K Termination Cap Restricted Area Air Supply Inlet Gas Meter All minimum clearances are listed with an Outside Air Kit (OAK) installed, unless otherwise noted in table below. 12 in. -
Page 14: Avoiding Smoke And Odors
B. Avoiding Smoke and Odors Vent Configurations When installing a pellet appliance with a horizontal vent Negative Pressure, Shut-Down Electrical configuration the frequency of power outages should Power Failure be considered: To reduce the probability of back-drafting or burn-back • Power outages during operation will cause the appliance in the pellet appliance during power failure or shut down to immediately turn off and may create conditions where conditions, it must be able to draft naturally without exhaust... -
Page 15: Negative Pressure
• Imbalances of the HVAC air handling system or the 3 to 6 inch (76-152mm) Top Vent Offset Adapter, • Upper level air leaks such as: use Listed double wall flue connector. A Quadra-Fire Outside Air Kit (OAK-3) must be used with manufactured - Recessed lighting home installations. -
Page 16: Equivalent Feet Of Pipe
F. Equivalent Feet of Pipe WARNING The table below can help you calculate the equivalent feet of pipe which is a method used to determine pellet vent size Vent surfaces get HOT, can cause burns (Figure 16.1). if touched. Non-combustible shielding or guards may be required. -
Page 17: Venting Systems
Venting Systems A. Full Reline with Outside Air - Horizontal B. Full Reline with Outside Air - Vertical NOTE: Check clearances carefully for this type of CAUTION installation to ensure adequate room for outside air venting. Never draw outside combustion air from: •... -
Page 18: Direct Connect With Outside Air
C. Direct Connect with Outside Air D. Direct Connect without Outside Air NOTE: In Canada, only a full reline is allowed per ULC S628-93, ORD ULC C1482-M1990. Note: • Use metal plate around exhaust vent Note: pipe seal edges with •... -
Page 19: Appliance Set-Up
Appliance Set-Up A. Leveling System The leveling bolts are located on the sides of the appliance, front and rear. To access the bolts, remove the front access panels. Reach in and turn the bolt to the desired height to Abaisser le nivellement level the appliance (Figure 19.1). -
Page 20: Surround & Cast Trim Set
D. Surround & Cast Trim Set E. Surround & Basic Trim Set 1. Remove contents from box being careful not to scratch 1. Secure the top panel to the surround sides with the or damage the cast trim pieces. screws provided (Figure 20.3). 2. -
Page 21: Optional Log Set Instructions
F. Optional Log Set Instructions 2 PIECE LOG SET INSTALLATION 1. Place the left log as shown. There are 2 indentations in the bottom of the log to fit over the screw heads in the Right Log firebox (Figures 21.1 and Figure 21.2). 2. -
Page 22: Power To Appliance And User Interface
H. Power to Appliance and User Interface I. Location & Mounting of User Interface 1. Prior to installing the power cord, turn the user interface NOTICE: DO NOT use if not properly mounted to a wall. to OFF. 2. Make sure the was receptacle has 120 VAC output. To ensure you have a reliable Bluetooth Connection locate the user interface: NOTE: Using a circuit protector can protect the appliance... -
Page 23: Mobile Home Installation
Mobile Home Installation You must use a Quadra-Fire Outside Air Kit for CAUTION installation in a mobile home. 1. An outside air inlet must be provided for the combustion THE STRUCTURAL INTEGRITY OF THE MOBILE air and must remain clear of leaves, debris, ice and/or HOME FLOOR, WALL AND CEILING/ROOF MUST snow. -
Page 24: Reference Materials
Refrence Materials A. Service & Maintenance Log Date of Service Performed By Description of Service 7082-153K 01/21... - Page 25 Date of Service Performed By Description of Service 7082-153K 01/21...
-
Page 26: Accessory List
B. Accessory List TREKKER INSERT Service Parts Beginning Manufacturing Date: June 2018 Ending Manufacturing Date: Active IMPORTANT: THIS IS DATED INFORMATION . Parts must be ordered from a dealer or Stocked Hearth and Home Technologies does not sell directly to consumers distributor. - Page 27 TREKKER INSERT Service Parts Beginning Manufacturing Date: June 2018 Ending Manufacturing Date: Active IMPORTANT: THIS IS DATED INFORMATION . Parts must be ordered from a dealer or Stocked Hearth and Home Technologies does not sell directly to consumers distributor. . Provide model number and serial number when requesting service parts from your dealer or distributor.
- Page 28 Hearth & Home Technologies 352 Mountain House Road Halifax, PA 17032 Division of HNI INDUSTRIES Please contact your Quadra-Fire dealer with any questions or concerns. For the number of your nearest Quadra-Fire dealer log onto www.quadrafi re.com CAUTION DO NOT DISCARD THIS MANUAL •...
Need help?
Do you have a question about the TREKKERI-MBK and is the answer not in the manual?
Questions and answers