
Subscribe to Our Youtube Channel
Related Manuals for SCHUNK KSP plus-BWM Series


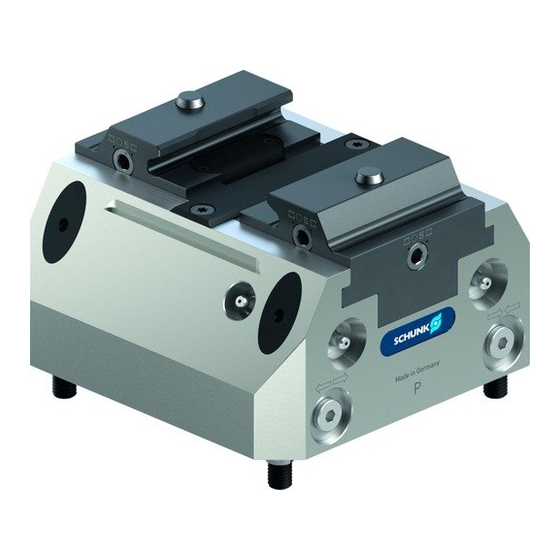
Summary of Contents for SCHUNK KSP plus-BWM Series
- Page 1 Translation of original operating manual TANDEM Clamping Force Block KSP plus-BWM, KSP-LH plus-BWM Assembly and Operating Manual Superior Clamping and Gripping...
- Page 2 Imprint Copyright: This manual is protected by copyright. The author is SCHUNK GmbH & Co. KG. All rights reserved. Any reproduction, processing, distribution (making available to third parties), translation or other usage - even excerpts - of the manual is especially prohibited and requires our written approval.
-
Page 3: Table Of Contents
Table of Contents Table of Contents 1 General ........................5 1.1 About this manual ....................5 1.1.1 Presentation of Warning Labels ..............5 1.1.2 Applicable documents ................... 6 1.1.3 Sizes ....................... 6 1.2 Warranty ........................6 1.3 Scope of delivery ...................... 6 1.4 Accessories ....................... - Page 4 Table of Contents 6.1 Assembling the clamping block on the machine table .......... 26 6.2 Connecting the clamping block ................27 6.3 Assembling the clamping block on the base plate ..........28 6.4 Inserting the changing jaws ..................29 6.5 Removing the changing jaws from the quick-change interface......32 7 Trouble shooting .....................
-
Page 5: General
General General About this manual This manual contains important information for a safe and appropriate use of the product. This manual is an integral part of the product and must be kept accessible for the personnel at all times. Before starting work, the personnel must have read and understood this operating manual. -
Page 6: Applicable Documents
Applicable documents • General terms of business * • Catalog data sheet of the purchased product * The documents marked with an asterisk (*) can be downloaded on our homepage schunk.com 1.1.3 Sizes This operating manual applies to the following sizes: •... -
Page 7: Basic Safety Notes
By conversions, changes, and reworking, e.g. additional threads, holes, or safety devices can impair the functioning or safety of the product or damage it. • Structural changes should only be made with the written approval of SCHUNK. 04.00|1151449 KSPplus-BWM, KSP-LHplus-BWM |en... -
Page 8: Spare Parts
Use of unauthorized spare parts Using unauthorized spare parts can endanger personnel and damage the product or cause it to malfunction. • Use only original spare parts or spares authorized by SCHUNK. Use of special chuck jaws Requirements of the chuck jaws When using special chuck jaws, please observe the following rules: •... -
Page 9: Personal Protective Equipment
Basic safety notes • All work may only be performed by qualified personnel. • Before working with the product, the personnel must have read and understood the complete assembly and operating manual. • Observe the national safety regulations and rules and general safety instructions. -
Page 10: Notes On Safe Operation
Basic safety notes Notes on safe operation Incorrect handling of the personnel Incorrect handling and assembly may impair the product's safety and cause serious injuries and considerable material damage. • Avoid any manner of working that may interfere with the function and operational safety of the product. -
Page 11: Disposal
Basic safety notes • Order appropriately trained personnel to rectify the malfunction. • Do not recommission the product until the malfunction has been rectified. • Test the product after a malfunction to establish whether it still functions properly and no increased risks have arisen. 2.12 Disposal Handling of disposal... -
Page 12: Protection During Commissioning And Operation
Basic safety notes • Stand clear of suspended loads and do not step into their swiveling range. • Never move loads without supervision. • Do not leave suspended loads unattended. 2.13.2 Protection during commissioning and operation Falling or violently ejected components Falling and violently ejected components can cause serious injuries and even death. -
Page 13: Notes On Particular Risks
Basic safety notes 2.13.4 Notes on particular risks WARNING Risk of injury to operating personnel if the clamping block fails because the technical data have been exceeded and a workpiece is released or parts fly off! • The technical data specified by the manufacturer for using the clamping block must never be exceeded. - Page 14 Basic safety notes CAUTION Risk of crushing from chuck jaws opening and closing when manually loading and unloading! • Do not reach between the chuck jaws. • Wear personal protective equipment. • Prevent the clamping block from being actuated unintentionally. •...
-
Page 15: Technical Data
Technical data Technical data Installation position variable Operating temperature + 5 °C to + 60 °C Noise emission [dB(A)] ≤ 70 Pressure medium Compressed air, compressed air quality according to ISO 8573-1:7 4 4 KSP plus-BWM, KSP-LH plus-BWM Designation LH 100 LH 160 LH 250 Stroke per jaw [mm] Clamping force* at max. - Page 16 Technical data KSP plus-BWM, KSP-LH plus-BWM Dimension Ø Q 10 f7 12 f7 14f7 Ø R 59.8 69.3 Dimensions 04.00|1151449 KSPplus-BWM, KSP-LHplus-BWM |en...
-
Page 17: Tightening Torques For Screws
Tightening torques for screws Tightening torques for screws Tightening torques to mount the clamping system on the machine table (screw quality 10.9) Screw size M4 M5 M6 M8 M10 M12 M14 M16 M18 M20 M22 M24 Admissible torque 120 160 200 290 400 500 (Nm) Tightening torques to mount top jaws on the TANDEM clamping block (screw quality 12.9) -
Page 18: Function
Function Function Functional description of quick-change jaw system Access Points for Changing Jaw Interface The TANDEM KSP plus-BWM/KSP-LH plus-BWM clamping force blocks come with a semi-automatic jaw quick-change system for external workpiece clamping. Changing jaws can be locked in place with a form-fitting diagonal pull without additional mounting screws on the base jaw. -
Page 19: Construction Concept And Dimensions Of Bwm System-Compatible Changing Jaws
Function from the top through a through hole in the changing jaw itself. The changing jaw can then be lifted off inwards and removed. The kinematics are automatically moved back into locking position by a spring mechanism. The lock bolt also moves back out. NOTE : Be sure to only apply moderate force when turning the hexagonal screwdriver. - Page 20 Function Changing jaw type: WTR The WTR changing jaw is essentially a top jaw blank. The clamping contour can be individually adjusted. The jaw steps can be milled to a limited extent. The clamping contour must be placed under clamping pressure. Additionally, a spacer with sufficient clamping stroke reserve must be clamped between the changing jaws.
-
Page 21: Wtr Changing Jaws
Function 5.2.1 WTR changing jaws Soft and undrilled. Mounted to TANDEM KSP plus-BWM standard stroke and long stroke with quick-change interlocking. Made out of hardenable 16MnCr5. Workpiece-specific adjusting possible by machining under clamping pressure. Bore holes and clamping contours can be made to order. WTR changing jaw Designation WTR 100... -
Page 22: Wtg Changing Jaws
Function Designation WTR 100 WTR 160 WTR 250 Weight/set 1.2 kg 5.2 kg 15.9 kg Sample workpiece clamping with WTR changing jaw 5.2.2 WTG changing jaws Hard and drilled with bore hole grid, as supporting jaw for SEI 6x reversible clamping inserts and STG clamping bars. Mounted to TANDEM KSP-BWM standard stroke and long stroke with quick-change interlocking. - Page 23 Function WTG changing jaw Designation WTR 100 WTR 160 WTR 250 0402311 0402312 0402313 suitable for sizes KSP/(-LH) plus 100- KSP/(-LH) plus 160- KSP/(-LH) plus 250- 28.5 d D1 d D2 Weight/set 0.8 kg 3.0 kg 9.2 kg 04.00|1151449 KSPplus-BWM, KSP-LHplus-BWM |en...
- Page 24 Function WTG changing jaw accessories: • SEI 6x reversible clamping inserts • STG clamping bars NOTE: 6x reversible clamping inserts and clamping bars come with mounting screws. Only use the mounting screws included at the ( 4, Page specified torque when assembling 17).
-
Page 25: Functional Testing
• If the clamping system is involved in a collision, it must be test- ed to see if it is still functioning properly before using it again. Only use original SCHUNK spare parts when replacing damaged items. • Visually inspect the clamping block at least once per shift for visible damage and defects. -
Page 26: Assembly
Assembly Assembly The item numbers specified for the corresponding individual components relate to chapter drawings ( 10, Page 51) and the figures "Assembling the clamping block" and "Connecting the clamping block". Make sure the power supply for the clamping block is off during assembly and connection. -
Page 27: Connecting The Clamping Block
Assembly Connecting the clamping block Make sure the power supply is off when connecting the clamping force block. See the "Basic Safety Notes" ( 2, Page 7) chapter. CAUTION Risk of workpiece loss and damage to automated system due to loss of air pressure caused by damaged pneumatic lines. -
Page 28: Assembling The Clamping Block On The Base Plate
Assembly • Connections I and II for operation without a base plate. • Connections III and IV in the base for hose-free, direct connection to the machine table or on the base plate. The threads for hose-free, direct connection are not designed for pneumatic fittings. -
Page 29: Inserting The Changing Jaws
Assembly are included in the accessory kit that comes with the clamping force block. • Do not open the connections on the front of the clamping force block (I, II) or alternatively seal them with suitable dummy plugs (M5 or G1/8"). •... - Page 30 Assembly Locking in place without tools 04.00|1151449 KSPplus-BWM, KSP-LHplus-BWM |en...
- Page 31 Assembly 2. Semi-automatic locking: With semi-automatic locking, the lock bolt is driven down with a hexagonal screwdriver. This is done by applying a one-quarter counter-clockwise turn at one of the side access points. Once the jaw is inserted into the interface and positioned, the locking kinematics return to their original position.
-
Page 32: Removing The Changing Jaws From The Quick-Change Interface
Assembly Removing the changing jaws from the quick-change interface The jaws can be removed in two ways: 1. Two-handed: Unlock the jaws with a one-quarter counter-clockwise turn from the hexagonal screwdriver at one of the side access points. At the same time, lift the jaw diagonally from the center upward and out of the change interface. - Page 33 Assembly 2. One-handed: Feed the hexagonal screwdriver through the hole in the changing jaw and unlock it directly from above. The tool drives the lock bolt down and simultaneously can be used to tip the jaw out of the change interface. One-handed 04.00|1151449 KSPplus-BWM, KSP-LHplus-BWM |en...
-
Page 34: Trouble Shooting
Check maintenance unit, perform maintenance Place oiler closer to clamping system Set required oil level Chuck piston screw broken (overload) Send clamping system to SCHUNK for repairs or disassemble clamping system and repair using ( 8.1, Page 37) original SCHUNK spare parts... - Page 35 Trouble shooting Possible cause Solution(s) The changing jaws have been switched. Changing and base jaw numbers must match. Increased changing jaw "rear-up" Clean interfaces between base and changing jaws. Set changing jaw firmly into change interface by pulling backward. Clamping block does not complete stroke Possible cause Solution(s) Chips or dirt between covering strip...
-
Page 36: Maintenance And Care
The base jaws (item 2), chuck piston (item 3) and housing (item 1) are made to go together. To replace these parts, ship the entire clamping system to SCHUNK along with a repair order. In order to keep the clamping block in proper working order, observe the following notes: •... -
Page 37: Disassembling And Assembling The Clamping Force Block
(item 1) are matched to each other. These parts cannot be replaced individually. To replace these parts, ship the entire clamping force block to SCHUNK along with a repair order. Always transport the clamping force block without the changing jaws. The KSP plus 250-BWM and KSP-LH plus 250-BWM have an... - Page 38 13 Remove the seals (items 12, 15, 17). 14 Clean all the parts thoroughly and check for damage and wear. Replace damaged and worn parts with original SCHUNK spare parts. 15 Lubricate the new seals (items 12, 15, 17, 20, 22) with Renolit HLT 2 or equivalent grease.
-
Page 39: Leak Test
Maintenance and care 20 Press the cylinder piston (item 4) into the cylinder of the housing (item 1). Do not tilt the cylinder piston (item 4). 21 Place the O-rings (items 20, 22) in the housing (item 1) and the O-ring (item 17) around the cover (item 5). -
Page 40: Testing Quick-Change Jaw Function
Maintenance and care 5 After 24 hours, the clamping force block is: – sealed if the pressure gauge indicates a drop in pressure of less than 0.5 bar. – leaking if the pressure gauge indicates a drop in pressure of more than 0.5 bar. - Page 41 Maintenance and care CAUTION Risk of injury from screwdriver slipping! Pressing on the lock bolt with the hexagonal screwdriver without a changing jaw in place can result in injury from the screwdriver slipping. • Never press on the lock bolt with the hexagonal screwdriver without a changing jaw in place.
-
Page 42: Seal Kit And Parts List
Seal Kit and Parts List Seal Kit and Parts List When ordering spare parts, the type, size and, if possible, the serial number of the clamping force block must always be stated to avoid delivery mistakes. Seals, sealing elements, screw connections, springs, bearings, screws, wiper bars and parts that come into contact with the workpiece are not covered by the warranty. -
Page 43: Accessory Packs
Seal Kit and Parts List Item Designation Quantity Flat seal O-ring, DIN 3771 6 x 1.50 Wear parts - recommend replacing when maintenance is performed The seal kit can only be ordered as a compete kit. Accessory packs KSPplus 100-BWM, KSP-LH plus 100-BWM Item Designation Quantity... -
Page 44: Stücklisten
Seal Kit and Parts List Stücklisten KSP plus 100-BWM Item Designation Quantity Body Base jaw Chuck piston Cylinder piston Cover Covering strip Covering strip 8*** Plug 9*** Fitting screw 10f7/M8 Lubrication nipple Locking screw 12** Quad-ring 72.62 x 3.53 Sound absorber Screw DEI 4762/10.9 M8 x 20 mm 15** Combined sealing element... - Page 45 Seal Kit and Parts List Item Designation Quantity Compression spring Cylindrical pin, DIN 7979 - 5 m6 x 24 mm KSP-LH plus 100-BWM Item Designation Quantity Body Base jaw Chuck piston Cylinder piston Cover Covering strip Covering strip 8*** Plug 9*** Fitting screw 10f7/M8 Lubrication nipple...
- Page 46 Seal Kit and Parts List Item Designation Quantity Compression spring Cylindrical pin, DIN 7979 - 5 m6 x 28 mm KSP plus 160-BWM Item Designation Quantity Body Base jaw Chuck piston Cylinder piston Cover Covering strip Covering strip 8*** Plug 9*** Fitting screw 12f7/M10 Lubrication nipple...
- Page 47 Seal Kit and Parts List Item Designation Quantity Compression spring Cylindrical pin, DIN 7979 - 5 m6 x 24 mm O-ring DIN 3771 5.5 x 1.50 KSP-LH plus 160-BWM Item Designation Quantity Body Base jaw Chuck piston Cylinder piston Cover Covering strip Covering strip 8***...
- Page 48 Seal Kit and Parts List Item Designation Quantity Unlocking bolt 2 Compression spring Cylindrical pin, DIN 7979 - 5 m6 x 28 mm O-ring DIN 3771 5.5 x 1.50 KSP plus 250-BWM Item Designation Quantity Body Base jaw Chuck piston Cylinder piston Cover Covering strip...
- Page 49 Seal Kit and Parts List Item Designation Quantity 27*** Clamping sleeve, DIN EN ISO 13337 DRM. 16 x 22 Locking bolt Unlocking bolt Unlocking bolt 2 Compression spring Cylindrical pin, DIN 7979 - 6 m6 x 32 mm KSP-LH plus 250-BWM Item Designation Quantity...
- Page 50 Seal Kit and Parts List Item Designation Quantity Set-screw, similar to DIN EN ISO 4026/45H M5 x 5 mm IN6RD/VZ/PA 27*** Clamping sleeve, DIN EN ISO 13337 DRM. 16 x 22 Locking bolt Unlocking bolt Unlocking bolt 2 Compression spring Cylindrical pin, DIN 7979 - 6 m6 x 32 mm * Individual components are made to go together and cannot not be replaced by the customer.
-
Page 51: Drawings
Drawings Drawings for size 160 for sizes 160/250 Centering with clamping **** Centering with fitting screws sleeves 04.00|1151449 KSPplus-BWM, KSP-LHplus-BWM |en... - Page 52 Drawings Clamping jaw interface design 04.00|1151449 KSPplus-BWM, KSP-LHplus-BWM |en...
-
Page 53: Translation Of The Original Declaration Of Incorporation
Directive 2006/42/EG, Annex II, Part 1.B of the European Parliament and of the Council on machinery. Manufacturer/ H.-D. SCHUNK GmbH & Co. Spanntechnik KG Distributor Lothringer Str. 23 D-88512 Mengen We hereby declare that on the date of the declaration the following partly completed machine complied with all basic safety and health regulations found in the directive 2006/42/EC of the European Parliament and of the Council on machinery. -
Page 54: Appendix On Declaration Of Incorporation, As Per 2006/42/Ec, Annex Ii, No. 1 B
Appendix on Declaration of Incorporation, as per 2006/42/EC, annex II, No. 1 B Appendix on Declaration of Incorporation, as per 2006/42/EC, annex II, No. 1 B 1. Description of the basic safety and health protection requirements, as per 2006/42/EC, annex I, that apply to and are fulfilled for the scope of the incomplete machine: Product designation TANDEM clamping force block, pneumatic (manual jaw change) Type designation KSP plus 100-BWM;... - Page 55 Appendix on Declaration of Incorporation, as per 2006/42/EC, annex II, No. 1 B Required characteristics of guards and protective devices 1.4.1 General requirements 1.4.2 Special requirements for guards 1.4.2.1 Fixed guards 1.4.2.2 Interlocking movable guards 1.4.2.3 Adjustable guards restricting access 1.4.3 Special requirements for protective devices Risks due to other hazards...
Need help?
Do you have a question about the KSP plus-BWM Series and is the answer not in the manual?
Questions and answers