Table of Contents
Advertisement
Quick Links
This product, as supplied by Harken, is considered to be applicable to general lifting operations and
is not intended to lift persons. Should this product be incorporated into systems for lifting persons,
it becomes "partly completed machinery" and, when appropriate additional safety devices are added,
must be certified for its intended application. Such systems are classified as "machinery for lifting
persons" and would require separate CE marking. Alternatively such systems may be classified as
personal protective equipment and would be within the scope of the PPE Directive.
i
Please read these instructions carefully before operating equipment.
Keep these instructions in a safe place for future reference.
Harken does not accept any responsibility for damage or harm caused by failure to follow the safety
requirements and instructions in this manual.
The manufacturer cannot be liable for damage, injury or consequential loss resulting from installation
or servicing by unqualified personnel.
The manufacturer will also not be liable for damage, injury, or consequential loss resulting from
incorrect operation or modification of the equipment.
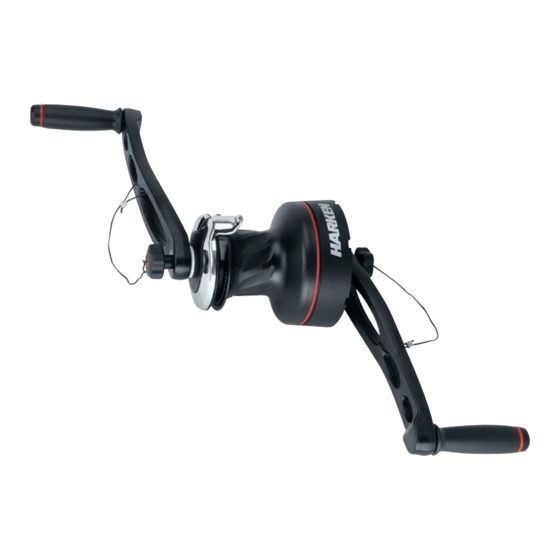
ACCESS WINCH WITH HANDLES
40.2STAACCSH
Instruction Manual
Advertisement
Table of Contents

Subscribe to Our Youtube Channel
Related Manuals for Harken 40.2STAACCSH


Summary of Contents for Harken 40.2STAACCSH
- Page 1 Please read these instructions carefully before operating equipment. Keep these instructions in a safe place for future reference. Harken does not accept any responsibility for damage or harm caused by failure to follow the safety requirements and instructions in this manual.
-
Page 2: Specifications
Description A strong, lightweight manual rope-handling winch. Double handles provide maximum ergonomics, for high power and operation speed. FEATurES Maximum Grip – The drum’s gripping surface is designed specifically to work with the drum diameter and material to maximize gripping power and reduce rope wear. Diagonal ribs stop the rope from rising (keeping rope wraps on part of drum where you have the best control), prevent overrides, and provide a smooth controlled release as rope exits the winch. - Page 3 • With loads in excess of the maximum working load (MWL) of 280 kg for lifting persons. • This product, as supplied by Harken, is considered to be applicable to general lifting operations and not intended to lift persons. Should this product be incorporated into systems for lifting persons, it then becomes “partly completed machinery”...
-
Page 4: Installation
If you have questions or ® concerns, Harken Tech Service is at your disposal at techservice@harken.it. ® WARNING! Incorrect installation of winch may cause severe injury or death. Consult equipment supplier if in doubt about correct position of winch. - Page 5 Installation Use either Procedure 1 or 2 to install winch. Use Procedure 1 to thread mounting screws into threaded holes in mounting plate. You can also use washers and nuts. Procedure 2 takes less time but can only be used if you can tighten nuts from behind mounting plate.
- Page 6 Installation PrOCEDurE 1 (CONTINuED) 7. Lift off drum (20). Install Socket Head bolts in winch. PrOCEDurE 2 Tools You Will Need To install winch you must remove skirt as directed One medium flat-blade screwdriver below. Use five (5) M6 Hex Head (HH) bolts, washers and nuts (Steel Alloy, 12.9 Class) Protective gloves (ISO 898 part 1).
-
Page 7: Final Installation
Note: When downloading winch templates make sure you have correct size paper and that printer will output at 100%. Before drilling holes verify that template is correct in every detail. Harken cannot be responsible for incorrectly drilled holes because of a faulty template. - Page 8 Installation Radial Winch 40 FINAL INSTALLATION (CONTINuED) Drive Gear (11 – Pinion Z13) Reduced-size drilling template. See Page 7 for important information about template. rEASSEMBLE WINCH All dimensions in millimeters. Dimensions to be followed as indicated and not to be scaled. 1.
-
Page 9: Operation
Operation PErSONAL PrOTECTIVE EQuIPMENT Rope Ø Min. Rope Turns Max. Rope Turns 8 mm Wear gloves to protect against rope abrasion or chafe when rotating handles. 10 mm LIFTING LOAD 12 mm IMPORTANT! Keep fingers, loose clothing, hair, etc. away from winch. Area around winch handles should be kept clear of people and objects at all times. -
Page 10: Lowering Load
Operation Begin turning handles counterclockwise. 1st Gear Faster = Less Power Gears engage automatically depending on direction handles are rotated. 1st gear: rotate handles counterclockwise. 2nd gear: rotate handles clockwise. E. When handles become difficult to rotate in 1st gear, reverse direction to access 2nd. A higher power ratio makes a heavier load easier to lift with the same effort. -
Page 11: Maintenance Schedule
Winch must be completely overhauled, cleaned, and lubricated at least every 12 months. Harsh environment and/ or heavy use may require more frequent maintenance. After inspection, replace worn or damaged components with genuine Harken parts. Do not replace or modify winch with a part that was not designed for it. -
Page 12: Maintenance (Disassembly)
Maintenance (Disassembly) 3. Unscrew six (6) Socket Head Cap Screws 4. Remove Assy Housing (14). Important: (15) (8Nm/71 in-lb). Washer (12) may remain inside drum support. 5. Remove washer (12). 6. Remove gear (7) and remove pawls (5). To facilitate operation, press spring against pawl with a blade. - Page 13 Maintenance (Disassembly) 9. Slide off gear (10) 10. Remove pawls (5). To facilitate operation, press spring against the pawl with a blade. 11. Remove washer (9). rEPLACING SELF-TAILING JAWS Tools You Will Need If it is necessary to replace winch jaws, proceed Medium flat-blade screw- as follows: driver...
-
Page 14: Maintenance
1. Carry out maintenance on components using products listed and shown below on exploded view. 2. Use brush to lightly lubricate all gears, gear pins, teeth, and all moving parts with Harken Grease. 3. Lightly lubricate pawls and springs with Harken Pawl Oil. Do not use grease on pawls! Location Harken Part No. -
Page 15: Spare Parts
Maintenance SPArE PArTS Spare parts can be ordered from Harken as described ® in the Harken Worldwide Limited Warranty using the ® W XXXXX part number in the Parts List and the serial number of the winch, which is printed on a plate on the XXXXXXXXX drum support and also on the skirt. - Page 16 Via Marco Biagi, 14, 22070 Limido Comasco (CO) Italy Telephone: 031.3520031 Web: www.harken.it, Email: info@harken.it EC Declaration of Conformity Harken Italy S.p.A. declares that the product described hereafter: Access Winch – 40.2STAACCSH complies with the essential requirements of the Machinery Directive 2006/42/EC and carries the appropriate CE marking.
- Page 17 Parts 04-08-10 Access Winch...
- Page 18 Parts Pos. Q.ty Code Description A 941896 00 Assy Base Winch 40 EL/HY Winch Serial Number Sticker A94141400 Assembly Skirt Winch 40** S 41302 00 04 Gear Z12 S 41303 00 04 Pawls Carrier Ø8xN2* S 00008 00 03 Pawl Ø8* S 00038 00 01 Pawl Spring dia 8 S 41283 00 41...
- Page 19 Parts Part No. Description 40.2STAACCSH Access winch with handles with locking knobs B10ACCS Handle with locking knob 40.2STAACCS Access winch without handles 04-08-10 Access Winch...
-
Page 20: Worldwide Limited Warranty
Representative Harken UK Ltd Bearing House, Ampress Lane Lymington, Hampshire S041 8LW, England Telephone: (44) 01590-689122 Fax: (44) 01590-610274 • Web: www.harken.co.uk Email: enquiries@harken.co.uk Worldwide Limited Warranty Refer to the Harken Worldwide Limited Warranty on the website at http://www.harkenindustrial.com/warranty.php 06-02-10...
Need help?
Do you have a question about the 40.2STAACCSH and is the answer not in the manual?
Questions and answers