Vega VEGAWAVE 62 Operating Instructions Manual
Contactless electronic switch
Hide thumbs
Also See for VEGAWAVE 62:
- Operating instructions manual (40 pages) ,
- Operating instructions manual (36 pages) ,
- Operating instructions manual (20 pages)
Table of Contents
Advertisement
Quick Links
Advertisement
Table of Contents

Related Manuals for Vega VEGAWAVE 62


Summary of Contents for Vega VEGAWAVE 62
- Page 1 Operating Instructions VEGAWAVE 62 - contactless electronic switch...
-
Page 2: Table Of Contents
Instrument repair ..... . . 8 Dismounting Dismounting steps ..... . VEGAWAVE 62 - - contactless electronic switch... - Page 3 Trademark ......Supplementary operating instructions manuals Information: VEGAWAVE 62 is available in different versions. Depending on the selected version, supplementary operating instructions manuals may also come with the shipment. The supplemen- tary operating instructions manuals are listed in section "Product description.
-
Page 4: About This Document
This symbol indicates special instructions for Ex applications. List The dot set in front indicates a list with no implied sequence. à Action This arrow indicates a single action. Sequence Numbers set in front indicate successive steps in a procedure. VEGAWAVE 62 - - contactless electronic switch... -
Page 5: For Your Safety
2.4 General safety instructions VEGAWAVE 62 is a high-tech instrument requiring the strict observance of standard regulations and guidelines. The user must take note of the safety instructions in this operating instructions manual, the country-specific installation standards... -
Page 6: Sil Conformity
2.8 Manufacturer declaration In conformity with DIN EN 60079-14/2004, para. 5.2.3, point c1, VEGAWAVE 62 is suitable for use in zone 2. The operator must use the instrument as it was intended to be used and follow the specifications of the following documents:... -
Page 7: Environmental Instructions
The environment man- agement system is certified according to DIN EN ISO 14001. Please help us fulfil this obligation by observing the environ- mental instructions in this manual: Chapter "Storage and transport" Chapter "Disposal" VEGAWAVE 62 - - contactless electronic switch... -
Page 8: Product Description
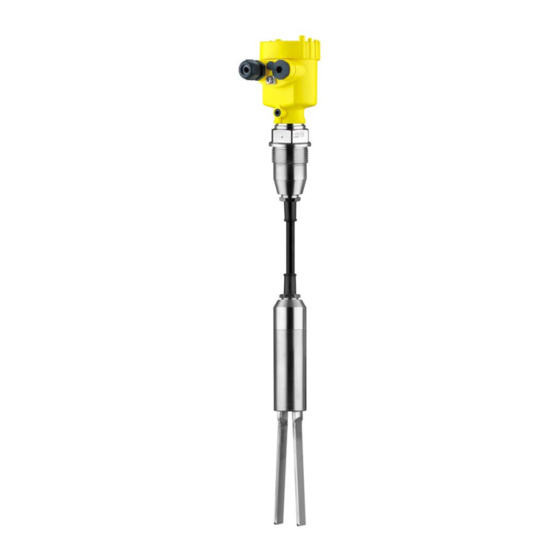
Fig. 1: VEGAWAVE 62 with plastic housing Housing cover Housing with electronics Process fitting 3.2 Principle of operation VEGAWAVE 62 is a level sensor with tuning fork for level Area of application detection. VEGAWAVE 62 - - contactless electronic switch... - Page 9 It functions even when exposed to strong external vibration or changing products. Solid detection in water If VEGAWAVE 62 was ordered for detection of solids in water, the tuning fork is adjusted to the density of water. In the air or when covered by water (density: 1 g/cm³/0.036 lbs/in) VEGAWAVE 62 signals "uncovered".
-
Page 10: Operation
PE foam or PE foil is also used. Dispose of the packaging material via specialised recycling companies. Storage and transport temperature see "Supplement - Storage and transport tem- perature Technical data - Ambient conditions" Relative humidity 20 … 85 % VEGAWAVE 62 - - contactless electronic switch... -
Page 11: Mounting
Mounting 4 Mounting 4.1 General instructions In general, VEGAWAVE 62 must be mounted vertically. The Switching point instrument must be mounted in such a way that the vibrating element is at the height of the requested switching point. Use the recommended cable (see chapter "Connecting to Moisture power supply") and tighten the cable gland. -
Page 12: Mounting Instructions
filling and emptying apertures into account. To compensate measurement errors in cylindrical vessels caused by the material cone, the sensor must be mounted at a distance of d/6 from the vessel wall. Fig. 3: Filling and emptying centered VEGAWAVE 62 - - contactless electronic switch... - Page 13 For that reason, avoid using mounting bosses for flanges and screwed fittings. This applies particularly to use with adhesive products. If VEGAWAVE 62 is mounted in the filling stream, unwanted Inflowing medium false measurements may be generated. Mount VEGAWAVE 62 at a location in the vessel where no disturbing influence...
- Page 14 To minimise flow resistance caused by the tuning fork, Flows VEGAWAVE 62 should be mounted in such a way that the surfaces of the blades are parallel to the product movement. Fig. 6: Orientation of the tuning fork in case of flow Marking with screwed version Direction of flow...
- Page 15 Mounting This baffle must be manufactured by you. > 125 mm ") Fig. 7: Baffle to protect against damages VEGAWAVE 62 - - contactless electronic switch...
-
Page 16: Connecting To Voltage Supply
Take note of the general installation regulations. As a rule, connect VEGAWAVE 62 to vessel ground (PA), or in case of plastic vessels, to the next ground potential. On the side of the housing there is a ground terminal between the cable entries. -
Page 17: Wiring Plans, Single Chamber Housing
The electrical connection is finished. Fig. 8: Connection steps 5 and 6 5.3 Wiring plans, single chamber housing The following illustrations apply to the non-Ex as well as to the EEx d version. VEGAWAVE 62 - - contactless electronic switch... - Page 18 DIL switch for mode adjustment Ground terminal Screwed terminals Control lamp We recommend connecting VEGAWAVE 62 in such a way that Wiring plan the switching circuit is open when there is a level signal, line break or failure (safe condition).
- Page 19 Domestic current is temporarily lowered below 1 mA after switching off the load so that contactors, whose holding current is lower than the constant domestic current of the electronics, are reliably switched off. Fig. 11: Wiring plan Screening VEGAWAVE 62 - - contactless electronic switch...
-
Page 20: Setup
Note: As a rule, always set the mode with mode switch (2) before starting the setup of VEGAWAVE 62. The switching output will change if you set the mode switch (2) afterwards. This could possibly trigger other connected instruments or devices. -
Page 21: Function Chart
It is already preset and must only be modified in special cases. By default, the potentiometer of VEGAWAVE 62 is set to the right stop (>0.02 g/cm³ or 0.0008 lbs/in³). In case of very light- weight solids, turn the potentiometer to the left stop (>0.008 g/ cm³... - Page 22 Switching sta- Control lamp Mode min. Dry run protection Switch closed Green Mode min. Dry run protection Switch open Failure of the supply voltage (min./max. mode) Switch open Failure Switch open flashes red VEGAWAVE 62 - - contactless electronic switch...
-
Page 23: Maintenance And Fault Rectification
Maintenance and fault rectification 7 Maintenance and fault rectification 7.1 Maintenance When used as directed in normal operation, VEGAWAVE 62 is completely maintenance free. 7.2 Remove interferences VEGAWAVE 62 offers maximum reliability. Nevertheless faults Causes of malfunction can occur during operation. These may be caused by the following, e.g.:... -
Page 24: Exchange Of The Electronics Module
3 Lift the opening levers of the terminals with a screwdriver 4 Pull the connection cables out of the terminals 5 Loosen the two screws with a screw driver (Torx size T10 or slot 4) VEGAWAVE 62 - - contactless electronic switch... - Page 25 13 Check the hold of the wires in the terminals by lightly pulling on them 14 Check the tightness of the cable entry. The seal ring must completely encircle the cable. 15 Screw the housing cover back on The electronics exchange is now finished. VEGAWAVE 62 - - contactless electronic switch...
-
Page 26: Instrument Repair
Attach the filled in form and if necessary, a safety data sheet to the instrument Please ask the agency serving you for the address of your return shipment. You find the respective agency on our website www.vega.com under: "Company - VEGA world- wide" VEGAWAVE 62 - - contactless electronic switch... -
Page 27: Dismounting
Correct disposal avoids negative effects to persons and environment and ensures recycling of useful raw materials. Materials: see "Technical data" If you cannot dispose of the instrument properly, please contact us about disposal methods or return. VEGAWAVE 62 - - contactless electronic switch... -
Page 28: Supplement
- when laid bare approx. 1 s Ambient conditions Ambient temperature on the housing -40 … +80 °C (-40 … +176 °F) Storage and transport temperature -40 … +80 °C (-40 … +176 °F) VEGAWAVE 62 - - contactless electronic switch... - Page 29 - max. 400 mA (at I >300 mA the ambient temperature can be max. 60 °C/140 °F) max. 4 A up to 40 ms Electrical protective measures Protection IP 66/IP 67 Overvoltage category VEGAWAVE 62 - - contactless electronic switch...
- Page 30 FM (NI) CL I, DIV 2, GP ABCD; (DIP) CL II, III, DIV 1, GP EFG CSA (NI) CL I, DIV 2, GP ABCD; (DIP) CL II, III, DIV 1, GP EFG Deviating data in Ex applications: see separate safety instructions. VEGAWAVE 62 - - contactless electronic switch...
-
Page 31: Dimensions
116mm (4 ") ø77mm (3 ") ø77mm (3 ") ø84mm (3 ") M20x1,5/ M20x1,5/ M20x1,5/ ½ NPT ½ NPT ½ NPT M20x1,5 Fig. 14: Housing versions Plastic housing Stainless steel housing Aluminium housing VEGAWAVE 62 - - contactless electronic switch... - Page 32 Supplement G1½A ø 43mm (1 ") ø 11mm ( ") ø 43mm (1 ") Fig. 15: VEGAWAVE 62, threaded version G1½ A Sensor length, see "Technical data" VEGAWAVE 62 - - contactless electronic switch...
-
Page 33: Industrial Property Rights
Les lignes de produits VEGA sont globalement protégées par des droits de propriété intellectuelle. Pour plus d'informations, on pourra se référer au site http://www.vega.com. VEGA lineas de productos están protegidas por los derechos en el campo de la propiedad industrial. Para mayor información revise la pagina web http://www.vega.com. - Page 34 Supplement VEGAWAVE 62 - - contactless electronic switch...
- Page 35 Supplement VEGAWAVE 62 - - contactless electronic switch...
- Page 36 All statements concerning scope of delivery, application, practical use and operating conditions of the sensors and processing systems correspond to the information avail- able at the time of printing. © VEGA Grieshaber KG, Schiltach/Germany 2007 Subject to change without prior notice 32251-EN-070117...
Need help?
Do you have a question about the VEGAWAVE 62 and is the answer not in the manual?
Questions and answers