Table of Contents
Advertisement
Quick Links
Advertisement
Table of Contents

Related Manuals for Kiloview U40


Summary of Contents for Kiloview U40
- Page 1 U40 4K NDI CONVERTER USER MANUAL CO., LTD. Changsha KILOVIEW Electronics...
- Page 2 Legal Notices Subject to the receiving of this document from Changsha Kiloview Electronics Co., Ltd., (Hereinafter referred to “Kiloview”), the following terms are understood and agreed. Or else, please stop using this document. This document is copyright of Kiloview, all rights reserved. The document covers the proprietary information of the company.
-
Page 3: Table Of Contents
8.1 Add video source ..............................20 8.1.1 RTMP convert to NDI/HX in live broadcast platform ................20 8.1.2 The RTMP service directly pushed to U40 and converted to NDI|HX ............21 8.1.3 U40 convert SRT to NDI|HX ........................23 8.2 Media Gateway (Trial) ............................24... - Page 4 8.2.2 RTSP service .............................. 26 8.2.3 Camera Link .............................. 26 9.Settings ................................... 28 9.1 User Management ............................... 28 9.2 Quick Reset ................................28 9.3 Reboot ................................. 28 9.4 Restore Factory Settings ............................28 9.5 Firmware Upgrade ............................... 29...
-
Page 5: Product Introduction
It features 4K P60 input, HDMI/USB/IP to NDI®, PoE + DC Out, PTZ, Tally, cold shoe camera mount. The small and exquisite U40 4K NDI encoder is equipped with all the functions you want, with only one network cable, video sources from HDMI... -
Page 6: Parameters
1.2 Parameters Model Interface HDMI 2.0 Video Up to 4K60 resolution Ethernet port 2*1000M Ethernet port USB interface USB2.0 Analog audio 3.5mm analog audio interface Support HDMI to Full NDI® Support 3.5mm analog audio embedded in full NDI® NDI® Support USB to Full NDI® performance Support other IP streams to NDI®|HX 2.0 Tally light... -
Page 7: Ndi Streaming
After connecting the NDI streaming to the Newtek Studio Monitor, click the gear button in the lower right corner to open the login link of the encoder's Web page (When logging in for the first time or after restoring the factory settings, you need to agree to the popping up “EULA”. -
Page 8: Device Interface Description
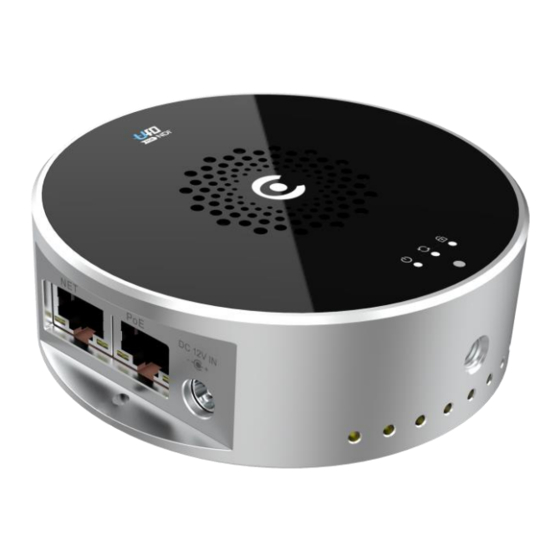
3.2 Device Interface Description 1. Tally 2. Indicators 3. 1000M Ethernet 4. 1000M Ethernet (PoE) 5. Power port 6.HDMI IN 7. USB port 8. 3.5mm Audio input 9. 5.5×2.5mm DC OUT... - Page 9 10.Reset button 11.Cold shoe 12. Tally...
-
Page 10: Led Light
3.3 LED light Name Color Status Description Always on Power connected Flashing Device failure POWER White No power supplied or device failure Flashing Device is working White The device is abnormal or not started Always on Video signal inputting locked Flashing Video signal... -
Page 11: Device Installation And Connection
4.Device Installation and Connection 4.1 Connect video signal Connect the HDMI video cable from a video source like a camera to the U40's HDMI input port. 4.2 Connect network Connect one end of a network cable to the U40's Ethernet port. The other end of the network cable is connected to your network switch or router. -
Page 12: Connect Power Supply
4.3. Connect power supply Connecting the equipped power adapter to U40's USB-C port. The unit boots once the power is supplied. At this moment, the power indicator lights will illuminate. Note: when network switcher provides PoE, no need to connect to the power supply. -
Page 13: Web
5.1.3. WEB page login Enter 192.168.1.168 or http://192.168.1.168 on the computer browser, and login with the username and password. Default username: admin; Password: admin. Notes: the device Web page may be displayed abnormally due to the compatibility of the browser; it is recommended to use Chrome and Firefox. For the first login or after restoring the factory settings, you need to accept the popping up “EULA”. -
Page 14: Ndi Discovery And Monitoring
6.NDI discovery and monitoring U40 is a professional video encoding device for NDI video production. It can compress HDMI/USB video source into FULL NDI streaming through Ethernet or convert other protocols (RTSP/RTMP/ SRT/TS-UDP) to NDI|HX for any compatible system, device or software on the network. -
Page 15: Ndi Discovery And Connection
6.2 NDI discovery and connection When the device is connected to the network, other NDI-enabled tools on the PC in the same broadcast domain can automatically discover the NDI stream. Currently, the tools supporting the NDI protocol are very common. Take NewTek Studio Monitor and VMIX as examples to introduce how to automatically discover and obtain NDI video streaming. - Page 16 Launch VMIX, click "Add Input" at lower left corner, select "more" to find various sources that can be added, click the "NDI/Desktop Capture" option, you can see a list of NDI video sources. You can select the device you want to add, and click "OK" to add the selected NDI video source to the VMIX playback source list.
-
Page 17: Ndi Encoding Bitrate
6.3 NDI Encoding Bitrate After encoding, it is FULL NDI transmission. The bitrate is high and needs to be connected to a gigabit network. The network card of the streaming end device also needs a gigabit network card, otherwise it will cause freezing or abnormal display. The following table is the reference bitrate of different resolutions: Resolution Output bandwidth... - Page 18 Group:The group name can be English letters and numbers. Multiple group ⚫ names are allowed, separated by commas. The default group is a public group. If you don't want other devices in the network to be discovered, you can set a specified group name, and other devices need to search for it through the specified group name.
-
Page 19: Advanced Settings
PTZ over Ethernet needs to correctly configure the protocol address and port of the connected PTZ, specify control protocol (Sony Visca/Visca(Laia)/Visca(Kato)/PELCO-D/PELCO-P). Application 1: PTZ camera supports serial port control. Connect the U40 device through the USB to RS232/RS422/RS485 adapter (cable), and receive the PTZ... - Page 20 Both Kiloview NDI decoder and other NDI-enabled PTZ software can be the receiver. HDMI HDMI PTZ Line NDI Decoder NDI Encoder Display HDMI PTZ Line NDI Encoder NDI Production Center Application 2: Cameras that support network PTZ, connect the device and camera through HDMI cable, then connect to the same local area network through a network cable.
-
Page 21: Discovery Server
Note: After starting this function, the mDNS auto-discovery function is invalid. The U40 output video stream can only be sent to the nominated server, and the receiving end must register with the same discovery server to get the NDI... -
Page 22: Receiving Via Kiloview Ndi Decoder
7.4.1 Receiving via Kiloview NDI decoder Switch the NDI device to decoding mode, click "discover server", and "Enable" it. Fill in the server address with the same registered address of the NDI encoder. Click "OK", all NDI sources registered to the discovery server can be found by scanning the list. -
Page 23: Network Ip Transfer To Ndi|Hx
8. Network IP transfer to NDI|HX Convert RTSP,RTMP,SRT,HLS,UDP and other video streams in the network to NDI|HX and connect to the NDI production system. 1) Enter to the web page, click “NDI/HX” to enter streams configuration page. 2) Open a NDI/HX stream which can be found and play via NDI production system or NDI player. -
Page 24: Add Video Source
8.1 Add video source 8.1.1 RTMP convert to NDI/HX in live broadcast platform 1) Obtain the correct RTMP streaming address from the live platforms, and you can use the VLC player to test whether it is effective. 2) Click the + button to add a source in the "Video Source column". Enter the RTMP streaming address in the URL address column. -
Page 25: The Rtmp Service Directly Pushed To U40 And Converted To Ndi|Hx
8.1.2 The RTMP service directly pushed to U40 and converted to NDI|HX 1) U40 can be used as an RTMP server to push RTMP streams from encoder to the U40 and then convert to NDI|HX. - Page 26 The complete address is the pushing IP address of the encoder. Note: When pushing RTMP from the remote Internet, the U40 needs to have a public network address, and do port forwarding to U40 in the network, and the forwarded port is 1935.The IP address format for RTMP pushing needs to be...
-
Page 27: U40 Convert Srt To Ndi|Hx
8.1.3 U40 convert SRT to NDI|HX 1) Choose "SRT" as source type, configure the SRT parameters and keep it. -
Page 28: Media Gateway (Trial)
Note: When pushing SRT from the remote Internet, either end of the encoder or U40 needs to have a public network address, and use UDP for port forwarding in a network router with a public network address. The forwarding port range is 1025-65535. For devices without a public network address, please adopt the CALLER mode, fill in the other party's public IP address and port number. -
Page 29: Rtmp Streaming Service
100% guarantee for its reliability. If this is going to be applied for formal scenario, an official Media Gateway product is recommended. Kiloview reserves the right to make changes and adjustments to this function, including: stopping update or disabling this function, changing the scope of the functions provided, etc. -
Page 30: Rtsp Service
5 stream services in total. 8.2.3 Camera Link When the computer can access to U40 device, but cannot access to camera or other encoding devices in another network. Connecting the two network ports of the U40 to different networks and configuring the IP address, the computer can enter the management page of the camera or encoding device through U40's web page. - Page 31 After configuring two IP addresses for U40, your computer can log in to the camera (192.1618.2.89) web page through the Camera link function in...
-
Page 32: Settings
9.Settings 9.1 User Management You can add and delete users, modify user passwords, etc. HTTP API Authorization: It is enabled by default. If disabled, identity authentication is not required to call the API. 9.2 Quick Reset "Quick reset" is used to reset the coding service. It is usually applied after the parameters modifications to take effect immediately or abnormal encoding/ decoding. -
Page 33: Firmware Upgrade
9.5 Firmware Upgrade Our product will be constantly improved, so we will continue to upgrade the device for bug fixing. Please contact our technical support to obtain the upgrade package or download it on our website. Click “System Setup”, select “Firmware” go to the firmware upgrade interface. After uploading the firmware to the device, click "Upgrade"... - Page 34 Thank you for reading! Changsha KILOVIEW Electronics CO., LTD. Service Hotline: 86-731-88315979 Website: en.kiloview.com Technical support Email: support@kiloview.com Skype: kiloview-support/keqiu wang/jone WhatsApp: +86-18573195156/18573195256 Address: 188#, Middle Huanbao Rd, Yuhua District, Changsha, Hunan Province, China...
Need help?
Do you have a question about the U40 and is the answer not in the manual?
Questions and answers