NexSens X2 Quick Start Manual
Base radio data logger
Hide thumbs
Also See for X2:
- Manual (14 pages) ,
- Quick start manual (9 pages) ,
- Quick start manual (2 pages)
Advertisement
X2 - BASE RADIO DATA LOGGER
QUICK START GUIDE
IMPORTANT - BEFORE FIELD DEPLOYMENT: Completely configure new X2 systems with sensors and a direct connec-
tion to the CONNECT software in a nearby work area. Operate the system for several hours and ensure correct sensor
readings. Use this test run to become familiar with the features and functions.
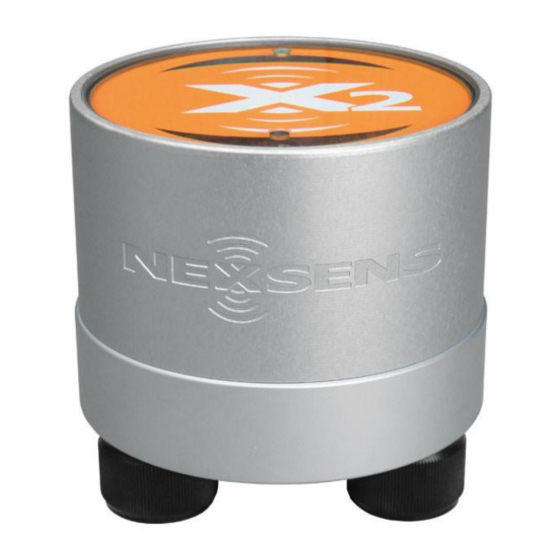
Figure 1: X2 Environmental Data Logger
Overview
The direct connect X2 base radio system includes an
integrated radio module for connection with a host of
field radio nodes. Three sensor ports provide industry
standard protocols including SDI-12, RS-232, and RS-485.
The center port offers direct communication (serial to
PC) and power input. Smartphones and tablets connect
by WiFi.
Base radio connection is established through direct con-
nection with the CONNECT software. Data is accessed
and stored on the WQData LIVE web datacenter. An
easy-to-use dashboard and built-in sensor library auto-
matically facilitate setup and configuration.
What's Included?
(1) X2 data logger
(1) X2 grounding kit
(3) Sensor port plugs, spare orings
(1) Power port plug, spare oring
(1) Oring grease
(1) Screwdriver with magnet tip
(1) Antenna
(1) Quick start guide
To get started:
1
a.
Go to
WQDataLIVE.com
b.
Create a new account or sign into an existing
account.
c.
Choose or create the project that will contain
the data logger by selecting the Projects link
from the bottom right footer of the page.
d.
Open the project and go to the ADMIN tab
located at the top of the project dashboard
and click Settings.
From there, choose the Project/Site pull down
2
menu and select the site for the new data logger.
a.
If a site has not been created, select New Site.
Enter the claim code listed below into the space
3
provided under Assigned Devices.
a.
Do the same for all field nodes assigned to
this base station.
Click Add Device.
4
a.
The new device(s) should be visible in the
Assigned Devices list.
Mount the X2-RB-DG in "line-of-sight" of the field
5
radio deployment area and install the antenna.
Figure 2: Step 5 - Rotate the antenna clockwise onto
the threads of the female RPSMA connector.
Advertisement
Table of Contents

Related Manuals for NexSens X2


Summary of Contents for NexSens X2
- Page 1 X2 - BASE RADIO DATA LOGGER QUICK START GUIDE IMPORTANT - BEFORE FIELD DEPLOYMENT: Completely configure new X2 systems with sensors and a direct connec- tion to the CONNECT software in a nearby work area. Operate the system for several hours and ensure correct sensor readings.
- Page 2 These errors can be indicative of a leak or other major problem with the system that requires attention. For additional information, please reference the X2 Resource Library on the NexSens Knowledge Base. nexsens.com/x2kb 937-426-2703 2091 Exchange Court Fairborn, Ohio 45324 www.nexsens.com...
Need help?
Do you have a question about the X2 and is the answer not in the manual?
Questions and answers