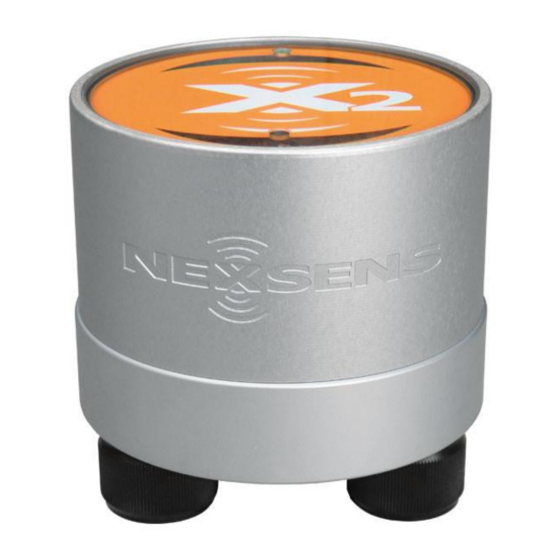
NexSens X2 Manual
Environmental data logger
Hide thumbs
Also See for X2:
- Manual (10 pages) ,
- Quick start manual (9 pages) ,
- Quick start manual (2 pages)
Advertisement
Quick Links
X2 Environmental Data Logger Manual
The NexSens X2 Environmental Data Logger offers the latest in real-time monitoring technology with
wireless communication, large plug-and-play sensor library, and ultra-low power consumption. The
unit includes Integral Wi-Fi and smartphone connectivity with options for radio, cellular & satellite
telemetry. WQData LIVE web datacenter provides instant access on any web browser.
1
Advertisement

Summary of Contents for NexSens X2
- Page 1 X2 Environmental Data Logger Manual The NexSens X2 Environmental Data Logger offers the latest in real-time monitoring technology with wireless communication, large plug-and-play sensor library, and ultra-low power consumption. The unit includes Integral Wi-Fi and smartphone connectivity with options for radio, cellular & satellite...
-
Page 2: Table Of Contents
Table of Contents Introduction Unboxing Apply Power Configure System Telemetry Connect Sensors Sensor Auto-detection WQData LIVE Overview WQData LIVE Setup Configure Logger Settings Generate Data Reports Technical Information... -
Page 3: Unboxing
Unboxing What’s included: • X2 environmental data logger • Quick Start Card with WQData LIVE Device Claim Code • (3) Sensor port plugs • (1) Power port plug • (1) Magnetic screwdriver • (1) Wireless antenna (telemetry units only) -
Page 4: Apply Power
Apply Power Connect SP-Series Solar Power Pack or UW6-PW AC Power Adapter UW6-PW... -
Page 5: Configure System Telemetry
Direct Connect –Establish permanent wireless data transmission for standard X2s. Wireless Network Setup process Cellular- a 4G Compliant Mini-SIM card is required for installation on cellular models of the X2. Factory-installation is recommended, but user installation is possible. SIM Installation process Configure Network APN Iridium- Factory-installed Iridium satellite modems allow for communication in the most remote deployment locations. -
Page 6: Connect Sensors
Connect Sensors All sensor cabling connected to the X2 must be configured with one of the following: • NexSens factory installed UW plug connector. • NexSens UW-FWP series field wireable plug. UW-FWP UW-plug connector Refer to the NexSens sensor listing at https://www.nexsens.com/support/product-manuals... - Page 7 Connect Sensors Connect the antenna, power and sensors to the X2 Connect the system antenna (if equipped) and move into an area with strong signal coverage. Remove the center power plug and required outer port plugs (1 for each sensor to connect) Connect sensors to any outer port (8 pin).
-
Page 8: Sensor Auto-Detection
Sensor Auto-Detection Following the configuration of the logger telemetry (if required) and the connection of all sensors to the X2, disconnect and re-apply power to the X2. Following power-up, the logger will automatically begin to scan through a list of common sensors to build the deployment sensor list. Sensors discovered during this process will automatically be updated on WQData LIVE via the X2’s on-board telemetry. -
Page 9: Wqdata Live Overview
WQData LIVE Overview WQData LIVE is a Cloud Data Center used in conjunction with the X2 data logger line for the following functionality: Data Collection- automatic X2 data upload to the web Data Export Remote System Configuration... -
Page 10: Wqdata Live Setup
The guide covers the three main prerequisites for setting up the Data Center: -Creating a free WQData LIVE account -Creating a new project on the WQData LIVE Datacenter -Using the Claim Code provided with each X2 to add the logger profile to the project... - Page 11 Once the logger has been claimed into the project and it is visible on WQData LIVE, check the ‘Last Contact’ time located in the lower right corner of the Project Dashboard page. The last successful data transmission from the X2 is denoted by this parameter.
- Page 12 Customize Logger Settings Adjustments to the X2 such as those listed below can be made remotely from the Remote Device Configuration Menu on WQData LIVE. -Change Data Upload/Transmit Frequency -Change Individual Sensor Logging Intervals -Set offsets for parameters -Queue additional Sensor Detections if new instrumentation has been connected to the system...
- Page 13 Generate/Review Reports CSV or PDF Reports can be manually generated, or configured to send automatically on a user-defined schedule from WQData LIVE. Information on the Report tool for the WQData LIVE datacenter can be found here.
-
Page 14: Technical Information
Peak Current: Power supply must be able to sustain a 500mA 1-second peak current (@ 12V) Operating Temperature: -20C to 70°C Rating: IP67 (Standalone); IP65 (With telemetry) Wi-Fi Communications: 802.11b/g/n (Direct to X2 or Connect X2 to an existing network) Wi-Fi Antenna: Internal to device Wi-Fi Range: 250 ft. maximum...


Need help?
Do you have a question about the X2 and is the answer not in the manual?
Questions and answers