INOXPA ASPIR Series Installation, Service And Maintenance Instructions
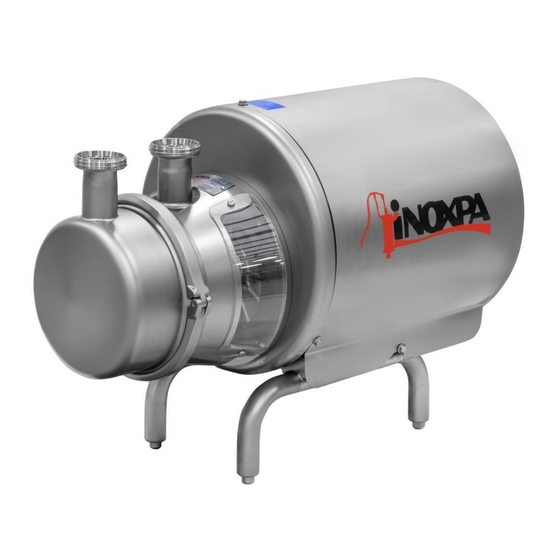
Side channel pump
Hide thumbs
Also See for ASPIR Series:

Related Manuals for INOXPA ASPIR Series


Summary of Contents for INOXPA ASPIR Series
- Page 1 INSTALLATION, SERVICE AND MAINTENANCE INSTRUCTIONS SIDE CHANNEL PUMP ASPIR Original Instructions 01.400.30.09EN (0) 2021/04...
- Page 2 EN 809:1998+A1:2009/AC:2010 EN 12162:2001+A1:2009 EN 60204-1:2018 The technical file has been prepared by the signer of this document in INOXPA. A copy of the technical file is in the possession of the notified body L.C.I.E. with reference number 0081. David Reyero Brunet...
-
Page 3: Table Of Contents
9.3. Dimensions with whroud and legs ......................20 9.4. Dimensions without whroud and without legs ..................... 21 9.5. Exploded drawing of ASPIR pump......................22 9.6. Parts list of ASPIR pump ..........................23 9.7. Mechanical seal with quench ........................24 INOXPA S.A.U. · 01.400.30.09EN · (0) 2021/04... -
Page 4: Generalities
The non-compliance of the prescribed indications in this manual means misuse of this gear on the technical side and the personal safety and this, exempt INOXPA of all responsibility in case of accidents and personal injuries and/or property damage. Also, excluded from the warranty all breakdowns caused by improper use of the gear. -
Page 5: Safety
Important instruction for the protection of the equipment and its functions ATTENTION 3.2. GENERAL SAFETY INSTRUCTIONS Read the instruction manual carefully before installing and starting the pump. Contact INOXPA in case of doubt. 3.2.1. During the installation Technical Specifications of chapter 9 should always be observed. -
Page 6: General Information
Misuse of the pump or its use beyond the operating limits may be dangerous or cause permanent damage to the equipment. INOXPA shall not be liable for any damage resulting from the incompleteness of the information provided by the purchaser (nature of the fluid, rpm, etc.). -
Page 7: Installation
Installation 5. Installation 5.1. RECEPTION OF THE PUMP INOXPA cannot be held responsible for the damage sustained by the equipment during transport or unpacking. Please visually check that the packaging is not damaged. The pump package includes the following documents: •... -
Page 8: Transport And Storage
Install the pump so as to allow proper ventilation. If the pump is installed outdoors, it should be covered by a roof. Its location should allow easy access for inspection or maintenance operations. INOXPA S.A.U. · 01.400.30.09EN · (0) 2021/04... -
Page 9: Pipes
Models with mechanical seal with quench may require the inlet and outlet connection to the cooling liquid. See the limits of water consumption and pressure from the cooling circuit in chapter 9. Technical Specifications. · INOXPA S.A.U. 01.400.30.09EN · (0) 2021/04... -
Page 10: Electrical Installation
• Start and stop the pump motor momentarily. Make sure that the direction of rotation is correct. If the pump rotates in the wrong direction it could cause serious damage. ATTENTION See indicator label on the pump. ALWAYS check the direction of rotation of the motor with liquid inside the pump. INOXPA S.A.U. · 01.400.30.09EN · (0) 2021/04... -
Page 11: Start-Up
Before starting the pump, carefully read the instructions in chapter Installation. Carefully read chapter 9. Technical Specifications. INOXPA will not be liable for improper use of the equipment. NEVER touch the pump or the lines if hot liquids are being pumped. 6.1. CHECKS BEFORE STARTING THE PUMP •... - Page 12 Use special protection when the sound pressure in the operation area exceeds 85 dB(A). If the pump has not an incorporated a pressure by-pass you should mount a relief valve or any other device that limits the pressure to 11,7 bar. INOXPA S.A.U. · 01.400.30.09EN · (0) 2021/04...
-
Page 13: Troubleshooting
The following table provides solutions to problems that might arise during the operation of the pump. The pump is assumed to have been properly installed and be suitable for the relevant application. Please contact INOXPA if technical assistance is required. Motor overload... -
Page 14: Maintenance
8.4. TIGHTENING TORQUE If not stated otherwise, the torques listed in the following table should be applied on the nuts and bolts of this pump. Size lbf·ft INOXPA S.A.U. · 01.400.30.09EN · (0) 2021/04... -
Page 15: Storage
Check the concentration of the cleaning solutions. Incorrect concentrations may lead to the deterioration of the pump seals. To remove any traces of cleaning products ALWAYS perform a final rinse with clean water at the end of the cleaning process. · INOXPA S.A.U. 01.400.30.09EN · (0) 2021/04... -
Page 16: Disassembly And Assembly Of The Pump
Incorrect assembly or disassembly may cause damage in the pump’s operation and lead to high repair costs and a long period of down time. INOXPA is not responsible for accidents or damages cause by a failure to comply with the instructions in this manual. - Page 17 2. At the point 9, remove carefully the suction casing (01) that has located the lip seal (88). Assembly 1. Fit the stationary part of the seal (08) on the suction casing (01) manually. 2. Assembly the lip seal (88) in the suction casing (01). · INOXPA S.A.U. 01.400.30.09EN · (0) 2021/04...
- Page 18 (52B) and washers (53A). ATTENTION When installing the new seal and lip seal, use soapy water when fitting the different parts and seals to allow them to slide better. INOXPA S.A.U. · 01.400.30.09EN · (0) 2021/04...
-
Page 19: Technical Specifications
Use special protection when the sound pressure in the operation area exceeds 85 dB(A) 9.1. WEIGHT WITH WHROUD AND LEGS Weight (kg) 0,75 5.5 7.5 A 50 A 80 A 150 A 200 161 184 · INOXPA S.A.U. 01.400.30.09EN · (0) 2021/04... -
Page 20: Weight Without Whroud And Without Legs
0,75 5.5 7.5 A 50 A 80 A 150 A 200 143 166 9.3. DIMENSIONS WITH WHROUD AND LEGS Motor Dimensions (mm) Pump type A 50 A 80 A 150 1073 A 200 INOXPA S.A.U. · 01.400.30.09EN · (0) 2021/04... -
Page 21: Dimensions Without Whroud And Without Legs
Technical Specifications 9.4. DIMENSIONS WITHOUT WHROUD AND WITHOUT LEGS Dimensions (mm) Motor Pump type A 50 A 80 A 150 A 200 · INOXPA S.A.U. 01.400.30.09EN · (0) 2021/04... -
Page 22: Exploded Drawing Of Aspir Pump
Technical Specifications 9.5. EXPLODED DRAWING OF ASPIR PUMP INOXPA S.A.U. · 01.400.30.09EN · (0) 2021/04... -
Page 23: Parts List Of Aspir Pump
Countersunk screw Protector screw Screw with flange Hexagonal screw Hexagonal screw Hexagonal screw Grower washer Flat washer Flat washer Grower washer Hexagonal nut Stud O-ring EPDM Splash ring EPDM Motor EPDM Recommended spare parts · INOXPA S.A.U. 01.400.30.09EN · (0) 2021/04... -
Page 24: Mechanical Seal With Quench
Technical Specifications 9.7. MECHANICAL SEAL WITH QUENCH Position Description Quantity Material Shaft for quench 1.4404 (AISI 316L) Lip seal Quick connector for tube D. 8 1.4404 (AISI 316L) Recommended spare parts INOXPA S.A.U. · 01.400.30.09EN · (0) 2021/04... - Page 25 NOTES ________________________________________________________________________________ ________________________________________________________________________________ ________________________________________________________________________________ ________________________________________________________________________________ ________________________________________________________________________________ ________________________________________________________________________________ ________________________________________________________________________________ ________________________________________________________________________________ ________________________________________________________________________________ ________________________________________________________________________________ ________________________________________________________________________________ ________________________________________________________________________________ ________________________________________________________________________________ ________________________________________________________________________________ ________________________________________________________________________________ ________________________________________________________________________________ ________________________________________________________________________________ ________________________________________________________________________________ ________________________________________________________________________________ ________________________________________________________________________________ ________________________________________________________________________________ ________________________________________________________________________________ ________________________________________________________________________________ ________________________________________________________________________________ ________________________________________________________________________________ ________________________________________________________________________________ ________________________________________________________________________________ ________________________________________________________________________________ ________________________________________________________________________________ ________________________________________________________________________________...
- Page 26 NOTES ________________________________________________________________________________ ________________________________________________________________________________ ________________________________________________________________________________ ________________________________________________________________________________ ________________________________________________________________________________ ________________________________________________________________________________ ________________________________________________________________________________ ________________________________________________________________________________ ________________________________________________________________________________ ________________________________________________________________________________ ________________________________________________________________________________ ________________________________________________________________________________ ________________________________________________________________________________ ________________________________________________________________________________ ________________________________________________________________________________ ________________________________________________________________________________ ________________________________________________________________________________ ________________________________________________________________________________ ________________________________________________________________________________ ________________________________________________________________________________ ________________________________________________________________________________ ________________________________________________________________________________ ________________________________________________________________________________ ________________________________________________________________________________ ________________________________________________________________________________ ________________________________________________________________________________ ________________________________________________________________________________ ________________________________________________________________________________ ________________________________________________________________________________ ________________________________________________________________________________...
- Page 27 NOTES ________________________________________________________________________________ ________________________________________________________________________________ ________________________________________________________________________________ ________________________________________________________________________________ ________________________________________________________________________________ ________________________________________________________________________________ ________________________________________________________________________________ ________________________________________________________________________________ ________________________________________________________________________________ ________________________________________________________________________________ ________________________________________________________________________________ ________________________________________________________________________________ ________________________________________________________________________________ ________________________________________________________________________________ ________________________________________________________________________________ ________________________________________________________________________________ ________________________________________________________________________________ ________________________________________________________________________________ ________________________________________________________________________________ ________________________________________________________________________________ ________________________________________________________________________________ ________________________________________________________________________________ ________________________________________________________________________________ ________________________________________________________________________________ ________________________________________________________________________________ ________________________________________________________________________________ ________________________________________________________________________________ ________________________________________________________________________________ ________________________________________________________________________________ ________________________________________________________________________________...
- Page 28 How to contact INOXPA S.A.U.: Contact details for all countries are Continually updated on our website. Please visit www.inoxpa.com to access the information. INOXPA S.A.U. Telers, 60 – 17820 – Banyoles – Spain Tel.: +34 972 575 200 – Fax.: +34 972 575 502...
Need help?
Do you have a question about the ASPIR Series and is the answer not in the manual?
Questions and answers