Table of Contents
Advertisement
Quick Links
Advertisement
Table of Contents

Related Manuals for INOXPA HYGINOX SEN


Summary of Contents for INOXPA HYGINOX SEN
- Page 1 INSTALLATION, SERVICE AND MAINTENANCE INSTRUCTIONS HYGINOX SEN INOXPA, S.A. c/Telers, 54 Aptdo. 174 E-17820 Banyoles Girona (Spain) Tel. : (34) 972 - 57 52 00 Fax. : (34) 972 - 57 55 02 email: inoxpa@inoxpa.com www.inoxpa.com 01.013.30.01EN (0) 2014/04...
- Page 2 INOXPA, S.A. c/ Telers, 57 17820 Banyoles (Girona), Spain herewith declares that the machine: HYGINOX SEN centrifugal pump with the serial number: ________________ conforms to the relevant provisions of the following directives: Machinery Directive 2006/42/EC (RD 1644/2008) Low voltage Directive 2006/95/EC...
-
Page 3: Safety
HYGINOX SEN pump. The information published in this instruction manual is based on updated data. INOXPA reserves the right to modify this instruction manual without prior notice. 1.2. INSTRUCTIONS FOR START-UP This instruction manual contains essential and useful information for the correct handling and maintenance of your pump. - Page 4 Risk to the environment due to the type of substances released. Warranty Any warranty will be void immediately and lawfully; additionally, INOXPA shall be compensated for any civil liability claims submitted by third parties, in the following cases: The service and maintenance work have not been carried out in accordance with the service instructions, the repairs have not been carried out by our personnel or have been carried out without our written authorisation;...
- Page 5 The usage of other parts will relieve the manufacturer of any liability. Changing the service conditions is only possible with prior written authorisation from INOXPA Please do not hesitate to contact us in case of doubts or if further explanations are required regarding specific data (adjustments, assembly, disassembly, etc.).
-
Page 6: Table Of Contents
7.3. Cleaning........................13 7.4. Assembly / disassembly of the pump ................15 Technical Specifications 8.1. Technical Specifications ....................17 8.2. Tightening torques ....................... 17 8.3. Cross section HYGINOX SEN ..................18 8.4. Parts list HYGINOX SEN ....................18 2.Table of contents 2014/02... -
Page 7: General Information
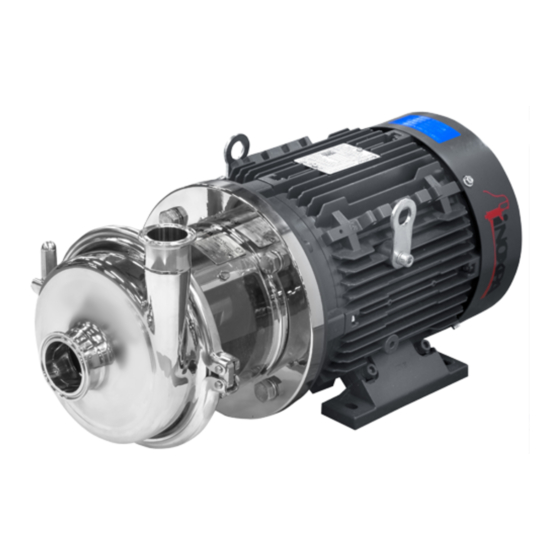
The pump is driven by a NEMA Premium Efficiency C face motor. 3.2. APPLICATION As a general rule, the most common application of HYGINOX SEN pumps in their standard version is in the food processing industry, mainly to transfer liquids. -
Page 8: Installation
4. Installation 4.1. RECEPTION OF THE PUMP INOXPA will not be liable for any deterioration of the material due to transport or unpacking. Visually check that the packaging has not been damaged. The following documentation is included with the pump: ... -
Page 9: Handling And Storage
4.2. HANDLING AND STORAGE HYGINOX SEN pumps are too heavy to be handled and stored manually. Lift the pump as indicated below: ATTENTION! Always remove the motor shroud before hoisting. 4.3. LOCATION Place the pump in a position that allows enough space around it to provide access to the pump as well as to the motor. -
Page 10: Electrical Installation
4.5. ELECTRICAL INSTALLATION The connection of the electrical motors must be performed by qualified personnel. Take the necessary precautions to prevent damage to cables and connections. Electrical equipment, terminals and components of the control systems may still bear electrical current when they are disconnected. -
Page 11: Starting The Pump
5.1. STARTING THE PUMP T echnical Specifications Carefully read Chapter 8. . INOXPA cannot be held responsible for the improper 5 0 H use of the equipment. NEVER touch the pump or the pipes if hot liquids are being pumped. -
Page 12: Operating Problems
The following table provides solutions to problems that may arise while operating the pump. It is assumed that the pump has been properly installed and that is has been selected correctly for the specific application. Please contact INOXPA if technical assistance is required. Motor overload. -
Page 13: Maintenance
7. Maintenance 7.1. GENERAL CONSIDERATIONS This pump, just like any other machine, requires maintenance. The instructions in this manual cover the identification and replacement of spare parts. The instructions are aimed at maintenance personnel and those responsible for the supply of spare parts. Carefully read Chapter 8. - Page 14 Check the concentration of the cleaning solutions; incorrect concentrations may lead to deterioration of the pump seals. To remove any traces of cleaning products, ALWAYS perform a final rinse with clean water at the end of the cleaning process. SIP (Sterilization-in-Place) cleaning Sterilization with steam is applied to all equipment including the pump.
-
Page 15: Assembly / Disassembly Of The Pump
7.4. ASSEMBLY / DISASSEMBLY OF THE PUMP Pump and mechanical seal Disassembly Remove the clamping ring (15) and disassemble the pump casing (01). Check the condition of the O-ring (80A) on the pump body and replace it if damaged. Remove the screws (50A) and the lantern protections (47A). - Page 16 Assembly Fit the shaft (03) on the motor (93). Secure the shaft (03) to the motor (93) with the studs (55), leaving it slightly loose to allow positioning the impeller (02) relative to the cover (03). Hold the cover (03) on the lantern (04) with the hand.
-
Page 17: Technical Specifications
8. Technical Specifications 8.1. TECHNICAL SPECIFICATIONS Maximum operating pressure 1000 kPa (10 bar) Temperature range - 10 to 120 °C (EPDM) Maximum speed 3000 rpm (50 Hz) 3600 rpm (60 Hz) Materials Parts in contact with the product AISI 1.4404 Other steel parts AISI 304 L (1.4306) Seals in contact with the product... -
Page 18: Cross Section Hyginox Sen
8.3. CROSS SECTION HYGINOX SEN 8.4. PARTS LIST HYGINOX SEN Description Item Quantity Material Pump housing AISI 316L Impeller AISI 316L Pump cover AISI 316L Lantern AISI 304 Shaft AISI 316L Mechanical seal Seal cover AISI 316L Clamp body AISI 304... - Page 19 Fax: 86 573 83 570 038 e-mail: spb@inoxpa.com INOXPA UCRANIA KIEV Tel: 38 050 720 8692 e-mail: kiev@inoxpa.com In addition to our branches, INOXPA has a network of independent distributors in over 50 countries worldwide.For further information, visit our website. w ww.inoxpa.com 5 8 H...
Need help?
Do you have a question about the HYGINOX SEN and is the answer not in the manual?
Questions and answers