
Related Manuals for INOXPA KIBER KSF


Summary of Contents for INOXPA KIBER KSF
- Page 1 INSTALLATION, SERVICE AND MAINTENANCE INSTRUCTIONS PROGRESSIVE CAVITY PUMP KIBER KSF / KSFT Original Instructions 01.611.30.08EN (0) 2020/02...
- Page 2 EN 60204-1:2006+A1:2009 In compliance with Regulation (EC) 1935/2004 relating to materials and articles intended to come into contact with food. The technical file has been prepared by the signer of this document in INOXPA S.A.U. David Reyero Brunet Technical Office Manager...
-
Page 3: Table Of Contents
9.4. Dimensions of KIBER KSF pump with by-pass pressure ..................... 23 9.5. Dimensions of KIBER KSFT pump ..........................24 9.6. Exploded drawing and parts list of KIBER KSF pump ....................25 9.7. Exploded drawing and parts list of KIBER KSFT PUMP ....................27 9.8. -
Page 4: Generalities
• risk to the environment due to the type of substances released. 2.3. WARRANTY Any warranty will be void immediately and lawfully and, additionally, INOXPA will be compensated for any civil liability claims submitted by third parties, in the following cases: •... -
Page 5: Safety
Important instruction for the protection of the equipment and its functions ATTENTION 3.2. GENERAL SAFETY INSTRUCTIONS Read the instruction manual carefully before installing and starting the pump. Contact INOXPA in case of doubt. 3.2.1. During the installation 9. Technical Specifications of chapter 9 should always be observed. -
Page 6: General Information
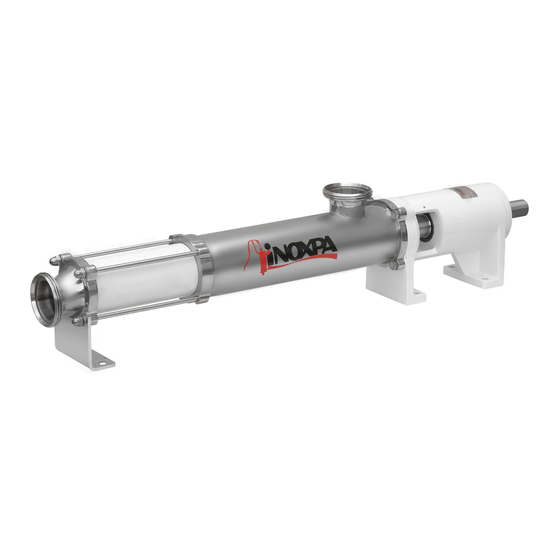
4. General Information 4.1. DESCRIPTION With a compact and robust design, INOXPA’s KSF and KSFT progressive cavity pumps form part of our range of positive-displacement pumps with helical rotor, intended for viscous fluids. The hydraulic parts that form the pump are the rotor and the stator. The rotor is a round-section worm. The stator has two ribs and its pitch doubles that of the rotor, thus allowing empty cavities between the stator and the rotor. -
Page 7: Installation
Serial number 5.3. TRANSPORT AND STORAGE ATTENTION The KIBER KSF and KIBER KSFT pumps are often too heavy to be stored manually. Use an appropriate means of transport. Use the points which are indicated in the drawing for lifting the pump. -
Page 8: Location
The type of protection selected should not isolate the pump entirely. It should allow for the bearings to be cooled more efficiently and for the bearings to be lubricated. INOXPA S.A.U. · 01.611.30.08EN · (0) 2020/02... -
Page 9: Pipes
For more information on the pressurization tank (installation, performance, maintenance, etc.), refer to the instruction manual supplied by the manufacturer. 5.6. ELECTRICAL INSTALLATION Only qualified personnel can connect the electric motors. Take the necessary measures to prevent damage to cables and connections. · INOXPA S.A.U. 01.611.30.08EN · (0) 2020/02... - Page 10 ALWAYS check the direction of rotation of the motor with liquid inside the pump. For models with a seal chamber, ALWAYS make sure that the chamber is full of fluid before checking the direction of rotation. INOXPA S.A.U. · 01.611.30.08EN · (0) 2020/02...
-
Page 11: Start-Up
Prior to starting the pump, carefully read the instructions in section Installation. Carefully read section 9. Technical Specifications. INOXPA will not be liable for improper use of the equipment. NEVER touch the pump or the lines if hot liquids are being pumped. 6.1. CHECKS BEFORE STARTING THE PUMP •... - Page 12 Start-up The pump always leaves INOXPA with a by-pass mounted to work with the aspiration in the pump casing and the impulsion ahead. If the pump has not an incorporated a pressure by-pass you should mount a relief valve or any other device that limits the pressure to 6 bar for single-stage stator or 12 for double-stage stator pump.
-
Page 13: Troubleshooting
The following table provides solutions to problems that might arise during the operation of the pump. The pump is assumed to have been properly installed and be suitable for the relevant application. Please contact INOXPA if technical assistance is required. Motor overload... -
Page 14: Maintenance
8.5. CLEANING The use of aggressive cleaning products such as caustic soda and nitric acid may give raise to skin burns. Use rubber gloves during cleaning procedures. Always use protective goggles. INOXPA S.A.U. · 01.611.30.08EN · (0) 2020/02... - Page 15 Maximum conditions during SIP process with steam or overheated water: a) Maximum temperature: 140°C / 284°F b) Maximum time: 30 min c) Cooling: sterile air or inert gas d) Materials: EPDM/PTFE (recommended) FPM/NBR (not recommended) · INOXPA S.A.U. 01.611.30.08EN · (0) 2020/02...
-
Page 16: Disassembly And Assembly Of The Pump
Incorrect assembly or disassembly may cause damage in the pump’s operation and lead to high repair costs and a long period of down time. INOXPA is not responsible for accidents or damages cause by a failure to comply with the instructions in this manual. - Page 17 ATTENTION When installing the different parts and seals, use soapy water to allow them to slide better. B. Heavy duty transmission (only optional for KIBER KSF) Disassembly • Loosen the nuts (54) and remove the leg (07) and the discharge nozzle (34).
- Page 18 • Slide the rotary part of the seal (08) into the shaft complement (26). • Place the seal ring (31) on the shaft and fasten it with the pins (55) according to the following assembly dimension: INOXPA S.A.U. · 01.611.30.08EN · (0) 2020/02...
- Page 19 Slide the rotary part of the seal (08) into the shaft complement (26). • Place the seal ring (31) on the shaft and fasten it with the pins (55) according to the A dimension showed in chapter 8.6.2. Mechanical seal. · INOXPA S.A.U. 01.611.30.08EN · (0) 2020/02...
- Page 20 KSF – 25/30 35,5 24 / 25 / 28 KSF – 40/50 24 / 25 / 28 / 30 KSF – 60/80 31,5 35 / 38 / 40 / 42 10 / 12 INOXPA S.A.U. · 01.611.30.08EN · (0) 2020/02...
-
Page 21: Technical Specifications
AISI 316L Other stainless steel parts AISI 304 Seals in contact with the product Stator Black NBR Other materials for the seal consult with INOXPA Surface finish matt Mechanical seal Type of seal: single inside seal Stationary parts material ceramic... -
Page 22: Particle Size
Pump type (Kg) type (Kg) type (Kg) type (Kg) KSF-20 2KSF-20 KSFT-20 2KSFT-20 KSF-25 2KS-25 KSFT-25 2KSFT-25 KSF-30 2KS-30 KSFT-30 2KSFT-30 KSF-40 2KS-40 KSFT-40 2KSFT-40 KSF-50 2KS-50 KSFT-50 2KSFT-50 KSF-60 KSFT-60 KSF-80 KSFT-80 INOXPA S.A.U. · 01.611.30.08EN · (0) 2020/02... -
Page 23: Dimensions Of Kiber Ksfpump
Pump type KSF-20 2KSF-20 KSF-25 2KSF-25 KSF-30 2KSF-30 KSF-40 1 175 2KSF-40 1 061 KSF-50 1 315 2KSF-50 1 265 KSF-60 1 395 KSF-80 9.4. DIMENSIONS OF KIBER KSF PUMP WITH BY-PASS PRESSURE · INOXPA S.A.U. 01.611.30.08EN · (0) 2020/02... -
Page 24: Dimensions Of Kiber Ksft Pump
KSF-80 1 245 9.5. DIMENSIONS OF KIBER KSFT PUMP Pump type KSFT-20 2KSFT-20 KSFT-25 2KSFT-25 KSFT-30 2KSFT-30 KSFT-40 2KSFT-40 1 175 KSFT-50 1 061 2KSFT-50 1 315 2KSFT-60 1 265 2KSFT-80 1 395 INOXPA S.A.U. · 01.611.30.08EN · (0) 2020/02... -
Page 25: Exploded Drawing And Parts List Of Kiber Ksf Pump
Technical Specifications 9.6. EXPLODED DRAWING AND PARTS LIST OF KIBER KSF PUMP · INOXPA S.A.U. 01.611.30.08EN · (0) 2020/02... - Page 26 AISI 316L Seal stop ring AISI 316L Stop washer F-522 Discharge nozzle AISI 316L Protection Plastic Screw Hexagonal screw Hexagonal screw Flat washer Spring washer Blind nut O-ring Drive Recommended spare parts INOXPA S.A.U. · 01.611.30.08EN · (0) 2020/02...
-
Page 27: Exploded Drawing And Parts List Of Kiber Ksft Pump
Technical Specifications 9.7. EXPLODED DRAWING AND PARTS LIST OF KIBER KSFT PUMP · INOXPA S.A.U. 01.611.30.08EN · (0) 2020/02... - Page 28 AISI 316L Stop washer F-522 Discharge nozzle AISI 316L Bolt washer AISI 316L Protection Plastic Countersunk screw Screw Hexagonal screw Hexagonal screw Flat washer Blind nut O-ring Drive Recommended spare parts INOXPA S.A.U. · 01.611.30.08EN · (0) 2020/02...
-
Page 29: Heavy Duty Transmission
AISI 316L Rotor AISI 316L Connecting rod AISI 316L Shaft complement AISI 316L AISI 316L Bolt Safe ring AISI 316L Transmission bushing AISI 316L O-ring O-ring Recommended spare parts · INOXPA S.A.U. 01.611.30.08EN · (0) 2020/02... -
Page 30: Cooled Mechanical Seal
Technical Specifications 9.9. COOLED MECHANICAL SEAL Position Description Quantity Material Cooled seal cover AISI 316L Lip seal Racord AISI 316 Recommended spare parts INOXPA S.A.U. · 01.611.30.08EN · (0) 2020/02... - Page 31 NOTAS ________________________________________________________________________________ ________________________________________________________________________________ ________________________________________________________________________________ ________________________________________________________________________________ ________________________________________________________________________________ ________________________________________________________________________________ ________________________________________________________________________________ ________________________________________________________________________________ ________________________________________________________________________________ ________________________________________________________________________________ ________________________________________________________________________________ ________________________________________________________________________________ ________________________________________________________________________________ ________________________________________________________________________________ ________________________________________________________________________________ ________________________________________________________________________________ ________________________________________________________________________________ ________________________________________________________________________________ ________________________________________________________________________________ ________________________________________________________________________________ ________________________________________________________________________________ ________________________________________________________________________________ ________________________________________________________________________________ ________________________________________________________________________________ ________________________________________________________________________________ ________________________________________________________________________________ ________________________________________________________________________________ ________________________________________________________________________________ ________________________________________________________________________________ ________________________________________________________________________________...
- Page 32 How to contact INOXPA S.A.U.: Contact details for all countries are Continually updated on our website. Please visit www.inoxpa.com to access the information. INOXPA S.A.U. Telers, 60 – 17820 – Banyoles – Spain Tel.: +34 972 575 200 – Fax.: +34 972 575 502...
Need help?
Do you have a question about the KIBER KSF and is the answer not in the manual?
Questions and answers