Macherey-Nagel NANOCOLOR Advance Operating Instruction
Hide thumbs
Also See for NANOCOLOR Advance:
- Quick start manual (15 pages) ,
- Quick start manual (146 pages)

Subscribe to Our Youtube Channel
Related Manuals for Macherey-Nagel NANOCOLOR Advance


Summary of Contents for Macherey-Nagel NANOCOLOR Advance
- Page 1 MACHEREY-NAGEL Spectrophotometer NANOCOLOR Advance ® Operating instruction www.mn-net.com www.mn-net.com...
-
Page 2: Table Of Contents
Contents 1. Introduction ................................. 4 2. CE marking ................................. 4 3. Type label ..................................4 4. Explanation of symbols ..............................5 5. Safety instructions ............................... 6 6. Chemical and biological safety ............................. 7 7. Technical description ..............................8 7.1 Technical data ............................... 8 8. - Page 3 Contents 12.1.1 NTU-Check ..............................29 12.1.2 Reaction time .............................. 29 12.2 Device Settings ..............................31 12.3 Energy Settings ..............................32 12.3.1 Logging ............................... 32 13. System ..................................32 13.1 Information ................................. 32 13.2 Update & Backup ............................... 33 13.3 System reset ..............................33 13.4 Battery ................................
-
Page 4: Introduction
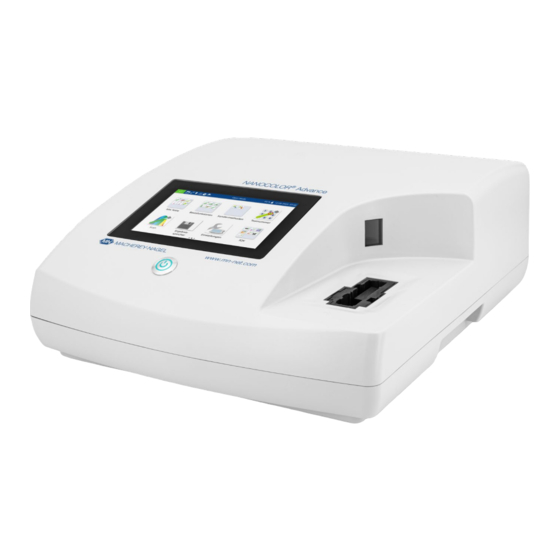
Introduction 1. Introduction The NANOCOLOR Advance is a spectrophotometer from MACHEREY-NAGEL for mobile use and for use in laborato- ries. It is used for the evaluation of colorimetric test kits from MACHEREY-NAGEL. Besides the measurement of the absorbed light it offers the possibility to determine the nephelometric tur- bidity units by measuring the light scattering in a 90°... -
Page 5: Explanation Of Symbols
The CE symbol indicates fulfillment of the applicable harmonization legislation of the European Community. MACHEREY-NAGEL Identification of the manufacturer This symbol indicates that there is a risk of electric shock. This symbol indicates that the chemicals used have a corrosive effect. Observe the safety measures in the laboratory and wear the prescribed protective equipment. -
Page 6: Safety Instructions
Safety instructions 5. Safety instructions BE SURE TO READ THE FOLLOWING SAFETY INSTRUCTIONS CAREFULLY BEFORE USING THE DEVICE. Failure to follow these instructions may result in serious injury to the operator, malfunction or damage to the equipment. Keep this manual in a safe place for future reference. Follow the safety notes and instructions in the operating manual and observe the stickers and notices on the device. -
Page 7: Chemical And Biological Safety
Chemical and biological safety 6. Chemical and biological safety WARNING Possible dangers of contact with chemical and biological substances. Working with samples, reagents and corresponding accesso- ries is associated with dangers. Wear suitable protective equipment when working with the cuvettes. Observe the safety data sheet (SDS) of the test kit used. -
Page 8: Technical Description
Technical description 7. Technical description The NANOCOLOR Advance enables measurements in the ® wavelength range of 340 nm to 800 nm. The light generated by a halogen lamp is diffracted by a concave grating and directed into the cuvette shaft of the instrument by means of imaging optics. After passing through the sample, the proportion of absorbed light is calculated by detecting the attenuated light. -
Page 9: Setting Up And Connecting The Device
Setting up and connecting the device 8. Setting up and connecting the device 8.1 Scope of delivery Check the delivery for completeness. If parts of the delivery should be missing, contact MACHEREY-NAGEL or your local distributor directly. Spectrophotometer NANOCOLOR Advance ®... -
Page 10: Transport
Fig. 2: Connecting the power supply 8.3 Transport NOTICE If the battery is damaged, the device must not be shipped. Contact MACHEREY-NAGEL or your local distributor. NOTICE When the equipment is shipped, the outer box must be marked to indicate a lithium-ion battery is included (UN 3481). -
Page 11: Device Views
Device views Only ship the device in a box that is suitable for shipment of devices containing lithium-ion batteries. If the original box is no longer available contact MACHEREY-NAGEL. 9. Device views 9.1 Front and side view Fig. 3: Front view Fig. -
Page 12: Initial Operation
Initial operation A Speaker B Lamp shaft C Cuvette slot drain 10. Initial operation WARNING Exposure of the eye to light. Do not look directly into the light beam of the halogen lamp and the turbidity LED. 10.1 Turning on the device After charging the battery, switch on the device using the button on the front panel below the display (Fig. -
Page 13: Application And Status Information Bar
Initial operation 10.2.2 Application and status information bar The operating menu of the spectrophotometer consists of a status information bar at the top of the screen and an application bar directly below. The status information bar is always displayed. The application bar is temporarily hidden depending on the menu for a better overview. -
Page 14: Start Screen
Initial operation 10.2.3 Start screen The start page of the device is empty when delivered. However, up to eight different icons can be linked on the start page. These are then available directly after the device is started. The icons can be attached to the start screen by holding the icon for a longer time and confirming the command “Attach to start screen”. -
Page 15: Measurements
Measurements 11. Measurements 11.1 Basic Functions Pressing the icon will open the basic functions menu with six different measurement options to choose from. With the excep- tion of the turbidity measurement, the tests in the Basic Functions menu are independent of the cuvette size used. After a measurement, various sample information can be entered via the icons below the results window. -
Page 16: Absorbance
Measurements After the measurement has been completed, the measurement result will be displayed in the result window (see 11.3 Result view, page 19). In case more samples need to be investigated the next sample can be inserted. Pressing will start the measure- ment of the next sample. -
Page 17: Transmittance
Measurements 11.1.5 Transmittance The basic function Transmittance enables the measurement of a sample’s transmission against a zero solution. After having se- lected this method, a window will appear asking for the wave- length of measurement. After calling the menu, a window appears for entering the wave- λ... -
Page 18: Standard Tests
Measurements NOTICE For tube tests that must be measured against a zero solution, no automatic measurement is performed. The measurement must be started manually by pressing Press the icon to access the selection list of tube tests. By selecting an entry, the corresponding test is highlighted. After confirming with , the measuring window is opened. -
Page 19: Visocolor ® Powder Pillows And Visocolor ® Eco
Measurements The desired test can also be called up by entering the test number (see 11.7 Test number, page 29). When the test is complete, the result is displayed in the measurement window. Various sample information can be entered using the icon and the icons below the result field (see 11.3 Result view, page 19). - Page 20 Measurements front of the corresponding sample information must be activated. To remove the icon from the sample information bar, proceed in the same way and set the slider to inactive. The following sample information can be added to the sample: Sample Number: Sample numbers are assigned automatically and consecutively by the instrument.
-
Page 21: Determination Of Corrections Values
Measurements The “Correction measurement” option can be used, if a correction value (see 11.4 Determination of corrections values, page 21) is applied to compensate for a measurement error with colored or turbid samples. With the command Do not save, the measurement result is not stored in the instrument memory when the cuvette is removed or when the menu is exited. -
Page 22: Correction Values For Nanocolor ® Tube Tests
Measurements If the correction factor is so low in the same matrix with several samples that it is negligible for the measurement problem at hand, the determination can be omitted. However, this only results from practical testing and is not evident beforehand! When measuring the correction value, a clean, empty tube filled with distilled water is used as the zero value (exception: tests 0-59 / 0-64 / 0-65 / 0-66). -
Page 23: Correction Values For Nanocolor ® Standard Tests With Reagent Blank Value
Measurements Test Tube for correction (value B) 0-64, 0-65 Nitrate 8–50 Open nitrate test tube, add 0.5 mL sample and 0.5 mL 2-propanol, close, mix. Blank value for correction: Open nitrate test tube, add 0.5 mL distilled water and 0.5 mL 2-propanol, close, mix. 0-66 Nitrate 250 Open nitrate test tube, add 0.2 mL sample and 0.5 mL 2-propanol, close, mix. -
Page 24: Correction Values For Nanocolor ® Standard Tests With Sample Blank Value
Measurements Test Preparation for correction (value B) 1-163 Chlorine dioxide 20 mL sample; 1.0 mL R4, 1.0 mL R1, mix; fill to 25 mL with distilled water, mix. 1-20 Chloride 20 mL sample; 2 mL R1, mix; fill to 25 mL with distilled water, mix. 1-26 Manganese LR No correction possible. -
Page 25: Special Methods
The Special Methods menu is opened by pressing the icon se- quence This menu allows you to retrieve the special → methods preprogrammed by MACHEREY-NAGEL, as well as the special methods created by the user. 11.5.1 Preprogrammed Methods Pressing will open the list box containing the MACHEREY-NAGEL preprogrammed special methods. -
Page 26: Method Design
Measurements The selected special method can be edited by selecting the icon. A window opens with the properties of the special method These properties can be viewed or changed. Confirming with saves the changes. Selecting the icon removes the marked method from the list. A prompt to confirm the deletion opens. - Page 27 Measurements Symbol: Enter a symbol via the text keypad which will be shown after the unit when the result is displayed. Confirm the entry with Enter. No more than 10 characters are allowed. Unit: Enter a unit via the text keypad which will be shown when the result is displayed.
-
Page 28: Scan
Measurements Factors: On the last page of the method design, factors for the final calculation of the measurement result are entered. Formulas up to the 4th degree can be used. Tapping on the individual fields of the factors will open a numeric keypad for entering numerical values. -
Page 29: Test Number
Settings 11.7 Test number All tests can also be accessed by entering the test number. When entering the three-digit test number, the information of the last selected sub-method appears. By entering the three-digit test number plus the corresponding sub-method number, the informa- tion for this sub-method can be viewed. - Page 30 Settings If the Reaction Time is activated, it can be skipped within a mea- surement by pressing 12.1.3 Result Memory By clicking on the Memory entry you can view the memory set- tings. In addition to an overview of the memory usage, the mea- surement result memory can be switched on or off here.
-
Page 31: Device Settings
Settings 12.2 Device Settings 12.2.1 Language NOTICE The device will restart automatically after changing the language. Click on Language to select the language of the instrument from the list that pops up. After you have selected the desired language, the list will close and the chosen language will be applied as the general display language for the entire device. -
Page 32: Energy Settings
Clicking on the Information icon opens a window with informa- tion about the device. Here you will find information about the manufacturer, device model, serial number, firmware versions and system ID. Have this information available when contacting MACHEREY-NAGEL Technical Support. Spectrophotometer NANOCOLOR Advance 1.0, 11.2020 ®... -
Page 33: Update & Backup
MACHEREY-NAGEL website. Unzip the folder and follow the in- structions in the update manual. 13.3 System reset A system reset sets the device back to the default setting. All data, special methods and custom settings will be deleted. We suggest that you backup all saved data, special methods, and the user-defined settings beforehand (see 13.2 Update &... -
Page 34: Zero Calibration
System 13.6.1 Zero Calibration Clicking opens the window for the zero calibration é ê Select the desired cuvette size and start the calibration procedure by confirming with . The instrument performs an air measure- ment first and then asks you to insert the calibration cuvette. NOTICE Make sure that the calibration cuvette used is free of scratches and turbidity. -
Page 35: Iqc
System 13.7 IQC The Internal Quality Control (IQC) menu is accessed via the icon. Through the various options, quality control parameter can be checked and documented.. 13.7.1 System Monitoring Clicking the icon opens the menu System Monitoring. The menu contains the programs for checking the optical properties of the device. -
Page 36: Standard Measurement
System 13.7.1.3 Wavelength Accuracy Check The Wavelength Accuracy Check tests the accuracy of the wavelengths at 361 nm, 446 nm and 536 nm against an internal holmium oxide filter. Press the icon to open the program for the Wavelength Accuracy Check. Confirm with to start the automatic measuring process. -
Page 37: User Accounts
System Removing the cuvette or leaving the measuring menu via the remaining icons in the application bar quits the measuring proce- dure and saves the result in the IQC memory of the instrument (see 13.7 IQC, page 35). Alternatively, a standard measurement can also be subsequently defined within the scope of a measurement. - Page 38 System deactivated, the user is no longer allowed to change settings in the device, delete measurements or edit users. The assignment of a password is mandatory for administrator accounts. Confirm with saves the created account and adds it to the user list. By clicking on the icon, the settings for a user can be edited.
-
Page 39: Results
Results 14. Results NOTICE If the maximum memory usage is exceeded, the oldest mea- surement results are overwritten. Before the memory is full, a warning appears in the start screen with the reminder to save the results. The measurement data memory can store up to 1000 measure- ment data, 1000 IQC results and 100 scans. -
Page 40: Filter Results
Results 14.1 Filter Results In the Results menu, the measurement and IQC results can be filtered according to different sample information by pressing The selection list for selecting according to a specific method is called up by clicking on the Method entry in the filter menu. After selecting the method, the memory contents are selected accordingly. -
Page 41: Maintenance And Cleaning
Maintenance and Cleaning 15. Maintenance and Cleaning NOTICE The unit must be switched off and disconnected from the power supply for all cleaning work. WARNING Fire hazard: Do not use flammable detergents or solvents to clean the unit. NOTICE Do not clean the device with acetone or similar products. WARNING Incorrect measurements: A dirty cuvette slot can lead to contamination of the inserted cuvettes and to incorrect results. -
Page 42: Cleaning Of Cuvette Slot And Adaptors
Maintenance and Cleaning 15.2 Cleaning of Cuvette Slot and Adaptors If necessary, clean or dry the cuvette slot and the adaptors with a soft, lint-free cotton cloth. Do not use sharp objects or brushes for cleaning to prevent damage to mechanical components. Liquid that has leaked into the cuvette slot is drained off through a hole in the bottom of the instrument. -
Page 43: Errors, Sources And Solutions
16. Errors, Sources and Solutions Depending on the operating status, different messages can be displayed. The source of the error can be either an operating error or a malfunction of the device. In case of recurring errors contact MACHEREY-NAGEL. Error Source Solution... -
Page 44: Service
Contact your local MACHEREY-NAGEL representative. Disposal according to EU Directive 2012/19/EU. In accordance with the EU Directive 2012/19/EU MACHEREY-NAGEL takes back the old device and disposes it free of charge. 17.3 Warranty, liability and complaints The warranty for this device is 24 months from date of purchase. -
Page 45: Contact
Service The warranty is limited to the repair of defective parts or – at MACHEREY-NAGEL’s discretion – the delivery of a faultless re- placement unit. The warranty period of 24 months shall not be affected by any warranty claim. There is no right of withdrawal.
Need help?
Do you have a question about the NANOCOLOR Advance and is the answer not in the manual?
Questions and answers