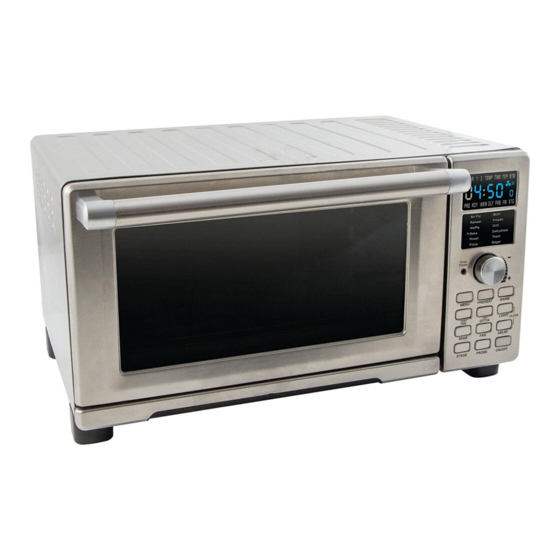
NuWave Bravo XL Owner's Manual
Air fryer and oven with temperature probe
Hide thumbs
Also See for Bravo XL:
- User manual ,
- Owner's manual (104 pages) ,
- Quick start manual (4 pages)
Advertisement
Available languages
Available languages
Advertisement
Table of Contents

Related Manuals for NuWave Bravo XL


Summary of Contents for NuWave Bravo XL
- Page 1 OWNER’S MANUAL Bravo ® Air Fryer and Oven with Temperature Probe nuwavenow.com...
- Page 2 As a special thank-you for registering your NuWave DOWNLOAD THE QR CODE unit, you’ll automatically receive an additional 6 months added to your limited manufacturer’s warranty!* APP TO YOUR MOBILE DEVICE All you have to do is follow these simple steps.
-
Page 3: Table Of Contents
IMPORTANT SAFEGUARDS TABLE OF CONTENTS HOUSEHOLD USE ONLY • READ ALL INSTRUCTIONS BEFORE USE OWNER’S MANUAL Operate only in accordance authorized service facility Important Safeguards ..............5-8 with intended use as for examination, repair, or described in this manual. adjustment. 12 Presets ..................9-10 When using electrical 10. -
Page 4: Important Safeguards
IMPORTANT SAFEGUARDS HOUSEHOLD USE ONLY • READ ALL INSTRUCTIONS BEFORE USE 19. Use aluminum foil to wrap 29. Never touch the insides To reduce the risk of WARNING foods that produce oil or of the Bravo while it is electric shock, this plug juice when operating and put operating. -
Page 5: 12 Presets
IMPORTANT SAFEGUARDS 12 PRESETS HOUSEHOLD USE ONLY • READ ALL INSTRUCTIONS BEFORE USE DO NOT attempt to use NOTICE: FAILURE TO 12 Preprogrammed Menus the Bravo to deep-fry any FOLLOW ANY OF THE Air Fry Pizza food as this is NOT its IMPORTANT SAFEGUARDS, Automatic Preheats to 450F Automatic Preheats to 450F... -
Page 6: Measurement Chart
12 PRESETS PROBE TEMPERATURE CHART Frozen Toast Cooking Rare Med Well Well Meats Temp. Rare Automatic Preheats to 450F Automatic Preheats to 450F °F/ °C °F/ °C °F/ °C °F/ °C °F/ °C °F/ °C (232C) (232C) • Default Temp: 375F (191C) •... -
Page 7: Parts & Accessories
PARTS & ACCESSORIES ASSEMBLY GUIDE Place the Bravo on a level, rear of the unit. even, and stable heat- Note: resistant surface. Do not cover or block the intake Slide the Cooking Rack(s) air vents located in the back and into Position 1, 2, 3, or 4 of sides of the Bravo, as doing so the Bravo. -
Page 8: Quickstart
QUICKSTART INSTRUCTIONS Press START/PAUSE a ON/OFF Getting Started Turns the Bravo ON and OFF. This also stops any cooking function. While Press ON/OFF once to turn second time to resume ® cooking press ON/OFF to cancel. your Bravo on. cooking. MENU •... -
Page 9: Instructions
INSTRUCTIONS WRM (WARM) Independent WARM Note: While using Broil from • Turn the START/PAUSE This feature will keep your food Press ON/OFF. the MENU, the BTM power counterclockwise to warm for up 3 hours. is not adjustable. The Broil decrease temperature Press WRM/FAN and TOP/ function only uses the TOP in 5F (1C) increments. - Page 10 INSTRUCTIONS START/PAUSE to begin Press TEMP/TIME. Adjust PREHEAT DELAY Press ON/OFF. Adjust cooking. Default – 1 hour. cooking temperature to cooking temperature and • If START/PAUSE is 360F (182C). cooking time. not pressed within the Press TEMP/TIME a 5-minute countdown, second time.
- Page 11 INSTRUCTIONS Menu option that requires it. 450F (232C) for 5 min. MENU SEAR 1 2 Menus with built-in preheat Press ON/OFF. (SEAR 2), display End, include “Air Fry”, “Bake”, and beep three times, Press SEAR twice. 450F “Pizza”, “Frozen”, “Toast”, indicating your cooking (232C), TEMP, and SEAR “Broil”, “Grill”, and “Roast”.
- Page 12 INSTRUCTIONS Press SEAR once. Turn • The remaining time for internal temperature of food. SEAR 1, SEAR 1 2, DELAY, START/PAUSE to adjust that function or stage will Default – 165F (74C). and WARM with STAGE temperature to 350F count down and colon (:) COOKING Example: Delay for 1 hour »...
- Page 13 INSTRUCTIONS • Press hold PROBE for Probe temperature achieved and the default TOP/BTM heat the milk and secure it with the 1 sec. to display the 200F (93C) at stage 2, the is 100/100. probe clip. Place the bowl into set temperature of the Bravo will stop cooking for the Bravo and heat it to 185F...
- Page 14 INSTRUCTIONS program number. The Refer to the Quickstart Guide Program Your Own Recipe To Edit a Program: program is now stored and Edit Before Cooking: for the list. During Cooking: Set your cooking functions, • Press PROG and find available for future recall. Memory Recall: Press the including temperatures the program number you...
- Page 15 INSTRUCTIONS • The Bravo will continue Notes: Oven Rack and Pan Positions the cooking process • If you save any recipe to an Position 1: with the edits that you already filled memory slot, Air Fry, Bake, Broil, Dehydrate, Frozen, Grill, Pizza, Reheat, Roast, have made.
-
Page 16: Cleaning & Maintenance
INSTRUCTIONS CLEANING & MAINTENANCE Always unplug the Bravo Carryover Cooking: Example: Before First Use: Wash all removable parts from the electrical outlet. 1. During cooking, it Probe: 200F (93C) warm, soapy water or in the NEVER clean the unit while will display current Regular Cooking: 380F dishwasher, top rack only. -
Page 17: Troubleshoot Guide
TROUBLESHOOT GUIDE TROUBLESHOOT GUIDE CLEANING & MAINTENANCE Bake vs. Roast vs. Broil To remove crumbs, slide The Bravo was engineered with out the Crumb Tray and an automatic shut-off feature Use Bake when cooking discard crumbs. Wipe to prevent overheating during items that rise (e.g., clean and replace. - Page 18 TROUBLESHOOT GUIDE TROUBLESHOOT GUIDE The LED screen is blank. Error Message: Solution(s): The Bravo overheated Probe not connected to the unit. Plug the and has shut itself down. Prb1 Bravo into the appropriate power socket. No action was taken after certain stages of cooking The Probe target internal temperature is set Prb2...
-
Page 19: Limited Warranty
Manufacturer will provide the necessary parts and labor to repair OF REPAIR OR REPLACEMENT AS PROVIDED UNDER any part of the Bravo at NuWave LLC Service Department. After THIS LIMITED WARRANTY IS EXCLUSIVE. IN NO the expiration of the warranty, the cost of the labor and parts will EVENT SHALL THE MANUFACTURER BE LIABLE FOR be the responsibility of the owner. - Page 20 DISPUTE RESOLUTION PROCEDURE. For disputes relating action with respect to the dispute arising out of your purchase to use of the website or use or purchase of a NuWave or use of a NuWave product. For any dispute arising out of product or service (collectively “Disputes”), you agree to first...
- Page 21 QR ubicado en la etiqueta de su producto ubicada en la parte posterior de la unidad. Se le dirigirá a la página de registro del producto NuWave con el número de serie único de su producto que se ingresa automáticamente en el campo correspondiente.
- Page 22 MEDIDAS DE SEGURIDAD IMPORTANTES ¡para una garantía USO DOMÉSTICO SOLAMENTE • LEA TODAS LAS INSTRUCCIONES adicional de ANTES DE USAR No lo haga funcionar si meses! Lee todas las instrucciones. el Bravo o el cable del aparato funcionan mal o Asegúrese de que el Bravo si han sido dañados de y todas las piezas estén...
- Page 23 MEDIDAS DE SEGURIDAD IMPORTANTES USO DOMÉSTICO SOLAMENTE • LEA TODAS LAS INSTRUCCIONES ANTES DE USAR 18. No coloque papel, cartón, 26. No llene en exceso El cable más largo debe ADVERTENCIA plástico ni ningún otro el Bravo, ya que el estar dispuesto de modo material inflamable encima contenido estaría tocando...
- Page 24 12 MENÚS PREPROGRAMADOS MEDIDAS DE SEGURIDAD IMPORTANTES USO DOMÉSTICO SOLAMENTE • LEA TODAS LAS INSTRUCCIONES 12 Menús Preprogramados ANTES DE USAR Air Fry Pizza No mueva el Bravo GUARDE ESTAS Precalienta automaticamente Precalienta automaticamente a mientras esté en INSTRUCCIONES a 450F (232C) 450F (232C) funcionamiento.
- Page 25 12 MENÚS PREPROGRAMADOS TABLA DE TEMPERATURA DEL SENSOR Poco Bein Frozen Toast Térm-indo Cocido Meats °F/ °C Cocido Punto Cocido Precalienta automaticamente Precalienta automaticamente a °F/ °C °F/ °C °F/ °C °F/ °C °F/ °C a 450˚F (232˚C) 450˚F (232˚C) Pechuga de pollo •...
- Page 26 PARTES Y ACCESORIOS GUIA DE MONTAJE Coloque el Bravo en una Enchufe el aparato en un superficie nivelada, estable enchufe de pared estándar. y resistente al calor. El enchufe de alimentación se encuentra en la parte Deslice la (s) rejilla (s) para posterior de la unidad.
- Page 27 INICIO RÁPIDO INSTRUCCIONES Presione START/PAUSE ON/OFF Enciende y apaga el Bravo. También detiene cualquier función de Empezando cocción. Mientras cocina, presione ON/OFF para cancelar. Presione ON/OFF una vez una vez durante la cocción para encender su Bravo. para hacer una pausa. MENU Elija entre las 12 opciones de menú...
- Page 28 INSTRUCCIONES La velocidad se puede • Warm siempre será la última START/PAUSE. Ajustable del reloj para disminuir el ajustar girando START/ función de cocción ejecutada en incrementos de 10%. tiempo en incrementos PAUSE. por el Bravo. Por ejemplo, Presione TOP/BTM de 1 minuto.
- Page 29 INSTRUCCIONES • Si utiliza una función de el disco para ajustar DELAY Temperaturas De Cocción menú preprogramado en incrementos más Predeterminado a 1 hora. 50F~275F (10C~135C) con un precalentamiento grandes. incorporado, después 280F~350F (138C~177C) Presione PREHEAT. de que finalice la cuenta 355F~400F (182C~200C) Presione START/ regresiva, presione START/...
- Page 30 INSTRUCCIONES 4. Una vez que se complete la durante 1 hora, luego • Gire START/PAUSE para Esto se configura en cuenta regresiva, el Bravo comenzará a cocinar a ajustar la temperatura predeterminado ANTES de la comenzará a cocinar a la 400F (204C) durante 10 y el tiempo, si es etapa de cocción normal.
- Page 31 INSTRUCCIONES 2, los dos puntos WARM a 125F (50C) durante TIME. Gire START/PAUSE STAGE (:) parpadearán, se 30 min. para ajustar el tiempo a mostrará End, y la Presione ON/OFF. Ajuste la 40 min. unidad emitirá un pitido temperatura a 325F (165C) Presiona STAGE tres veces, indicando girando START/PAUSE,...
- Page 32 INSTRUCCIONES Presione START/PAUSE. el tiempo de cocción LOCK PROBE El bloqueo se utiliza para Se mostrará la temperatura predeterminado, la unidad El Sensor de temperatura detener la función del Bravo. actual de el sensor interna. continuará cocinando. Para digital se utiliza para mostrar Mientras está...
- Page 33 INSTRUCCIONES • Los números 1-100 Para ajustar la temperatura a colocar el recipiente en el 2. Si la temperatura objetivo son programas de tostado para cada nivel, Bravo y cierre la puerta. Con es inferior a 250F (121C) preestablecidos. y la sonda no aumenta presione TEMP/TIME para la temperatura de la sonda mostrar la temperatura de...
- Page 34 INSTRUCCIONES todas las funciones Editar durante la cocción: Gire START/PAUSE Programe su propia receta programadas para ese • Durante la cocción, para elegir el número de durante la cocción: número de programa. presione TEMP/TIME programa deseado para Configure sus funciones •...
- Page 35 INSTRUCTIONS • Presione PROG por un Rejilla del Horno y Posiciones del Refractario segundo para guardar y Posición 1: almacenar sus ediciones. Air Fry, Reheat, Roast, Broil, Pizza, Frozen, Grill, Bake, y Notas: Dehydrate • Si guarda cualquier receta en una ranura de memoria ya llena, la nueva receta anulará...
- Page 36 LIMPIEZA Y MANTENIMIENTO INSTRUCCIONES Antes del primer uso: Mantenga presionado el botón PROBE durante 1 segundo. Lave todas las piezas desmontables en agua tibia jabonosa o en el Ajuste la temperatura deseada de el Sensor utilizando el dial lavaplatos, solo en la rejilla superior. START/PAUSE.
- Page 37 LIMPIEZA Y MANTENIMIENTO Para eliminar las migajas, deslice la bandeja de migajas y Limpiar después de cada uso: Permita que el Bravo se enfríe completamente antes de limpiar. deseche las migajas. Limpie y reemplace. La bandeja para migajas se debe vaciar y limpiar después de cada uso. Nunca Siempre desenchufe el Bravo de la toma de corriente.
- Page 38 GUÍA DE RESOLUCIÓN DE PROBLEMAS El Bravo fue diseñado con una función de apagado automático para Humo blanco está saliendo del producto. evitar el sobrecalentamiento durante el uso. Si el Bravo se apaga Está cocinando comidas grasosas. La bandeja para hornear para enfriarse, puede detectarse un olor.
- Page 39 Freidora de Aire Digital NuWave Bravo en el Departamento Prb4 los alimentos y que estén en el horno durante de Servicio de NuWave LLC. Una vez vencida la garantía, el la cocción. costo de mano de obra y las partes será responsabilidad del Sensor de temperatura NTC sobrecalentado.
- Page 40 (una copia del recibo) al realizar reclamaciones Para disputas relacionadas con el uso del sitio web o el uso o bajo esta garantía. la compra de un producto o servicio NuWave (colectivamente OBLIGACIÓN DEL FABRICANTE “Disputas”), usted acepta comunicarse primero con NuWave La obligación del fabricante en virtud de esta Garantía...
- Page 41 NuWave. Para cualquier disputa que surja de su uso del producto, comuníquese con NuWave LLC al: del sitio web de NuWave, tiene treinta (30) días a partir de la 1-877-689-2838 o envíe un correo electrónico a fecha en que proporcionó información al sitio web para optar help@nuwavenow.com.
-
Page 42: Replaceable Parts
REPLACEABLE PARTS To order replaceable parts head over to NuWaveNow.com Part Name Part Description Part No. For baking and roasting various foods. 26818 Stainless Steel Tray Pan is used for baking and broiling. Broiler Rack is used for roasting and Enamel Baking Pan 26804 broiling together with Pan. - Page 43 For patent information please go to: www.nuwavenow.com/legal/patent Designed & Developed in USA by: NuWave LLC 560 Bunker Ct. Vernon Hills, IL 60061, U.S.A. Item No: BM 20825 Rev. 03-OG Customer Service: 09-16-20 1-877-689-2838 • help@nuwavenow.com ©2020 NuWave LLC • All Rights Reserved. DJ03 CC02...
Need help?
Do you have a question about the Bravo XL and is the answer not in the manual?
Questions and answers