NuWave BRAVO XL PRO Owner's Manual
Smart oven & air fryer with grill
Hide thumbs
Also See for BRAVO XL PRO:
- User manual ,
- Owner's manual (24 pages) ,
- Owner's manual (24 pages)

Related Manuals for NuWave BRAVO XL PRO


Summary of Contents for NuWave BRAVO XL PRO
- Page 1 BRAVO® XL PRO SMART OVEN & AIR FRYER WITH GRILL Owner’s Manual Model: 20855 Rev.1 Questions or Comments? For Amazon Purchases: support@nuwavenow.com For All Other Purchases: help@nuwavenow.com...
- Page 2 THANK YOU! Congratulations on your NuWave® purchase. We know there are many options available and sincerely appreciate the trust you have placed in us. For the last 30 years, we have committed to introducing products that promote healthy living at affordable prices. By combining the highest quality designs with cutting edge technology, we have always strived to blend feature, function, and innovation into every product we make.
-
Page 3: Table Of Contents
RECIPE BOOK QR Code Visit www.nuwavenow.com/bravo-xl-pro-recipe-book-20855 or scan the QR code to access recipes written by our team of chefs specifically for your NuWave® Bravo® XL Pro Para la versión en español de este manual, visita www.nuwavenow.com nuwavenow.com | 3... -
Page 4: Safeguards & Information
ALWAYS KEEP THIS MANUAL HANDY FOR FUTURE REFERENCE. READ ALL INSTRUCTIONS and WARNINGS Only use the appliance as intended and always follow basic safety precautions. Avoid any misuse of the Bravo XL Pro that can void your warranty and create the risk of serious injury. -
Page 5: Power-Supply Cords
To disconnect the Bravo XL Pro, turn it off by pressing the ON/OFF button and then remove the plug from Do not store any materials, other than the wall outlet. -
Page 6: Parts & Accessories
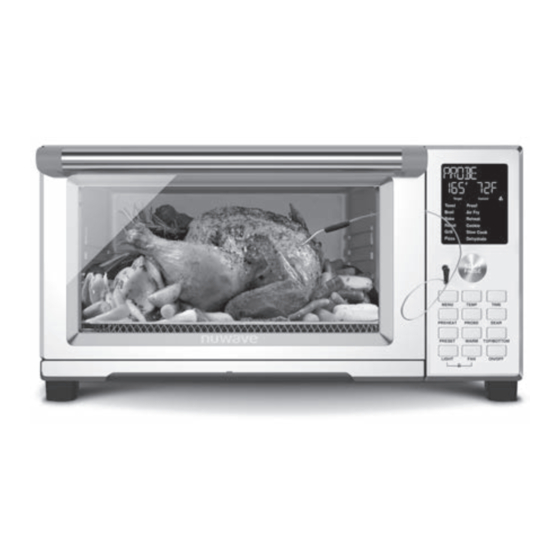
PARTS & ACCESSORIES Base Part #: BRA48 Handle Digital Display Menu Probe Input Jack Temperature Probe Part #: BRP4 START/PAUSE Dial Function Buttons Pull-Out Crumb Tray Part #: BRA17 Heavy-Duty Cooking Rack Part #: BRA43 Grill/Griddle Part #: BRA39 Mesh Rack Part #: BRA40 Light Bulb... -
Page 7: Assembly Guide
ASSEMBLY GUIDE LED DISPLAY CONTROL PANEL DIAL BUTTON BUTTONS Door TEMPERATURE PROBE Before First Use Remove and discard any packaging material from the unit. Remove all accessories from their packaging and wash them in warm, soapy water or in the dishwasher, top rack only, except for the Probe. NEVER submerge the main unit in water. -
Page 8: Control Panel
CONTROL PANEL LED Display Temp Target Time Current Sear Rack Rack Level Toast Proof Level Broil Air Fry Cooking Function Menu Bake Reheat Roast Cookie Grill Slow Cook Pizza Dehydrate Probe Jack START/PAUSE Dial MENU TEMP TIME PREHEAT PROBE SEAR WARM PRESET TOP/BOTTOM... -
Page 9: Operating Buttons
Rack Toast Proof TEMP TIME Grill Slow Cook Rack Toast Proof Level Level Pizza Dehydrate Broil Air Fry Broil Air Fry CONTROL PANEL Bake Reheat PROBE SEAR Roast Cookie OPERATING BUTTONS Bake Grill Reheat Slow Cook Pizza Dehydrate WARM TOP/BOTTOM Roast Cookie MENU... -
Page 10: Operating Buttons Functions
PROBE SEAR OPERATING BUTTONS FUNCTIONS WARM TOP/BOTTOM ON/OFF NOTE: Press ON/OFF to turn the oven on. • To change the temperature ON/OFF While the oven is cooking, press display from Fahrenheit to ON/OFF to stop cooking and cancel Celsius, press and hold TEMP all programmed functions. - Page 11 • Some Presets will automatically MENU TEMP TIME preheat. SEAR The Bravo XL Pro can sear food at high • The Bravo XL Pro can be set PREHEAT PROBE SEAR heat. The default is 500°F for 5 minutes. to preheat automatically by...
- Page 12 Level PREHEAT Broil Air Fry PROBE SEAR To recall the 100 preset recipes: Bake Reheat To mute the Bravo XL Pro’s beeps, Roast Cookie press and hold TOP/BOTTOM until Press PRESET, and 1 will be Grill Slow Cook PRESET WARM...
-
Page 13: Temperature And Measure Charts
TEMPERATURE CHARTS Probe Temperatures Oven Meats Rare Well Temp. Rare Well Chicken, breast Turkey, breast 165* Duck, breast Chicken, whole Turkey, whole 165* Duck, whole Chicken, thigh Turkey, thigh 165* Duck, thigh Steak 1" thick (25mm) 145* 150* 160* Burgers ½ lb (227g) 145* 155* 160*... -
Page 14: Using The Menu Functions
TEMP TIME USING THE MENU FUNCTIONS PROBE SEAR WARM TOP/BOTTOM Press the ON/OFF button to turn the unit on. Press the MENU button. ON/OFF MENU TEMP TIME Turn the START/PAUSE dial to make a Menu selection Adjust the settings if desired, then press PREHEAT PROBE SEAR... -
Page 15: Bake
WARM TOP/BOTTOM Press the ON/OFF button to turn the unit on. Press the MENU button. ON/OFF Turn the START/PAUSE dial to make a Menu MENU TEMP TIME selection Adjust the settings if desired, then press PREHEAT PROBE SEAR START/PAUSE to begin. PRESET WARM TOP/BOTTOM... -
Page 16: Grill
WARM TOP/BOTTOM Press the ON/OFF button to turn the unit on. Press the MENU button. ON/OFF MENU TEMP TIME Turn the START/PAUSE dial to make a Menu selection Adjust the settings if desired, then press PREHEAT PROBE SEAR START/PAUSE to begin. PRESET WARM TOP/BOTTOM... -
Page 17: Care & Maintenance
CARE & MAINTENANCE BEFORE FIRST USE: Wash all removable parts in warm, soapy water or in the dishwasher, top rack only. Remove all the packaging materials. Remove the glue and labels on the appliance. Clean the Cooking Rack, Grill/Griddle, Mesh Rack and Crumb Tray thoroughly with hot water, a nonabrasive sponge, and mild dish detergent, or in the dishwasher, top rack only. -
Page 18: Replacing The Lightbulb
CARE & MAINTENANCE Storage • Unplug the Bravo and let unit cool down completely. • Make sure that all parts are cleaned and dry. • Never wrap the cord around the Bravo. IMPORTANT - Do not immerse the Bravo in water or attempt to cycle through dishwasher. -
Page 19: Troubleshooting
Oven shut down. Finally, the Control Panel itself may not be working correctly. Unplug the Bravo XL Pro and allow it to completely cool. Plug it in and see if it is working. If the screen remains blank, contact Customer Service. - Page 20 The Probe temperature hasn’t changed for 60 minutes. Ensure the Error 1 Bravo XL Pro is cooking. The Bravo XL Pro’s cooking temperature is lower than the Probe Error 2 target temperature. NTC Temperature Sensor overheated. Turn unit off to cool. If the Error 3 Bravo is not working after it cools down, contact Customer Service.
-
Page 21: Limited Warranty
LIMITED WARRANTY THE MANUFACTURER WARRANTS NuWave, LLC warrants that Bravo XL Pro will be free from manufacturer defects for 1 year from the date of purchase, under normal household use, and when operated in accordance with the Manufacturer’s written instructions This Limited Warranty covers for the Original Purchaser only. - Page 22 NUWAVE LLC. DISPUTE RESOLUTION PROCEDURE For disputes relating to use of the website or use or purchase of a NuWave product or service (collectively “Disputes”), you agree to first contact NuWave LLC at legal@nuwavenow.com. If we cannot resolve your dispute informally, any and all disputes shall be submitted to final and binding arbitration.
- Page 23 READ YOUR OWNER’S MANUAL If you still have any questions about operation or warranty of this product, please contact NuWave LLC at For Amazon Purchases: support@nuwavenow.com For All Other Purchases: help@nuwavenow.com...
-
Page 24: Recipe Book Qr Code
Designed & Developed in USA NuWave LLC 560 Bunker Ct. Vernon Hills, IL 60061, U.S.A. Email: For Amazon Purchases: support@nuwavenow.com For All Other Purchases: help@nuwavenow.com Made in China ©2023 NuWave LLC • All Rights Reserved. Item No: BM20855 nuwavenow.com Rev.1-JL 1-4-24...
Need help?
Do you have a question about the BRAVO XL PRO and is the answer not in the manual?
Questions and answers