NuWave Bravo XL Owner's Manual
Smart oven
Hide thumbs
Also See for Bravo XL:
- User manual ,
- Owner's manual (84 pages) ,
- Quick start manual (4 pages)
Table of Contents
Advertisement
Available languages
Available languages
Advertisement
Table of Contents

Related Manuals for NuWave Bravo XL


Summary of Contents for NuWave Bravo XL
- Page 1 NuWave Bravo ™ Smart Oven Owner’s Manual & Complete Recipe Book...
- Page 2 NuWave ® NuWave Brio ® Nutri-Pot Digital Air Fryer Digital Pressure Cooker Super-heated air cooks Easily cook rice, poultry, your food to crispy, vegetables and more all tender perfection. with the press of a button! The digital touch screen The Nutri-Pot’s safety...
- Page 3 ® NuWave PIC ® NuWave Oven (Precision Induction Pro Plus Cooktop) Cook healthier meals Cook faster, safer, faster and more efficiently and more efficiently with Triple Combo than you ever could Cooking Power. on your gas or electric stovetop. www.nuwavenow.com...
- Page 4 Vacuum Blender Quality and convenience at your With the simple press of a button, the fingertips. The NuWave BruHub NuWave Moxie can remove all the accommodates virtually all of your excess air from the blender. favorite single-serve pods, but By vacuuming the air out of the with more flavor.
- Page 5 NuWave Duralon ® Healthy Ceramic Non-Stick Cookware Coated with Duralon Healthy Ceramic Non-Stick coating for easy cleanup, this versatile cookware is perfect for use in ovens or on gas, electric, and even induction cooktops. www.nuwavenow.com 1-877-689-2838...
-
Page 6: Table Of Contents
TABLE OF CONTENTS OWNER’S MANUAL Important Safeguards ....9-10 Sweet Potato Fries....... 56 Additional Safeguards ....11-12 Goat Cheese- Stuffed Mushrooms ...... 57 Parts Description......13 Baked Sweet Potatoes....58 Assembly Guide ......14 Cajun-Roasted Potatoes ....59 Operating Instructions ..... 15-24 Oven Baked Mac and Cheese .. - Page 7 12 Pre-Programmed Menus Air Fry Broil Default Temp: 360°F Default Temp: 500°F • • Default Time: 15 minutes Default Time: 10 minutes • • Heat Source: High Fan (level 3) Heat Source: Top (100 percent) • • Rack Position: Position #1, 2, or 3 Rack Position: Position #1 or 2 •...
- Page 8 Probe Preset Temp Guide Beef Chicken Pork Seafood 165℉ 145℉ 145℉ 125℉ Rare 135℉ Medium-Rare Medium 145℉ Medium-Well 150℉ 160℉ Well Measurement Chart Teaspoon = t Fahrenheit = °F Minute = min Tablespoon = T Celsius = °C Second = sec Cup = C Fluid Ounces = fl oz Inch = in.
-
Page 9: Important Safeguards
IMPORTANT SAFEGUARDS READ ALL INSTRUCTIONS WARNING: When using the Bravo Smart Oven, basic safety precautions should always be followed: Do not touch hot surfaces. Use handles and oven gloves when removing items from the Bravo. Do not use the Bravo together with other electric appliance with high-power, in case of overload. -
Page 10: Important Safeguards
IMPORTANT SAFEGUARDS (Continued) accessories not recommended by the manufacturer. Do not cover any part of the oven with metal foil. If excess smoke is escaping from the air vent during operation, unplug the unit immediately and contact Customer Service at 1-877-689-2838 or email help@nuwavenow.com. -
Page 11: Additional Safeguards
ADDITIONAL SAFEGUARDS SEE CARE AND MAINTENANCE BEFORE USE Electrical Information The Bravo Smart Oven is supplied with a short power cord to reduce the risk of entanglement or tripping. Extension cords may be used if care is exercised in their use. If an extension cord is used: The marked electrical rating of the extension cord should be at least as great as the electrical rating of the Bravo. - Page 12 ADDITIONAL SAFEGUARDS (Continued) Before removing the plug from the outlet, always turn the unit "OFF". Always unplug power cord by pulling on plug, NOT the cord. NOTICE: FAILURE TO FOLLOW ANY OF THE IMPORTANT SAFEGUARDS, ADDITIONAL SAFEGUARDS, OR THE INSTRUCTIONS FOR SAFE USE IS A MISUSE OF THE BRAVO SMART OVEN THAT CAN VOID THE WARRANTY AND CREATE THE RISK OF SERIOUS INJURY.
-
Page 13: Parts Description
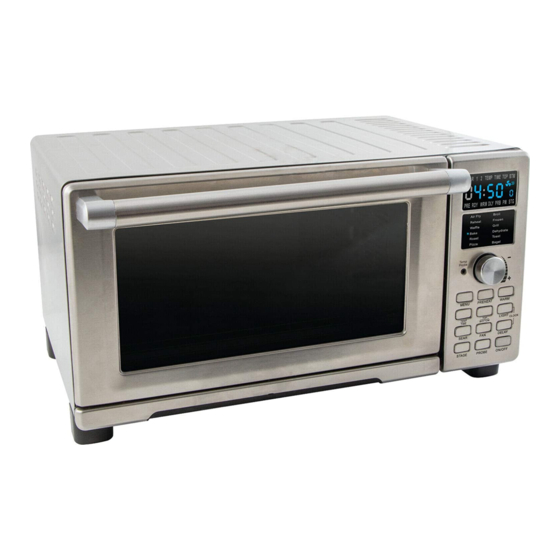
PARTS DESCRIPTION Pull-Out Crumb Tray Base Part #: 26801 Handle 2 Heavy-Duty Digital Display Menu Cooking Racks Part #: 26802 Menu Enamel Baking Pan Probe Input and Enamel Broiler Rack Part #: 26804 Temperature Probe Part #: 26808 Chrome-Plated Air Fry Basket Dial Part #: 26806 Functions... -
Page 14: Assembly Guide
ASSEMBLY GUIDE Place the Bravo on a level, even, and stable Parts heat-resistant surface. Slide the Cooking Rack(s) into either Position 1, 2, 3, or 4 of the Bravo. Air Fry Basket Place Baking Pan with Broiler Rack on Cooking Rack in Position 1. -
Page 15: Operating Instructions
OPERATING INSTRUCTIONS SEAR 1 2 TEMP TIME TOP BTM PRE RDY WRM DLY PRB PM STG Air Fry Broil Reheat Frozen Waffle Grill Bake Dehydrate Roast Toast Pizza Bagel Temp Probe START PAUSE MENU PREHEAT WARM TEMP/TIME TOP/BTM LIGHT CLOCK SEAR DELAY STAGE... - Page 16 OPERATING INSTRUCTIONS (Continued) Press "TEMP/TIME" to switch LED screen display between current • cooking temperature and time. Press "START/PAUSE" once during cooking to pause. If the LED display is on cooking time when paused, it will show remaining • cooking time and TIME and ":" will be solid. If the LED display is showing cooking temperature, it will show TIME and •...
- Page 17 OPERATING INSTRUCTIONS (Continued) Level of fan speed: Level 1 – 33.33% speed • Level 2 – 66.67% speed • Level 3 – 100% speed • TOP/BTM: Default – Top 100%, Bottom 100%. This refers to the amount of heat coming from the top and bottom heating elements. Press "ON/OFF".
- Page 18 OPERATING INSTRUCTIONS (Continued) NOTE: "TEMP/TIME" can be pressed to see the current cooking temperature and • current remaining cooking time. "START/PAUSE" knob can be turned in conjunction with pressing "TEMP/ • TIME" to change cooking temperature and time during cooking. Cooking Time range for 100F~395F is 00:00 to 99:59 and 400F~450F is •...
- Page 19 OPERATING INSTRUCTIONS (Continued) TIME will be displayed solid in LED screen during the delay time • countdown. DLY and ":" will flash during the delay time countdown. Once delay countdown is complete, the Bravo will begin cooking at set cooking temperature and time (default is 350°F for 10 minutes). Using DELAY with cooking function Example #1 Delay cooking 40 minutes, Cook at 360°F for 20 minutes : Press "DELAY".
- Page 20 OPERATING INSTRUCTIONS (Continued) SEAR: Default — 450°F, 5 minutes. Sear 1: Sear 1 will ALWAYS be the stage BEFORE the regular cooking stage. Press "ON/OFF". Press "SEAR" once. The LED display will show "450F", TEMP and SEAR will be backlit, and "1" will flash. Press "START/PAUSE".
- Page 21 OPERATING INSTRUCTIONS (Continued) STAGE: Maximum of 5 stages can be programmed. Press "ON/OFF". LED display will show "350F". Press "STAGE". The LED display will show TEMP and STG 2. • Press "TEMP/TIME". Turn "START/PAUSE" to adjust this stage's cooking • temperature and time.
- Page 22 OPERATING INSTRUCTIONS (Continued) Press "WARM". Adjust temperature to 125°F by turning "START/PAUSE". Press "TEMP/TIME". Adjust time to 30 minutes by turning "START/ PAUSE". LED display will show WRM, "00:30", and TIME. Press "START/PAUSE" to begin cooking process. NOTE: During cooking, the Bravo will show all functions programmed for that •...
- Page 23 OPERATING INSTRUCTIONS (Continued) Default 140°F, 10 minutes. Press "ON/OFF". Adjust to desired cooking temperature. Press "PROBE". "140F" (default) will appear on the LED display along with TEMP and PRB. Adjust the temperature to the desired internal cooked temperature. • Temperature range is 100°F~210°F. Adjust cooking time. Time range is 1 minute to 99 hours, 59 minutes (00:01–99:59).
-
Page 24: Operating Instructions
OPERATING INSTRUCTIONS (Continued) Oven Rack And Pan Positions Position 1: Air Fry, Reheat, Roast, Broil, Frozen, Grill, & Dehydrate Position 2: Air Fry, Reheat, Waffle, Bake, Pizza, Broil, Frozen, Dehydrate, Toast, and Bagel Position 3: Parts Air Fry, Reheat, Waffle, Bake, Pizza, Frozen, Dehydrate, Toast, and Bagel... -
Page 25: Care & Maintenance
CARE & MAINTENANCE Before First Use: Wash all removable parts in warm, soapy water or in the dishwasher, top rack only. Remove all the packaging materials. Remove the glue and labels on the appliance. Clean the Cooking Racks, Baking Pan, Broiler Rack, Air Fry Basket and Crumb Tray thoroughly with hot water, a nonabrasive sponge, and mild dish detergent, or in the dishwasher, top rack only. -
Page 26: Troubleshooting
CARE & MAINTENANCE (Continued) To remove crumbs, slide out the Crumb Tray and discard crumbs. Wipe clean and replace. Crumb Tray should be emptied and cleaned after each use. To remove baked-on grease, soak Tray in hot, soapy water. Never operate the oven without the Crumb Tray in place. - Page 27 TROUBLESHOOTING (Continued) Possible Cause(s): Solution(s): Problem: Use Bake when cooking items that rise (i.e., cakes and cookies). Use Roast for Bake vs. When to use these dense foods that are browned Roast vs. three functions. throughout the cooking process. Broil Use Broil to quickly brown or crisp a food item.
-
Page 28: Limited Warranty
The Manufacturer will provide the necessary parts and labor to repair any part of the Bravo at the NuWave, LLC Service Department. After the expiration of the warranty, the cost of the labor and parts will be the responsibility of the owner. - Page 29 ABOUT OPERATION OR WARRANTY OF THE PRODUCT, PLEASE CONTACT NUWAVE, LLC. READ YOUR OWNER’S MANUAL If you still have any questions about operation or warranty of the product, please contact NuWave, LLC at: 1-877-689-2838 or email help@ nuwavenow.com. Owner’s Manual...
-
Page 30: Breakfast
Breakfast Recipes... -
Page 31: Baked Eggs In Hell
Baked Eggs in Hell Serves: 2 Ingredients: 4 eggs 2 red peppers, roasted 5 dried arbol chiles 1 roma tomato Pinch of salt and pepper Pinch of chili flake Directions: 1. In a blender or food processor combine all ingredients except for your eggs. 2. -
Page 32: Homemade Granola
Homemade Granola Serves: 2 Ingredients: 2 C oats ¼ C almonds ¼ C cashews ¼ C pecans ¼ C raisins ¼ C dried cranberry 3 T maple syrup 1 t vanilla extract Pinch of salt 3 T coconut oil Directions: 1. -
Page 33: Seafood
Seafood Recipes... -
Page 34: Baked Shrimp
Baked Shrimp Serves: 2 Ingredients: 1 ½ lb shrimp, peeled and devained 1 lemon, juiced 2 T butter, softened 4 cloves garlic, minced Pinch of salt and pepper Pinch of chili flakes 2 T parsley (garnish) Directions: 1. In a bowl combine all ingredients and coat shrimp. 2. -
Page 35: Lemon Sesame Salmon
Lemon Sesame Salmon Serves: 2 Ingredients: 2-8 oz salmon filets, skin on 2 T honey ½ lemon juiced 2 t soy sauce 1 T sesame seeds Directions: 1. In a bowl combine honey, soy sauce, lemon juice, and sesame seeds. 2. -
Page 36: Crab Cakes With Red Pepper Sauce
Crab Cakes with Roasted Red Pepper Sauce Serves: 4 2 T mayonnaise Ingredients: Extra-virgin olive oil For Crab Cakes: 1 C cracker meal Lemon wedges for garnish 1 egg, beaten ½ C milk For Red Pepper Sauce: 12 oz. jumbo lump crab meat 1 (8-oz) jar roasted red peppers, 1 T baking powder drained... -
Page 37: Fish And Chips
Fish and Chips Serves: 4 Ingredients: For Fish: 2-¾ C cornflakes, crushed For Chips: 3 Idaho potatoes, ¼-inch sticks 3 egg whites ¼ C extra-virgin olive oil 1-½ lbs white fish, boneless, skinless, Fresh cracked black pepper 3-inch pieces Sea Salt Sea salt Black pepper, ground Cooking spray... -
Page 38: Poultry
Poultry Recipes... -
Page 39: Roasted Chicken
Roasted Chicken Serves: 4 Ingredients: 1- 4 lb whole chicken, giblets and neck removed 3 T olive oil 1 lemon, juiced Pinch of salt and pepper 5 cloves garlic 4 sprigs rosemary Directions: 1. Pat chicken dry with paper towel then toss chicken in oil. 2. -
Page 40: Roasted Turkey Drumsticks
Roasted Turkey Drumsticks Serves: 2 Ingredients: 2-10 oz turkey drumsticks, skin-on Pinch of salt and pepper 1 t paprika 1 t thyme 2 t garlic powder 2 T olive oil Directions: 1. Pat drumsticks dry with paper towel. 2. Once dried, coat the drumsticks with olive oil and season with your dry ingredients. 3. -
Page 41: Roasted Cornish Hen
Roasted Cornish Hen Serves: 6 Ingredients: Garnish: 2 Cornish hens 4 T parsley, chopped 1 yellow onion, quartered 4 stalks celery, large dice 3 T olive oil Pinch of salt and pepper 4 cloves garlic 2 T chili powder Directions: 1. -
Page 42: Turkey Sliders
Turkey Sliders Serves: 8 Ingredients: Garnish: 1lb ground turkey Tomato ½ C bread crumbs Pickles Pinch of salt and pepper Cheese 2 cloves garlic, minced Mayo ¼ onion, minced Lettuce ¼ T ground mustard 8 slider buns. Directions: 1. In a bowl combine all ingredients except the buns. 2. -
Page 43: Baked Chicken Parmesan
Baked Chicken Parmesan Serves: 4 Ingredients: 2 chicken breast, butterflied (to make 4) ¾ C panko breadcrumbs ⅓ C Parmesan cheese 2 T olive oil ¾ C mozzarella cheese 1 C marinara sauce Directions: 1. In a bowl combine breadcrumbs and Parmesan cheese. 2. - Page 44 Beef Recipes...
-
Page 45: Beef Ny Strip
NY Strip Serves: 2 Ingredients: 2- 1 inch thick NY Strip Steaks ⅓ C olive oil Pinch of salt and pepper Garnish: Goat cheese Chives Directions: 1. Brush your strips with olive oil and season generously with salt and pepper. 2. -
Page 46: Ribeye With Roasted Mushrooms
Ribeye with Roasted Mushrooms Serves: 2 Ingredients: 2-1 inch thick ribeye steaks 3 T butter, melted 2 cloves garlic, minced Pinch of salt and pepper 1 pack of crimini mushrooms, sliced Directions: 1. Melt your butter and stir in mixed garlic. 2. -
Page 47: Flank Steak
Flank Steak Serves: 4 Ingredients: 1 lb flank steak 2 T olive oil 3 cloves garlic, minced 2 T cajun spice Pinch of salt and pepper Directions: 1. In a bowl marinate your steak in olive oil, garlic, cajun spice, salt, and pepper. -
Page 48: Open-Faced Reuben Sandwich
Open-Faced Reuben Sandwich Serves: 2 Ingredients: 2 slices rye bread ½ lb pastrami, shaved 4 oz sauerkraut, drained 4 T thousand island dressing 4 slices swiss cheese Directions: 1. Build your sandwich layering dressing, sauerkraut, pastrami, and cheese. 2. Place onto a greased Baking Pan and set on Cooking Rack on the lowest position. -
Page 49: Pork
Pork Recipes... -
Page 50: Pork Shoulder Roast With Potatoes
Pork Sholder Roast with Potatoes Serves: 6 Ingredients: 4 lb pork shoulder roast 3 T salt 2 T pepper 2 t garlic powder 2 t onion powder 2 t cayenne pepper 1 T olive oil ½ lb baby potatoes Directions: 1. -
Page 51: Baked Bbq Ribs
Baked BBQ Ribs Serves: 4 Ingredients: 1 rack of ribs 1 t cayenne pepper ⅓ C brown sugar 1 T cumin 2 T black pepper 1 t ground mustard 1 C BBQ sauce Directions: 1. In a bowl combine all dry ingredients. 2. -
Page 52: Vegetarian
Vegetarian Recipes... -
Page 53: Roasted Root Vegetables
Roasted Root Vegetables Serves: 4 Ingredients: 1 bunch, organic colored carrots, peeled ½ red onion, quartered 6 cloves garlic 1 yam, peeled, quartered Pinch of salt and pepper 3 T olive oil Directions: 1. Set your Bravo to "Roast" and preheat at 425˚F. 2. -
Page 54: Roasted Brussels Sprouts
Roasted Brussels Sprouts Serves: 4 Ingredients: 1 lb Brussels sprouts, trimmed 2 T olive oil Pinch of salt and pepper Directions: 1. Set your Bravo to "Roast" and preheat at 425˚F. 2. Toss your brussels in a bowl with olive oil and season with salt and pepper. 3. -
Page 55: Turmeric Roasted Cauliflower
Tumeric Roasted Cauliflower Serves: 6 Ingredients: 1 head cauliflower, cut into florets 4 cloves garlic 3 T olive oil ½ t turmeric ¼ t chili flake Pinch of salt and pepper Directions: 1. Set your Bravo to "Roast" and preheat at 425˚F. 2. -
Page 56: Sweet Potato Fries
Sweet Potato Fries Serves: 4 Ingredients: 2 sweet potatoes, peeled and cut into wedges 3 T olive oil Pinch of salt and pepper ½ t red peppercorn Garnish: Green Onion Maple Syrup Directions: 1. Set your Bravo to "Roast" and preheat at 425˚F. 2. -
Page 57: Goat Cheese-Stuffed Mushrooms
Goat Cheese Stuffed Mushrooms Serves: 4 Ingredients: 2 packs of crimini mushrooms, stems removed Pinch of salt and pepper 3 T goat cheese, crumbled 4 T chives, sliced Directions: 1. Set your Bravo to "Roast" and preheat at 400˚F. 2. Stuff your mushrooms with goat cheese. 3. -
Page 58: Baked Sweet Potatoes
Baked Sweet Potatoes Serves: 4 Ingredients: 4 sweet potatoes 2 T olive oil Pinch of salt Directions: 1. Rub your sweet potatoes with olive oil and prick the potatoes with a fork. Season with salt. 2. Set your Bravo to "Bake" at 425˚F for 45 minutes and place the Baking Pan on a Cooking Rack at lowest position. -
Page 59: Cajun-Roasted Potatoes
Cajun Roasted Potatoes Serves: 6 Ingredients: 2 lbs baby potatoes ⅓ C olive oil 2 cloves garlic, minced Pinch of salt and pepper ½ t cayenne pepper Directions: 1. Set your Bravo to "Roast" and preheat at 450˚F. 2. In a bowl toss your potatoes in olive oil, garlic, and cayenne pepper. 3. -
Page 60: Oven Baked Mac And Cheese
Oven Baked Mac and Cheese Serves: 6 Ingredients: 1 lb macaroni noodles 4 T butter 4 T flour 2 C milk 3 C cheddar cheese Pinch of salt and pepper ⅓ C panko bread crumbs Directions: 1. In a pot bring salted water to a boil and add in macaroni. 2. -
Page 61: Pizza
Pizza Recipes... -
Page 62: Margarita Pizza
Margarita Pizza Serves: 4 Ingredients: Topping: 1 C sun-dried tomato Dough: 2 ½ C flour ½ C tomato sauce 1 t sugar 3 cloves garlic, minced ½ t active dry yeast Pinch of salt and pepper Pinch of salt 3 T grated Parmesan cheese ½... -
Page 63: Meat Lovers Pizza
Meat Lovers Pizza Serves: 4 Ingredients: Topping: 1 C Italian Sausage, rolled into balls Dough: 2 ½ C flour ½ C pepperoni 1 t sugar ½ C bacon, diced ½ t active dry yeast 3 cloves garlic, minced Pinch of salt ½... -
Page 64: Triple-Cheese Pizza
Triple Cheese Pizza Serves: 4 Ingredients: Topping: ½ C tomato sauce Dough: 2 ½ C flour 3 cloves garlic, minced 1 t sugar 2 T olive oil ½ t active dry yeast Pinch of salt and pepper Pinch of salt 3 T grated Parmesan cheese ½... -
Page 65: Dehydrate
Dehydrate Recipes... -
Page 66: Beef Jerky
Beef Jerky Serves: 20 Ingredients: 1 lbs Flank Steak, Sliced into strips ½ C soy sauce Pinch of salt and pepper 1 ½ T liquid smoke 1 T garlic powder Directions: 1. In a bowl combine all your ingredients, then add in steak and coat steak with your marinade. -
Page 67: Banana Chips
Banana Chips Serves: 12 Ingredients: 2 bananas, sliced into rounds Directions: 1. Lay bananas out into your Air Fry Basket. 2. Place into your Bravo on the Cooking Rack set on the middle position. 3. Set your Bravo to "Dehydrate" at 200˚F for 1 hour and 30 minutes. 4. -
Page 68: Candied Bacon
Candied Bacon Serves: 6 Ingredients: 12 slices of bacon ⅓ C brown sugar 4 T maple syrup Pinch of black pepper Directions: 1. Season bacon with brown sugar and pepper. 2. Lay strips onto Baking Pan and top with maple syrup. 3. -
Page 69: Croutons
Croutons Serves: 8 Ingredients: 1 loaf day old bread (sourdough, challah, etc.), Cubed ⅓ C olive oil Pinch of salt and pepper 2 T herbs de provance Directions: 1. In a bowl combine bread, olive oil, salt, pepper, and herbs. 2. -
Page 70: Sun-Dried Tomatoes
Sun-dried Tomato Serves: 2 Ingredients: 2 lb roma tomatoes, halved Pinch of salt and pepper ⅓ C olive oil 2 sprigs rosemary Directions: 1. Toss your tomatoes in olive oil and season with salt and pepper. 2. Sprinkle rosemary over the tops and lay on a Baking Pan. 3. -
Page 71: Dried Apricots
Dried Apricots Serves: 12 Ingredients: 10 apricots, pitted and sliced 1 T lemon juice Directions: 1. Soak apricots for 10 minutes then drain and blot dry. 2. Mix apricots with lemon juice and lay them out onto your Air Fry Basket. 3. -
Page 72: Baking
Baking Recipes... -
Page 73: Buttery Dinner Rolls
Buttery Dinner Rolls Serves: 12 4 T sugar Ingredients: 1 pack active dry yeast 1 T salt ¼ C water Pinch of pepper ⅓ T sugar 1 ½ C milk 4 C flour 6 T butter, softened Directions: 1. In a bowl dissolve the yeast in warm water with sugar, let sit for 5 minutes. 2. -
Page 74: Italian Loaf
Italian Loaf Serves: 1 Ingredients: 1 pack active dry yeast 1 t sugar 3 C bread flour 2 T olive oil Pinch of salt Directions: 1. In a bowl combine yeast and sugar in warm water and let sit for 5 minutes. 2. -
Page 75: Frutti Di Bosco
Frutti di Bosco Serves: 8 Ingredients: ⅔ C butter, melted 1 ¼ C sugar 8 large eggs, separated ½ lemon, zested 1 t cinnamon ¼ t salt 2 ½ C flour, sifted 4 ½ C mixed berries (blueberries, strawberries, raspberries) Directions: 1. -
Page 76: Dessert
Dessert Recipes... -
Page 77: Bread Pudding
Bread Pudding Serves: 6 Ingredients: 1 loaf day old bread, cubed 5 eggs 1 C sugar 3 C heavy cream 2 t vanilla extract 1 t cinnamon Directions: 1. In a bowl whisk together eggs, heavy cream, vanilla, cinnamon, and sugar. 2. -
Page 78: Homestyle Peach Cobbler
Homestyle Peach Cobbler Serves: 4 Ingredients: 4 T butter 1 C flour 2 C sugar, divided 1 T baking powder ½ C milk 4 Peaches, sliced Directions: 1. In a bowl combine flour, 1 cup sugar, and baking powder, add milk and stir. 2. -
Page 79: Chocolate Chunk Cookies
Chocolate Chunk Cookies Serves: 12 Ingredients: 2 ½ C flour 1 t baking soda 1 ½ t cornstarch ½ C sugar ½ t salt ¾ C butter, melted ¾ C brown sugar 1 egg 1 t vanilla 1 C chocolate chips Directions: 1. -
Page 80: Manual
NuWave Bravo ™ Horno Inteligente Manual del Usuario y Recetario Completo... - Page 81 12 Menús Preprogramados Freir con Aire Asar Temperatura Predeterminada: 360°F Temperatura Predeterminada: 500°F • • Tiempo Predeterminado: 15 minutos Tiempo Predeterminado: 10 minutos • • Fuente de Calor: Ventilador Alto Fuente de Calor: Superior • • (Nivel 3) (100 por ciento) Posición de la Rejilla: Posición 1, 2 ó...
- Page 82 NOTA: NUNCA permita que ningún alimento toque los elementos de calor • directamente. Las temperaturas, los tiempos y las posiciones de la rejilla predeterminados • son una guía. Es posible que sea necesario realizar ajustes para alcanzar el resultado deseado. La velocidad del ventilador es Alta (nivel 3) a menos que se ajuste la •...
- Page 83 MEDIDAS DE SEGURIDAD IMPORTANTES LEE TODAS LAS INSTRUCCIONES ADVERTENCIA: Cuando se use el Horno Inteligente Bravo, siempre se deben seguir medidas de seguridad básicas: No toque las superficies calientes. Use las agarraderas y guantes para horno cuando retire alimentos del Bravo. Para protegerse contra el riesgo de descarga eléctrica, no sumerja el cable, el enchufe o cualquier parte de la unidad principal del Bravo en agua u otros líquidos o cuando sus manos estén mojadas.
- Page 84 MEDIDAS DE SEGURIDAD IMPORTANTES (Continuación) 19. Nunca toque el interior del Bravo mientras está en funcionamiento. 20. Nunca deje el Bravo desatendido durante el uso. 21. El Bravo está diseñado para uso doméstico normal. No está diseñado para ser utilizado en entornos tales como cocinas de personal, tiendas, oficinas u otros entornos de trabajo.
- Page 85 MEDIDAS DE SEGURIDAD ADICIONALES VER CUIDADO Y MANTENIMIENTO ANTES DEL USO Información eléctrica El Horno Inteligente Bravo incluye un cable de alimentación corto para reducir el riesgo de enredos o tropiezos. Se pueden usar cables de extensión si se tiene cuidado en su uso. Si se usa un cable de extensión: La La clasificación eléctrica marcada del cable de extensión debe ser al menos tan buena como la clasificación eléctrica del Bravo.
- Page 86 MEDIDAS DE SEGURIDAD ADICIONALES (Continuación) Antes de quitar el enchufe de la toma de corriente, siempre apague la unidad. Desenchufe siempre el cable de alimentación tirando de la clavija, NO del cable. AVISO: EL NO SEGUIR CUALQUIERA DE LAS MEDIDAS DE SEGURIDAD IMPORTANTES, MEDIDAS DE SEGURIDAD ADICIONALES O LAS INSTRUCCIONES PARA UN USO SEGURO, SE CONSIDERA UN MAL USO DEL HORNO INTELIGENTE BRAVO, LO CUAL PUEDE ANULAR LA GARANTÍA Y...
- Page 87 DESCRIPCIÓN DE PARTES Bandeja para Migajas Base Removible Manija Parte #: 26801 Menú de Pantalla Digital 2 Rejillas de Cocina de Uso Rudo Menú Parte #: 26802 Entrada de Sensor Bandeja Esmaltada para Horno y Rejilla Esmaltada Sensor de Temperatura para Asar Parte #: 26808 Parte #: 26804...
- Page 88 GUÍA DE MONTAJE Coloque el Bravo en una superficie plana, Partes nivelada, estable y resistente al calor. Coloque la(s) Rejilla(s) de Cocción ya sea en la posición 1, 2, 3 ó 4 del Bravo. Canastilla Para Freir Coloque la Bandeja para Hornear con la Rejilla para Asar en la Rejilla de Cocina en la posición 1.
- Page 89 INSTRUCCIONES DE FUNCIONAMIENTO (Continuación) ON/OFF y START/PAUSE: Presione "ON/OFF" una vez para encender el Bravo. La unidad emitirá un pitido y la pantalla LED mostrará "350F" (predeterminado), TEMP, TOP, BTM y El ícono del ventilador se mostrará fijo. Presione "START/PAUSE" para comenzar a cocinar. La unidad cocinará a 350°F por 10 minutos.
- Page 90 INSTRUCCIONES DE FUNCIONAMIENTO (Continuación) RELOJ: Configuración del Reloj: Presione "LIGHT" y "DELAY" al mismo tiempo. La pantalla LED mostrará • "00:00" y ":" parpadeará. Gire la perilla "START/PAUSE" para configurar el Reloj. Cuando la • pantalla LED llegue a "12:00", PM estará retroiluminado. Visualización del Reloj durante la cocción: Presione "LIGHT"...
- Page 91 INSTRUCCIONES DE FUNCIONAMIENTO (Continuación) NOTA: Al utilizar la función de Menú “Broil”, la potencia BTM no es ajustable ya que la función Broil solo utiliza los elementos superiores de calentamiento. TEMPERATURA/TIEMPO: Predeterminado - 350° F, 10 minutos Presione "TEMP/TIME" una vez, la pantalla LED mostrará "00:10" y TIME. Presione "START / PAUSE"...
- Page 92 INSTRUCCIONES DE FUNCIONAMIENTO (Continuación) ajustada y TEMP será fijo. Presione "START / PAUSE" para comenzar el precalentamiento. Durante el precalentamiento, la pantalla LED mostrará la temperatura • seleccionada parpadeando junto con el ícono FAN, TEMP, TOP, BTM & PRE. Cuando se alcanza la temperatura de precalentamiento, la pantalla LED •...
- Page 93 INSTRUCCIONES DE FUNCIONAMIENTO (Continuación) temperatura a 360°F (360°F). Presione "TEMP/TIME" por segunda vez y ajuste el tiempo a 20 minutos (00:20). • Presione "START/PAUSE". El Bravo esperará 40 minutos, luego comenzará • cocinar a 360°F por 20 minutos. Ejemplo #2: Deje cocinar por 60 minutos, cocine a 400°F por 10 minutos. Presione "DELAY", ajuste el tiempo a 1 hora (01:00).
- Page 94 INSTRUCCIONES DE FUNCIONAMIENTO (Continuación) SELLAR: Predeterminado - 450°F, 5 minutos. Sear 1: Sear 1 SIEMPRE será la etapa ANTES de la etapa de cocción regular. Presione "ON/OFF". Presione "SEAR" una vez, la pantalla LED mostrará "450F", TEMP y SEAR estarán retroiluminados y 1 parpadeará. Presione "START/PAUSE".
- Page 95 INSTRUCCIONES DE FUNCIONAMIENTO (Continuación) ETAPA: Se pueden programar un máximo de 5 etapas. Presione "ON/OFF". La pantalla LED mostrará "350F". Presione "STAGE". La pantalla LED mostrará TEMP y se mostrará STG 2. • Presione "TEMP/TIME" y gire "START/PAUSE" para ajustar la •...
- Page 96 INSTRUCCIONES DE FUNCIONAMIENTO (Continuación) Presione "WARM" y ajuste la temperatura a 125°F girando la perilla "START/PAUSE". Presione "TEMP/TIME" y ajuste el tiempo a 30 minutos girando la perilla "START/PAUSE". La pantalla LED mostrará "00:30" y WRM y TIME. Presione "START/PAUSE" para comenzar el proceso de cocción. NOTA: Durante el cocinado, Bravo mostrará...
- Page 97 INSTRUCCIONES DE FUNCIONAMIENTO (Continuación) SENSOR: Inserte la sonda de temperatura en la comida. Coloque los alimentos en el horno dejando suficiente del cable para salir del horno sobre la parte superior de la puerta. (ver diagrama). Inserte el conector de la sonda de temperatura en la entrada de la sonda.
- Page 98 INSTRUCCIONES DE FUNCIONAMIENTO (Continuación) OPERATING INSTRUCTIONS (Continued) Posición de la Rejilla y la Bandeja para Horno Posición 1: Freír con Aire, Recalentar, Rostizar, Asar, Congelado, A la Parrilla y Deshidratar Posición 2: Freír con Aire, Recalentar, Waffle, Hornear, Pizza, Asar, Congelado, Deshidratar, Tostar y Bagel Posición 3: Partes...
- Page 99 CUIDADO Y MANTENIMIENTO Antes del Primer Uso: Lave todas las piezas extraíbles con agua jabonosa tibia o en el lavavajillas, sólo en la rejilla superior. Retire todos los materiales de embalaje. Retire el pegamento y las etiquetas en el aparato. Limpie las Canastillas de cocción, la Bandeja para Hornear, la Rejilla para Asar, la Canastilla para Freír y la Bandeja para Migajas cuidadosamente con agua caliente, una esponja no abrasiva y un detergente suave para...
- Page 100 CUIDADO Y MANTENIMIENTO (Continuación) Cuando la puerta de vidrio esté completamente fría, rocíe el limpiador de vidrios sobre una toalla de tela limpia. Limpie la puerta por dentro y fuera. Use un paño húmedo para enjuagar la puerta y luego seque completamente con una toalla limpia y seca.
- Page 101 SOLUCIÓN DE PROBLEMAS (Continuación) Possible Cause(s) Solution(s): Problem Use Hornear al cocinar los alimentos que esponjan (es decir, pasteles y galletas). Use Cuándo usar estas Hornear vs. Rostizar para alimentos densos tres funciones. Rostizar vs. que se doren durante el proceso Asar de cocción.
- Page 102 El fabricante proporcionará las piezas y el trabajo necesarios para reparar cualquier pieza del Bravo en el Departamento de Servicio de NuWave, LLC. Después de la expiración de la garantía, el costo de la mano de obra y las partes será...
- Page 103 DE LA OPERACIÓN O GARANTÍA DEL PRODUCTO, COMUNÍQUESE CON NUWAVE, LLC. LEA SU MANUAL DEL PROPIETARIO Si aún tiene alguna pregunta sobre el funcionamiento o la garantía del producto, comuníquese con NuWave, LLC al: 1-877-689-2838 o envíe un correo electrónico a help@nuwavenow.com. El Manual del Propietario...
- Page 104 For patent information please go to: www.nuwavenow.com/legal/patent Designed & Developed in USA by: NuWave, LLC 1795 N. Butterfield Road Libertyville, IL 60048, U.S.A. Customer Service: 1-877-689-2838 • help@nuwavenow.com Item No: BM20801 Made in China Rev. 13 AA ©2018 NuWave, LLC • All Rights Reserved. 07-26-18...
Need help?
Do you have a question about the Bravo XL and is the answer not in the manual?
Questions and answers
Where can I get glass tube heating element