Advertisement
Available languages
Available languages
Advertisement
Table of Contents

Related Manuals for NuWave Bravo 20831


Summary of Contents for NuWave Bravo 20831
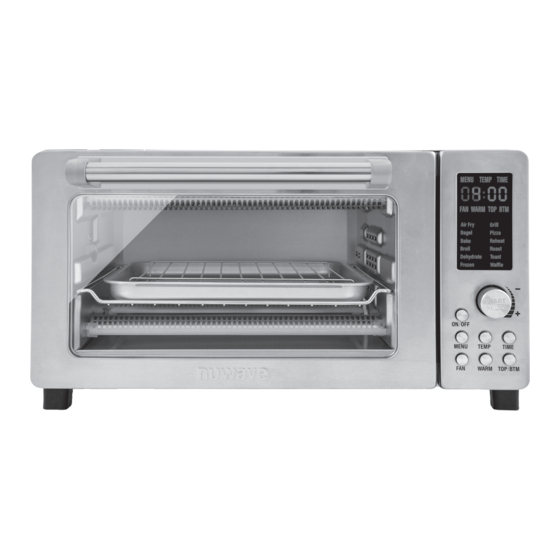
- Page 1 OWNER’S MANUAL Toaster Oven & Air Fryer nuwavenow.com...
- Page 2 As a special thank-you for registering your NuWave Bravo, you’ll automatically receive an additional 3 months added to your limited manufacturer’s warranty!* All you have to do is follow these simple steps. Using your smartphone or smart device, scan the QR code located on the unit label on the back of the Bravo.
- Page 3 for an additional months warranty! DOWNLOAD THE QR CODE APP TO YOUR MOBILE DEVICE Open your mobile app store (App Store, Google Play). Search for "QR code readers." QR code readers Simply download the QR code reader to your phone, open it, scan the code and you are ready to go.
-
Page 4: Table Of Contents
TABLE OF CONTENTS OWNER’S MANUAL Guides................5-6 Important Safeguards ............6-9 Parts & Accessories ............. 9 Assembly Guide ..............10 Quickstart ................12 Instructions..............13-18 Cleaning & Maintenance ..........18-19 Troubleshoot Guide ............20-21 Limited Warranty ............22-24 Spanish................25-49 Replaceable Parts............ -
Page 5: Guides
GUIDES 12 Preprogrammed Menus Note: Preset temperatures and times may need minor adjustments to best suit your desired results. Air Fry Grill • Default Temp: 360°F • Default Temp: 425°F • Default Time: 15 minutes • Default Time: 15 minutes •... - Page 6 GUIDES Notes: • NEVER allow any food to touch the heating elements directly. • Default temperatures, times, and rack positions are a guide. Adjustments may need to be made to reach desired result. • Fan speed is High (level 3) unless speed is adjusted. Meat Thermometer Temperature Guide Beef Temp...
-
Page 7: Important Safeguards
IMPORTANT SAFEGUARDS HOUSEHOLD USE ONLY • READ ALL INSTRUCTIONS BEFORE USE 10. Do not place on or near a on top of or inside the Bravo. hot gas or electric burner or 21. Use aluminum foil to wrap on a heated oven or on a foods that produce oil or stovetop. - Page 8 IMPORTANT SAFEGUARDS HOUSEHOLD USE ONLY • READ ALL INSTRUCTIONS BEFORE USE 31. Oversized foods or metal WARNING utensils must not be inserted in the Bravo as they may In case of other create a fire or a risk of problems, unplug the electric shock.
- Page 9 ADDITIONAL other). To reduce the risk of electric shock, this plug is SAFEGUARDS intended to fit into a polarized Amount of ingredients placed outlet only one way. If the in the Bravo should comply plug does not fit fully into the with directions listed under outlet, reverse the plug.
-
Page 10: Parts & Accessories
PARTS & ACCESSORIES WARNING Never use the Bravo with loose, damaged, or missing parts. Base Part #: 26831 Heavy-Duty Cooking Rack Part #: 26833 Steel Baking Rack Part #: 26834 Baking Pan Part #: 26835 Air Fry Basket Part #: 26806 Crumb Tray Part #: 26832 To order replaceable parts head over to the Replaceable Parts section... -
Page 11: Assembly Guide
ASSEMBLY GUIDE Place the Bravo on a level, even, and stable heat-resistant surface. Slide the Cooking Rack into either Slot 1 or 2 of the Bravo. Place Baking Pan on Cooking Rack. Place Crumb Tray into position by sliding it into slot at bottom of oven. -
Page 12: Quickstart
2018.10.27. QUICKSTART ON/OFF Turns the Bravo ON and OFF. This ® also stops any cooking function. While cooking press ON/OFF to cancel the cooking function and turns the Bravo off. START/PAUSE Press START/PAUSE to start and pause cooking at any time. Press START/PAUSE for 1 second (until you hear a beep) to mute and unmute the Bravo. -
Page 13: Instructions
INSTRUCTIONS Getting Started Press START/PAUSE once Press ON/OFF once to turn during cooking to pause. your Bravo on. Press START/PAUSE a second time to resume cooking. • Remaining cooking time will be displayed and the countdown will continue. Note: Press START/PAUSE for 1 second (until you hear a beep) 3 5 0 F to mute and unmute the Bravo... - Page 14 INSTRUCTIONS • 50F~275F: 00:00-99:99 WARM (0-min. to 99-hrs., 99- Press WARM to keep your min.) food warm after cooking until you’re ready to serve. The • 280F~400F: 00:00-24:00 default for Warm is 140ºF for (0-min. to 24-hrs.) 1 hour. • 405F~450F: 00:00-01:00 (0-min.
- Page 15 and use the START/PAUSE Once your desired menu dial to adjust the warming option is chosen, press temperature up to 200ºF. START/PAUSE to begin cooking. The colon (:) will When the warming time runs flash, indicating the Bravo out, the display will show is now cooking.
- Page 16 INSTRUCTIONS Press ON/OFF. Press TOP/BTM, 100 and TOP will be displayed. Adjust the amount of heat coming from the top heating element by turning START/ PAUSE. Adjustable in 10% increments. Press TOP/BTM again, 100 and BTM will be displayed. Adjust the amount of heat coming from the bottom heating element by turning START/PAUSE.
- Page 17 OVEN RACK AND PAN POSITIONS Parts Cooking Rack Slot 2 Baking Rack Slot 1 Baking Pan Air Fry Basket Oven Rack and Pan Positions Position 1: For chicken or other large items (with Baking Pan) as shown. Position 2: Position 3: Position 4: Dehydrating only nuwavenow.com nuwavenow.com...
-
Page 18: Cleaning & Maintenance
INSTRUCTIONS Measurement Chart Teaspoon = t Fahrenheit = °F Minute = min Tablespoon = T Celsius = °C Second = sec Cup = c Fluid Ounces = fl oz Inch = in. Ounce = oz Liter = L Dozen = doz Pound = lb(s) Milliliter = ml Hour = hr... - Page 19 Apply the cleaning agent directly to a cloth towel, not directly to the Bravo, before cleaning. To clean interior, use a damp cloth, mild liquid soap solution, and a clean cloth towel. Never use steel wool pads, etc., on interior or exterior of oven.
- Page 20 TROUBLESHOOTING GUIDE The Bravo is engineered with an automatic shut-off feature to prevent overheating during use. If the Bravo shuts off to cool itself down, an odor may be detected. Unplug the Bravo and wait for it to completely cool down. To prevent the Bravo from overheating, do not cook foods at higher temperatures or longer times than recommended.
- Page 21 The display is blank. The Bravo overheated and has shut itself down. No action was taken after certain stages of cooking and the Bravo shut down. Control panel not working correctly. Unplug the Bravo and allow the Bravo to completely cool. Plug back in and see if it is working.
-
Page 22: Limited Warranty
Manufacturer’s written instructions. The Manufacturer will provide the necessary parts and labor to repair any part of the Bravo at NuWave LLC Service Department. After the expiration of the warranty, the cost of the labor and parts will be the responsibility of the owner. - Page 23 PRODUCT, PLEASE CONTACT NUWAVE LLC. DISPUTE RESOLUTION PROCEDURE. For disputes relating to use of the website or use or purchase of a NuWave product or service (collectively “Disputes”), you agree to first contact NuWave LLC at (877) 689-2838 (phone), (847) 367-5486 (facsimile), or legal@ nuwavenow.com (email).
- Page 24 NuWave product. For any dispute arising out of your use of NuWave’s website, you have thirty (30) days from the date you provided information to the website to opt out of arbitration.
- Page 25 Tostadora de Horno y Asador nuwavenow.com nuwavenow.com nuwavenow.com...
- Page 26 QR ubicado en la etiqueta de su Bravo ubicada en la parte posterior de la unidad. Se le dirigirá a la página de registro del producto NuWave con el número de serie único de su Bravo que se ingresa automáticamente en el campo correspondiente.
- Page 27 !para una garantía adicional de meses! DESCARGUE LA APLICACIÓN QR CODE EN SU DISPOSITIVO MÓVIL Abra su tienda de aplicaciones móviles (App Store, Google Play). Busque “lectores de códigos QR”. lectores de códigos QR Simplemente descargue el lector de códigos QR a su teléfono, ábralo y escanee el código, ya está...
- Page 28 GUÍAS 12 Menús Preprogramados Nota: Las temperaturas y los tiempos predeterminados pueden necesitar ajustes menores para adaptarse mejor a los resultados deseados. Air Fry Grill • Temperatura predeterminada: • Temperatura predeterminada: 360°F 425°F • Tiempo predeterminado: • Tiempo predeterminado: 15 minutos 15 minutos •...
- Page 29 Dehydrate Toast • Temperatura predeterminada: • Temperatura predeterminada: 100°F 450°F • Tiempo predeterminado: • Tiempo predeterminado: 2 horas 6 minutos • Fuente de calor: superior/ • Fuente de calor: superior/ inferior (100/100 por ciento) inferior (100/100 por ciento) • Posición de la rejilla: 1, •...
- Page 30 MEDIDAS DE SEGURIDAD IMPORTANTES USO DOMÉSTICO SOLAMENTE • LEA TODAS LAS INSTRUCCIONES ANTES DE USAR ADVERTENCIA: Al usar personas con falta de el Horno Tostador Bravo, experiencia o conocimiento siempre se deben seguir las de esta unidad. precauciones básicas de No deje que el cable seguridad: cuelgue del borde de la...
- Page 31 el Bravo. Evite usar 23. No cubra la bandeja para recipientes hechos de migajas ni ninguna parte cualquier otro material que del horno con papel de no sea de cerámica, vidrio aluminio. Esto provocaría o metal en el Bravo. el sobrecalentamiento del horno y un incendio.
- Page 32 MEDIDAS DE SEGURIDAD IMPORTANTES USO DOMÉSTICO SOLAMENTE • LEA TODAS LAS INSTRUCCIONES ANTES DE USAR 31. Los alimentos de gran 40. Permita que el Bravo se tamaño o los utensilios enfríe antes de poner, metálicos no deben quitar partes o antes de insertarse en el Bravo, limpiar.
- Page 33 La calificación eléctrica ADVERTENCIA marcada del cable de extensión debe ser al Nunca use el Bravo con menos tan grande como piezas sueltas, dañadas o la calificación eléctrica del aparato. faltantes. El cable más largo debe estar dispuesto de modo GUARDE ESTAS que no se cuelgue sobre la INSTRUCCIONES...
- Page 34 MEDIDAS DE SEGURIDAD IMPORTANTES USO DOMÉSTICO SOLAMENTE • LEA TODAS LAS INSTRUCCIONES ANTES DE USAR MEDIDAS DE Antes de quitar el enchufe del tomacorriente, siempre SEGURIDAD apague el Bravo. ADICIONALES Siempre desenchufe el La cantidad de ingredientes cable de alimentación colocados en el Bravo tirando del enchufe, NO del debe cumplir con las...
- Page 35 Base Parte #: 26831 Rejilla Parte #: 26833 Rejilla para Hornear Parte #: 26834 Bandeja para Hornear Parte #: 26835 Cesta para Freír con Aire Parte #: 26806 Bandeja para Migajas Parte #: 26832 Para pedir piezas reemplazables, diríjase a la sección Piezas Reemplazables y luego a NuWaveNow.com.
- Page 36 Coloque el Bravo en una superficie nivelada, uniforme, estable y resistente al calor. Deslice la rejilla para cocinar en la ranura 1 o 2 del Bravo. Coloque la bandeja para hornear en la rejilla para cocinar. Coloque la bandeja para migajas en su posición deslizándola en la ranura en la parte inferior del horno.
- Page 37 2018.10.27. INICIO RÁPIDO ON/OFF Enciende y apaga el Bravo . Esto ® también detiene cualquier función de cocción. Mientras cocina, presione “ON/OFF” para cancelar y apagar el Bravo. START/PAUSE Presione START/PAUSE para comenzar y pausar la cocción en cualquier momento. Presione START/PAUSE durante 1 segundo (hasta que escuche un pitido)s para silenciar y activar el Bravo.
- Page 38 INSTRUCCIONES Comenzando ajustar durante la cocción Presione ON/OFF una vez presionando TEMP o para encender el Bravo. TIME y luego girando el botón START/PAUSE para ajustar cada uno. Presione START/PAUSE una vez durante la cocción para hacer una pausa. Presione START/PAUSE 3 5 0 F por segunda vez para reanudar la cocción.
- Page 39 TIME Presione el botón FAN para Presione TIME cada vez ajustar la velocidad del que desee ver o ajustar el ventilador. tiempo de cocción. Presione FAN una vez y la pantalla mostrará FAN 3. Presione FAN por segunda vez y la pantalla mostrará FAN 2.
- Page 40 INSTRUCCIONES • 50ºF ~ 200ºF: 00:00 - en la pantalla. 03:00 MENU Presione START/PAUSE Hay 12 opciones de menú para para comenzar a cocinar. que usted elija. El Bravo pasará por un ciclo de cocción regular y luego entrará en Caliente a la temperatura y el tiempo establecidos.
- Page 41 START/PAUSE. Ajustable cocción predeterminada en incrementos del 10%. para esa opción de menú. Gire la perilla START/ Presione TOP/BTM PAUSE para ajustar la nuevamente, se mostrarán temperatura de cocción. 100 y BTM. Ajuste la cantidad de calor que Para pausar la cocción, proviene del elemento presione START/PAUSE.
- Page 42 INSTRUCCIONES POSICIONES DE LA REJILLA Y LA BANDEJA DEL HORNO Partes Rejilla para Cocinar Ranura 2 Rejilla para Hornear Ranura 1 Bandeja para Hornear Cesta para Freír con Aire Posiciones de la Rejilla y la bandeja Posición 1: Para pollo u otros alimentos grandes, use la Posición 1 (con una bandeja para hornear) como se muestra arriba.
- Page 43 Consejos Útiles Para agregar más tiempo durante el ciclo de cocción actual, gire la perilla de START/PAUSE hacia la derecha. Monitoree los alimentos para asegurarse de que no se cocinen en exceso. Algo de humedad puede aparecer en la puerta durante ciertos ciclos de cocción.
- Page 44 LIMPIEZA Y MANTENIMIENTO Antes del primer uso: Lave todas las piezas extraíbles con agua tibia jabonosa o en el lavaplatos, solo en la rejilla superior. Retire todos los materiales de embalaje. Retire el pegamento y las etiquetas del aparato. Limpie a fondo la rejilla de cocción, la bandeja para hornear, la cesta de freír con aire y la bandeja para migajas con agua caliente, una esponja no abrasiva y detergente suave para platos, o solo en el lavavajillas, en la rejilla superior.
- Page 45 El Bravo fue diseñado con una función de apagado automático para evitar el sobrecalentamiento durante el uso. Si el Bravo se apaga para enfriarse, puede detectarse un olor. Desenchufe el Bravo y espere a que se enfríe completamente. Para evitar que el Bravo se sobrecaliente, no cocine alimentos a temperaturas más altas o más tiempo de lo recomendado.
- Page 46 GUÍA DE RESOLUCIÓN DE PROBLEMAS La pantalla está en blanco. Bravo se sobrecalentó y se apagó. No se realizó ninguna acción después de ciertas etapas de cocción y apagado de el Bravo. El panel de control no funciona correctamente. Desenchufe el Bravo y deje que el Bravo se enfríe completamente.
- Page 47 Fabricante. El Fabricante proporcionará las partes necesarias y mano de obra para reparar cualquier parte de la Freidora de Aire Digital NuWave Bravo en el Departamento de Servicio de NuWave LLC. Una vez vencida la garantía, el costo de mano de obra y las partes será...
- Page 48 Puede comenzar el proceso de arbitraje enviando una solicitud por escrito a la Asociación Americana de Arbitraje (“AAA”) y enviando una copia a NuWave. NuWave pagará todos los costos de presentación. Un solo árbitro de la AAA llevará a cabo el arbitraje en un lugar conveniente para usted o por teléfono.
- Page 49 NuWave. Para cualquier disputa que surja de su uso del sitio web de NuWave, tiene treinta (30) días a partir de la fecha en que proporcionó información al sitio web para optar por no participar en el arbitraje.
-
Page 50: Replaceable Parts
REPLACEABLE PARTS To order replaceable parts head over to NuWaveNow.com Part Name Stainless Steel Baking Rack Stainless Steel Heavy-Duty Cooking Rack Stainless Steel Air Fry Basket Baking Pan Crumb Tray Feet replaceable parts... - Page 51 Part Description Part No. Used to place food on. Placed on top of Baking Pan so fats, oils, and 26834 grease fall into Pan. Used to place food on. Racks are 26833 inserted into slots in oven. Used to cook fried and crispy foods in. 26806 Placed underneath Baking Rack and 26835...
- Page 52 Designed & Developed in USA by: NuWave LLC 560 bunker Ct. Vernon Hills, IL 60061, U.S.A. Customer Service: Item No: BM 20831 1-877-689-2838 • help@nuwavenow.com Rev. 10-OG Made in China 11-04-20 ©2020 NuWave LLC • All Rights Reserved. DJ01 CC01...
Need help?
Do you have a question about the Bravo 20831 and is the answer not in the manual?
Questions and answers