Advertisement
Available languages
Available languages
Quick Links
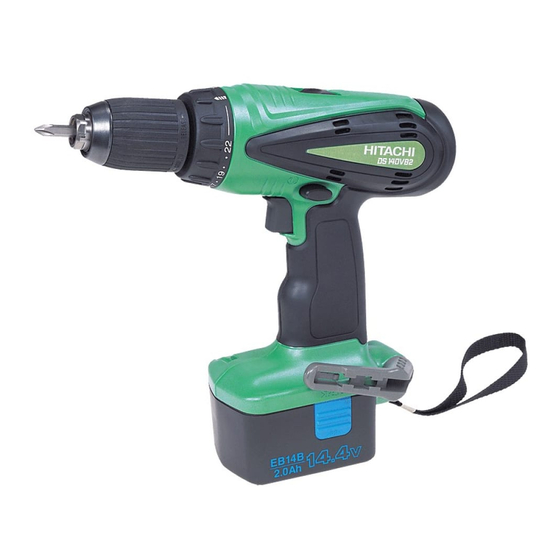
Cordless Driver Drill
Akku-bohrschrauber
Perceuse-visseuse à batterie
Trapano-avvitatore a batteria
Snoerloze boor-schroefmachine
Taladro atornilladór a batería
Berbequim aparafusadora a bateria
¢Ú··ÓÔηÙÛ¿‚È‰Ô Ì·Ù·Ú›·˜
Variable speed
DS 9DVB2 • DS 12DVB2
DS 14DVB2 • DS 18DVB2
Read through carefully and understand these instructions before use.
Diese Anleitung vor Benutzung des Werkzeugs sorgfältig durchlesen und verstehen.
Lire soigneusement et bien assimiler ces instructions avant usage.
Prima dell'uso leggere attentamente e comprendere queste instruzioni.
Deze gebruiksaanwijzing s.v.p. voor gebruik zorgvuldig doorlezen.
Leer cuidadosamente y comprender estas instrucciones antes del uso.
Antes de usar, leia com cuidado para assimilar estas instruções.
∆ιαβάστε προσεκτικά και κατανοήσετε αυτές τις οδηγίες πριν τη χρήση.
Handling instructions
Bedienungsanleitung
Mode d'emploi
Istruzioni per l'uso
Gebruiksaanwijzing
Instrucciones de manejo
Instruções de uso
Οδηγίες χειρισµού
DS14DVB2
Advertisement

Related Manuals for Hitachi Koki DS 9DVB2


Summary of Contents for Hitachi Koki DS 9DVB2
- Page 1 Taladro atornilladór a batería Berbequim aparafusadora a bateria ¢Ú··ÓÔηÙÛ¿‚È‰Ô Ì·Ù·Ú›·˜ Variable speed DS 9DVB2 • DS 12DVB2 DS 14DVB2 • DS 18DVB2 DS14DVB2 Read through carefully and understand these instructions before use. Diese Anleitung vor Benutzung des Werkzeugs sorgfältig durchlesen und verstehen.
- Page 5 English Deutsch Français Italiano 9,6 V aufladbare Batterie Batterie rechargeable Batteria ricaricabile da 9.6 V Rechargeable (Für DS9DVB2) 9,6 V (Pour DS9DVB2) 9,6 V (Per DS9DVB2) battery (For DS9DVB2) Batterie rechargeable Batteria ricaricabile da 12 V Rechargeable 12 V aufladbare Batterie battery (For DS12DVB2) (Für DS12DVB2) 12 V (Pour DS12DVB2)
- Page 6 Nederlands Español Português Ελληνικά 9,6 V oplaadbare batterij Batería recargable de Bateria recarregável de 9,6V Επαναφορτιζ µενη (voor DS9DVB2) 9,6 V (Para DS9DVB2) 9,6 V (Para DS9DVB2) µπαταρία (Για DS9DVB2) 12 V oplaadbare batterij Batería recargable de Bateria recarregável de 12V Επαναφορτιζ...
- Page 7 English 22. Always use the charger at the voltage specified GENERAL OPERATIONAL PRECAUTIONS on the nameplate. 23. Do not touch movable parts or accessories unless 1. Keep work area clean. Cluttered areas and benches the battery has been removed. invite accidents. 24.
- Page 8 English SPECIFICATIONS POWER TOOL Model DS9DVB2 DS12DVB2 No-load speed (Low/High) 0 – 300 / 0 – 1100min –1 (/min) 0 – 350 / 0 – 1300min –1 (/min) Wood 21 mm 32 mm (Thickness 18mm) Drilling Metal Steel: 10 mm, Steel: 13 mm, (Thickness 1.6mm) Aluminum: 10 mm...
- Page 9 English 3. Battery (EB1414S, EB1414, EB14B, EB1426H, STANDARD ACCESSORIES EB1430H) (For DS14DVB2) 1 Plus driver bit (No. 2 × 55L) ..1 2 Charger (UC9SD, UC14YFA or DS9DVB2 UC18YG) ........... 1 3 Plastic case ........1 1 Plus driver bit (No. 2 × 55L) ..1 2 Charger (UC12SD, UC14YFA or DS12DVB2 UC18YG) ...........
- Page 10 English specified into the charger and some of them may and normal time required for recharging will be light up the pilot lamps. However, you are restored by recharging the batteries 2 – 3 times. requested to exercise utmost caution not to charge How to make the batteries perform longer batteries other than specified ones because these can not only be charged but also such actions can...
- Page 11 English (2) Regarding the temperatures of the rechargeable extended period is not activated, the electric battery discharge might be low when using them the first The temperatures for rechargeable batteries are as and second time. This is a temporary phenomenon, shown in table 2, and batteries that have become and normal time required for recharging will be hot should be cooled for a while before being...
- Page 12 English (2) Regarding recharging time PRIOR TO OPERATION Depending on the combination of the charger and batteries, the charging time will become as shown 1. Setting up and checking the work environment in Table 5. Check if the work environment is suitable by following the precautions.
- Page 13 English When setting the shift knob to “HIGH” (high speed) If the motor is locked, immediately turn the power and the position of the cap is “17” or “22”, it may off. If the motor is locked for a while, the motor happen that the clutch does not engaged and that or battery may be burnt.
- Page 14 English NOTE: (b) Remove the hook and spring (Fig. 14). If the sleeve is tightened in a state where the clip (c) Install the hook and spring on the other side and of the keyless chuck is opened to a maximum limit, securely fasten with screw (Fig.
- Page 15 English Do not discard batteries together with normal trash NOTE: and do not throw batteries into fire. This requirement is provided according to BRITISH Store batteries out of the reach of children. STANDARD 2769: 1984. Use batteries correctly in accordance with the battery Therefore, the letter code and colour code may not be specifications and indications.
- Page 16 Deutsch 18. Das Werkzeug und Ladegerät nicht anders als in der VORSICHT FÜR ALLGEMEINE BEDIENUNG Gebrauchsanweisung vorgeschrieben verwenden. 19. Die Benutzung von Zubehör und Sonderzubehör, 1. Den Arbeitsplatz stets sauber halten. Unaufger- die nicht im HITACHI-Katalog oder in der äumte Arbeitsplätze und Werkbänke erhöhen die Bedienungsanleitung aufgeführt sind, erhöhen das Unfallgefahr.
- Page 17 Deutsch Die Batterie nicht ins Feuer werfen. 10. Darauf achten, daß keine Gegenstände durch Sie könnte dabei explodieren. Belüftungsschlitze des Aufladers in das Gerät Beim Bohren von Wand, Boden oder Decke, eindringen. nachprüfen ob keine versenkten Kabel, usw. Wenn Metallobjekte oder entzündliche vorhanden sind.
- Page 18 Deutsch 3. Batterie (EB1414S, EB1414, EB14B, EB1426H, STANDARDZUBEHÖR EB1430H) (Für DS14DVB2) 1 Plusschrauber (Nr.2 × 55L) ... 1 2 Ladegerät (UC9SD, UC14YFA oder DS9DVB2 UC18YG) ........... 1 3 Plastikgehäuse ........1 1 Plusschrauber (Nr.2 × 55L) ... 1 2 Ladegerät (UC12SD, UC14YFA oder DS12DVB2 UC18YG) ...........
- Page 19 Deutsch ACHTUNG: Wenn solch eine Batterie sofort nach der Die Modelle UC9SD, UC12SD, UC14SD und Verwendung aufgeladen wird, werden die UC18SD sind exklusiv entworfene Ladegeräte. Batteriechemikalien beeinträchtigt, und die Sie können nur die festgelegten Batterien laden. Batterielebensdauernimmt ab. Die Batterie etwas Es ist möglich, andere als die festgelegten stehen lassen und erst aufladen, wenn sie sich Batterien einzuschieben, und bei einigen leuchten...
- Page 20 Deutsch Tafel 1 Anzeigen der Kontrollampe Leuchtet für 0,5 Sekunden. Vor dem Blinkt Loscht für 0,5 Sekunden. (Aus für 0,5 Sekunden) Laden (ROT) Leuchtet Leuchtet kontinuierlich Beim Laden (ROT) Leuchtet für 0,5 Sekunden. Laden Blinkt Loscht für 0,5 Sekunden. (Aus für 0,5 Sekunden) durchgeführt (ROT) Leuchtet für 0,1 Sekunden.
- Page 21 Deutsch Tafel 4 Aufladebereiche für Batterien Verlängerung der Lebensdauer von Batterien Temperaturen, bei (1) Die Batterien aufladen, bevor sie völlig erschöpft Akkubatterien denen die Batterie sind. geladen werden kann Wenn festgestellt wird, daß die Leistung des EB914S, EB914, EB9B, Werkzeugs nachläßt, mit der Arbeit aufhören und EB1214S, EB1214L, die Batterie aufladen.
- Page 22 Deutsch Wenn das Werkzeug weiter verwendet wird und die Die Einheit zeigt die Anzugsdrehkraft mit den Ziffern Batterie völlig erschöpft wird, kann die Batterie „1, 3, 5 ... 22” auf der Kappe und einem weißen beschädigt und ihre Lebensdauer verkürzt werden. Punkt an.
- Page 23 Deutsch 5. Wahl von Anziehdrehmoment und Drehfrequenz Tafel 7 Wahl der Drehgeschwindigkeit (Stellung des Schaltknopfs) Verwendung Kappenlage LOW (niedrige Geschwindigkeit) HIGH (hohe Geschwindigkeit) Für Schraube von 6 mm Für Schrauben von 4 mm Maschineschraube 1 – 22 durchscnitt oder weniger Durchschnitt oder weniger Für 8 mm Durchschnitt oder Einschrau-...
- Page 24 Deutsch HINWEIS: verwendet werden. Verwenden Sie keine anderen Wenn der Motor beginnt, zu rotieren, ist ein Summen Einsätze, da diese sich lösen können. zu bören. Dabei handelt es sich nicht um eine (4) Verwendung als Hilfsbeleuchtung (Haken mit störung. Beleuchtung) 11.
- Page 25 Deutsch Vernachlässigung dieses Punktes kann zu erheblicher Gefahr führen. 3. Außenreinigung Wenn der Bohrschrauber schmutzig ist, ihn mit einem weichen und trockenen Tuch abwischen oder mit einem in Seifenwasser benetzten Tuch. Kein Chlorsolvent, Benzin oder Farbsolvent verwenden da sie plastik-Material schmelzen. 4.
- Page 26 Français 19. L’utilisation d’accessoires ou fixations autres que PRECAUTIONS GENERALES ceux préconisés dans le manuel d’instructions ou le catalogue HITACHI peut présenter un danger 1. Maintenir la zone de travail propre. Des surfaces pour l’utilisateur. et des bancs de travail encombrés sont propices 20.
- Page 27 Français Ne jetez pas la batterie au feu. Elle pourrait exploser. 10. Ne pas introduire d’objets métalliques ou des pro Pour le forage dans un mur, le sol ou le plafond, duits inflammables dans les fentes d’aération du vérifiez qu’il n’y a pas présence de cordons chargeur, cela provoquera un choc électrique ou électriques enfouis, etc.
- Page 28 Français 3. Batterie (EB1414S, EB1414, EB14B, EB1426H, ACCESSOIRES STANDARD EB1430H) (Pour DS14DVB2) 1 Mèche-visseuse cruciforme (No.2 × 55L) ........1 2 Chargeur (UC9SD, UC14YFA ou DS9DVB2 UC18YG) ........... 1 3 Boîtier en plastique ......1 1 Mèche-visseuse cruciforme (No.2 × 55L) ........1 2 Chargeur (UC12SD, UC14YFA ou DS12DVB2 UC18YG) ...........
- Page 29 Français ATTENTION : (2) Eviter d’effectuer la recharge sous des températures Les modèles UC9SD, UC12SD, UC14SD et élevées. UC18SD sont les chargeurs exclusifs. Ils ne Une batterie est toujours chaude immédiatement peuvent charger que les batteries spécifiées. Il après son utilisation. Si la batterie est rechargée est possible d'insérer des batteries autres que immédiatement après utilisation, les substances les batteries spécifiées dans le chargeur et, avec...
- Page 30 Français Tableau 1 Indications de la lampe témoin S’allume pendant 0,5 seconde. Ne s’allume pas pendant 0,5 seconde. Avant la Clignote (Eteint pendant 0,5 seconde) recharge (ROUGE) S’allume S’allume sans interruption Pendant la (ROUGE) recharge S’allume pendant 0,5 seconde. Ne s’allume pas pendant 0,5 seconde. Recharge Clignote (Eteint pendant 0,5 seconde)
- Page 31 Français phénomène est temporaire et le temps de recharge Tableau 4 Plage de recharge des batteries normal sera rétabli quand les batteries auront été Températures rechargées 2 ou 3 fois. Batteries rechargeables de recharge de la batterie Comment prolonger la durée de vie des batteries EB914S, EB914, EB9B, (1) Recharger les batteries avant qu’elles ne soient EB1214S, EB1214L,...
- Page 32 Français Quand la puissance de l’outil utilisé faiblit, l’éteindre La perceuse indique le couple de serrage par les et recharger la batterie. Si l’outil continue d’être numéros “1, 3, 5 ... 22” sur le capot et un point utilisé jusqu’à épuisement du courant électrique, la blanc.
- Page 33 Français 5. Sélection de la couple de serrage et de la fréquence de rotation Tableau 7 Sélection de vitesse de rotation (Positiondu bouton de changement) Position du Utiisation capuchon LOW (Petite vitesse) HIGH (Grande vitesse) Pour vis de 6 mm ou Pour vis de 4 mm ou moins Vis méchanique 1 –...
- Page 34 Français 11. Utilisation du crochet Durée d’éclairage ATTENTION : Piles au manganèse AAAA : environ 15 heures Lorsqu’on utilise le crochet, faire attention que l’outil Piles alcalines AAAA : environ 30 heures principal ne tombe pas. Si l’outil tombe, cela risque ATTENTION : de provoquer un accident.
- Page 35 Français ATTENTION : Les réparations, modifications et inspections des outils électriques Hitachi doivent être confiées à un service après-vente Hitachi agréé. Il sera utile de présenter cette liste de pièces au service après-vente Hitachi agréé lorsqu’on apporte un outil nécessitant des réparations ou tout autre entretien.
- Page 36 Italiano 17. Usare solo parti di ricambio originali HITACHI. PRECAUZIONI PER LE OPERAZIONI 18. Non usare gli utensili elettrici e il caricabatterie GENERALI per impieghi diversi da quelli specificati nelle istruzioni per l’uso. 1. Tenere pulita l’area di lavoro. Aree in disordine 19.
- Page 37 Italiano Non gettare la batteria nel fuoco. Può esplodere. 10. Non inserire nessun oggetto nelle fessure di Quando si fanno fori sulle pareti, pavimenti o ventilazione del caricatore. soffitti, controllare che non ci siano cavi elettrici Inserendo oggetti metallici o infiammabili nelle nascosti.
- Page 38 Italiano 3. Batteria (EB1414S, EB1414, EB14B, EB1426H, ACCESSORI STANDARD EB1430H) (Per DS14DVB2) 1 Cacciavite a croce (n.2 × 55L) ..1 2 Caricatore (UC9SD, UC14YFA o DS9DVB2 UC18YG) ..........1 3 Custodia in plastica ......1 1 Cacciavite a croce (n.2 × 55L) ..1 2 Caricatore (UC12SD, UC14YFA o DS12DVB2 UC18YG) ..........
- Page 39 Italiano ATTENZIONE: usata, la sostanza chimica interna viene deteriorata I modelli UC9SD, UC12SD, UC14SD e UC18SD e la durata della batteria abbreviata. Consentire alla sono caricatori a progettazione specifica. Essi batteria di raffreddarsi per un po’e quindi ricaricarla. 〈 UC14YFA/UC24YFA 〉 non possono essere usati per caricare batterie diverse da quelle specificate.
- Page 40 Italiano Tabella 1 Indicazioni della spie Si illumina per 0,5 secondi. Non si illumina per 0,5 secondi. Prima della Lampeggia (Spento per 0,5 secondi) carica (ROSSO) Si illumina Durante la Si illumina stabilmente (ROSSO) carica Si illumina per 0,5 secondi. Carica Lampeggia Non si illumina per 0,5 secondi.
- Page 41 Italiano (2) Tempo di carica necessario Come mantenere più lunga la durata delle batterie A seconda della combinazione di caricatore e (1) Ricaricare le batterie prima che si scarichino batterie, il tempo di carica è come indicato nella completamente. Tabella 5. Quando si sente che la potenza dell’attrezzo si indebolisce, interrompere l’uso e ricaricare la Tabella 5 Tempo di carica (a 20°C)
- Page 42 Italiano (3) Regolazione della coppia di serraggio PRIMA DI INIZIARE LE OPERAZIONI Ruotare il tappo e allineare i numeri “1, 3, 5 ... 22” sul tappo, o il punto bianco, con il simbolo del 1. Stabilire e controllare l’ambiente di lavoro triangolo sul corpo esterno.
- Page 43 Italiano 5. Scelta della coppia di serraggio e della frequenza di rotazione Tabella 7 Selezione della velocità di rotazione (Posizione della manopola di selezione) Posizione del tappo LOW (bassa velocità) HIGH (alta velocità) Per viti di 6 mm diametro Per viti de 4 mm diametro o Viti di macchina 1 –...
- Page 44 Italiano Non attaccare alcuna punta utensile tranne una (5) Sostituzione delle pile punta con testa a croce all’unità principale (a) Allentare la vite del gancio con un cacciavite con dell’utensile quando si trasporta l’unità principale testa a croce (n.1). (Fig. 19) utensile con il gancio agganciato alla cintura.
- Page 45 Italiano Nell’uso e nella manutenzione degli utensili elettrici devono essere osservate le normative di sicurezza e i criteri prescritti in ciascun paese. MODIFICHE: Gli utensili elettrici Hitachi vengono continuamente migliorati e modificati per includere le più recenti innovazioni tecnologiche. Di conseguenza, alcuni pezzi possono essere modificati senza preavviso.
- Page 46 Nederlands 16. Gebruik uitsluitend de bijbehorende acculader. ALGEMENE VOORZORGSMAATREGELEN Gebruik geen andere acculaders om gevaar te voorkomen. 1. De plaats waar gewerkt wordt schoonhouden. Niet 17. Maak alleen gebruik van originele HITACHI- opgeruimde werkplaatsen en werkbanken onderdelen. verhogen het gevaar van ongelukken. 18.
- Page 47 Nederlands Demonteer de oplaadbare batterij of acculader niet. Het gebruik van een uitgeputte batterij zal de acculader beschadigen. Voorkom kortsluiting van de oplaadbare batterij. 10. Steek nooit een voorwerp in de ventilatie- Kortsluiting kan resulteren in oververhitting. Dit kan schade of brandgevaar opleveren. openingen van de acculader.
- Page 48 Nederlands 3. Batterij (EB1414S, EB1414, EB14B, EB1426H, STANDAARD TOEBEHOREN EB1430H) (Voor DS14DVB2) 1 Kruiskopdrijver (Nr.2 × 55L) ..1 2 Acculader (UC9SD, UC14YFA of DS9DVB2 UC18YG) ..........1 3 Plastic doos ........1 1 Kruiskopdrijver (Nr.2 × 55L) ..1 2 Acculader (UC12SD, UC14YFA of DS12DVB2 UC18YG) ..........
- Page 49 Nederlands 〈 UC14YFA/UC24YFA 〉 LET OP: De UC9SD, UC12SD, UC14SD en UC18SD modellen Voor het gebruik van de boor-schroefmachine dient de zijn de speciaal hiervoor ontworpen laders. Deze accu als volgt opgeladen te worden. kunnen uitsluitend de opgegeven batterijen 1. Sluit het netsnoer van het oplaadapparaat op het opladen.
- Page 50 Nederlands Tabel 1 Aanduidingen van het controlelampje Knippert Voor het Brandt ongeveer 0,5 sekonde. (ROOD) laden Brandt ongeveer 0,5 sekonde niet. (Uit voor 0,5 seconde) Tijdens Brandt Blift branden opladen (ROOD) Knippert Na opladen Brandt ongeveer 0,5 sekonde. (ROOD) Brandt ongeveer 0,5 sekonde niet. (Uit voor 0,5 sekonde) Opladen Knippert...
- Page 51 Nederlands Tabel 4 Temperatuur voor opladen van baterijen Om langdurig gebruik van de batterij te bevorderen Geschikte temperatuur Oplaadbare batterijen (1) Laad batterij op vóórdat ze volledig uitgeput zijn. voor het opladen Merkt u dat de gevoede apparatuur minder krachtig EB914S, EB914, EB9B, gaat werken, onderbreek dan het gebruik en laad EB1214S, EB1214L,...
- Page 52 Nederlands (2) Verricht het opladen niet bij hoge temperatuur. De machine geeft het aantrekkoppel aan met de Een oplaadbare batterij zal onmiddellijk na gebruik nummers „1, 3, 5 ... 22” op de kap en een witte gewoonlijk erg warm zijn. Als u een dergelijke batterij stip.
- Page 53 Nederlands 5. Scelta della coppia di serraggio e della frequenza di rotazione Tabel 7 Kiezen van het toerental (kapstand) Toepassing Kapstand LOW (laag toerental) HIGH (hoog toerental) Voor schroevan met een Voor schroevan met een Kolomschroef 1 – 22 diameter van 6 mm of minder diameter van 4 mm of minder Voor schroeven met een nominale diameter van 8 mm of minder...
- Page 54 Nederlands De draaisnelheid van de boor kunt u regelen door (a) Druk de schakelaar in om het licht uit te zetten. in meer of mindere mate aan de trekschakelaar te Vergeet u dit te doen, dan zal het licht na 15 trekken.
- Page 55 Nederlands 4. Opbergen Bewaar de slagboor op een plaats waar de temperatuur niet hoger is dan 40°C, en buiten het bereik van kinderen. 5. Lijst vervangingsonderdelen LET OP: Reparatie, modificatie en inspectie van Hitachi elektrisch gereedschap dient te worden uitgevoerd door een erkend Hitachi Service-centrum.
- Page 56 Español 17. Utilice sólo piezas de repuestos originales HITACHI. PRECAUCIONES GENERALES DE OPERACION 18. No utilizar herramientas ni el cargador para otras aplicaciones que difieran de las especificadas en 1. Mantener limpia el área de trabajo, los puestos el manual de instrucciones. de trabajo y bancos desordenados predisponen a 19.
- Page 57 Español Nunca poner en cortocircuito la batería recargable. El uso de una batería descargada dañará el Poner en cortocircuito la batería produce una cargador. corriente eléctrica enorme y el consecuente 10. No insertar objetos en las ranuras de ventilación recalentamiento, pudiendo quemar o deteriorar la del cargador.
- Page 58 Español 3. Batería (EB1414S, EB1414, EB14B, EB1426H, ACCESORIOS ESTANDAR EB1430H) (Para DS14DVB2) 1 Destornillador en cruz (+) (No.2 × 55L) ........1 2 Cargador (UC9SD, UC14YFA o DS9DVB2 UC18YG) ........... 1 3 Caja de plástico ....... 1 1 Destornillador en cruz (+) (No.2 ×...
- Page 59 Español pueden cargar otras baterías que no sean las batería y recárguela después de que se haya enfriado especificadas. Es posible insertar en el cargador durante cierto tiempo. 〈 UC14YFA/UC24YFA 〉 otras baterías distintas de las especificadas, y en algunas se podrían iluminar las lámparas pilotos. Antes de usar el taladro atornillador, cargar la batería Sin embargo, solicitamos prestar suma atención del modo siguiente:...
- Page 60 Español Tabla 1 Indicaciones de la lámpara piloto Se encenderá durante 0,5 segundos. No se encenderá durante 0,5 segundos. Antes de la Parpadeo (Apagada durante 0,5 segundos) carga (ROJA) Durante la Iluminación Iluminación permanente carga (ROJA) Se encenderá durante 0,5 segundos. Carga Parpadeo No se encenderá...
- Page 61 Español Tabla 4 Márgenes de carga de las baterías Descarga eléctrica en caso de baterías nuevas, etc. Temperatura con Como la substancia química interna de las baterías Baterías la que podrá nuevas o las que no se hayan utilizado durante cargarse la batería mucho tiempo no está...
- Page 62 Español la capacidad de la batería, ésta podría dañarse y (2) Indicación del par de apriete su duración útil podría acortarse. El par de apriete dependerá del tipo de tornillo y (2) Evite realizar la recarga a altas temperaturas. del material que esté atornillando. Una batería se calentará...
- Page 63 Español 5. Modo de seleccionar el par de apriete y la velocidad de rotación Table 7 Selección de la velocidad de rotación (Posición del mando de cambio) Posición de Utilizaciones la cubierta LOW (Baja velocidad) HIGH (Alta velocidad) Para tornillos de 6 mm de Tornillo para Para tornillos de 4 mm de 1 –...
- Page 64 Español 11. Uso del gancho Tiempo de iluminación PRECAUCIÓN: Pilas de manganeso AAAA: aprox. 15 horas. Cuando se utiliza el gancho, preste la debida atención Pilas alcalinas AAAA: aprox. 30 horas. para evitar que se caiga el equipo principal. La PRECAUCIÓN: caída de la herramienta implica el riesgo de No mire directamente hacia la luz.
- Page 65 Español 5. Lista de repuestos PRECAUCIÓN: La reparación, modificación e inspección de las herramientas eléctricas Hitachi deben ser realizadas por un Centro de Servicio Autorizado de Hitachi. Esta lista de repuestos será de utilidad si es presentada junto con la herramienta al Centro de Servicio Autorizado de Hitachi, para solicitar la reparación o cualquier otro tipo de mantenimiento.
- Page 66 Português 19. Para evitar ferimentos corporais, use somente os PERCAUÇÕES GERAIS QUANTO À acessórios e complementos recomendados neste OPERAÇÃO manual de instruções ou no catalálogo da HITACHI. 20. Se o fio de alimentação do carregador estiver 1. Mantenha o local de trabalho arrumado. A danificado, o carregador deve ser devolvido para desordem no local de trabalho pode ser motivo um centro de assistência autorizado da HITACHI,...
- Page 67 Português Leve a bateria à loja onde você a comprou assim A inserção de objetos metálicos ou inflamáveis que a vida útil da bateria após a recarga começar nas aberturas de ventilação do recarregador pode a ficar muito curta para uso prático. Não descarte causar choques elétricos ou danificar o a bateria velha.
- Page 68 Português 3. Bateria (EB1414S, EB1414, EB14B, EB1426H, ACESSÓRIOS-PADRÃO EB1430H) (Para DS14DVB2) 1 Palhetão de chave mais (Nº2 × 55L) ... 1 2 Recarregador (UC9SD, UC14YFA ou DS9DVB2 UC18YG) ............. 1 3 Estojo de plástico ........1 1 Palhetão de chave mais (Nº2 × 55L) ... 1 DS12DVB2 2 Recarregador (UC12SD, UC14YFA ou UC18YG) .............
- Page 69 Português CUIDADO: (2) Evite fazer a recarga em altas temperaturas. Os modelos UC9SD, UCI2SD, UCI4SD e UCI8SD Um bateria recarregável se aquece imediatamente são recarregadores especialmente projetados. depois do uso. Se ela for recarregada imediatamente Eles não podem recarregar baterias que não depois de ter sido usada, sua substância química sejam as especificadas.
- Page 70 Português Quadro 1 Indicações das lâmpadas Acende-se por 0,5 segundo. Não se acende Antes da Pisca por 0,5 segundo. (desliga-se por 0,5 segundo) recarga (VERMELHO) Fica continuamente acesa Durante a Acende recarga (VERMELHO) Acende-se por 0,5 segundo. Não se acende Recarga Pisca por 0,5 segundo.
- Page 71 Português (2) Quanto ao tempo de recarga Como prolongar a vida útil das baterias Conforme a combinação do recarregador e das (1) Recarregue as baterias antes que elas se baterias, o tempo de recarga será o que mostra o descarreguem completamente. Quadro 5.
- Page 72 Português (3) Ajuste do torque de aperto ANTES DA OPERAÇÃO Gire a tampa e alinhe os números “1, 3, 5 … 22” da tampa, ou os pontos brancos, com a marca do 1. Definição e verificação do ambiente de trabalho triângulo na parte externa do corpo.
- Page 73 Português 5. Como selecionar a potência de aperto e a velocidade de rotação Tabela 7 Seleção da velocidade de rotação (Posição do comutador) Posição da tampa LOW (velocidade baixa) HIGH (velocidade alta) Parafuso de Para parafusos de diâmetro Para parafusos de diâmetro 1 –...
- Page 74 Português NOTA: (b) A direção da luz pode ser ajustada no espaço Pode ser produzido um som de pio quando o motor das posições 1 - 5 do gancho (Fig. 18) estiver para começar a girar, mas é apenas um Tempo de iluminação ruído, não um defeito da máquina.
- Page 75 Português 5. Lista de peças para conserto CUIDADO: Consertos, modificações e inspeção de Ferramentas Elétricas da Hitachi devem ser realizados por uma Oficina Autorizada da Hitachi. Esta lista de peças pode ser útil se apresentada com a ferramenta na Oficina Autorizada da Hitachi ao solicitar conserto ou manutenção.
- Page 76 ∂ÏÏËÓÈο 17. Χρησιµοποιήστε µ νο αυθεντικά ανταλλακτικά °∂¡π∫∞ ª∂∆ƒ∞ ¶ƒ√ºÀ§∞•∏™ °π∞ ∆∏ HITACHI. §∂π∆√Àƒ°π∞ 18. Μην χρησιµοποιήσετε τα ηλεκτρικά εργαλεία για εφαρµογές διαφορετικές απ αυτές που 1. Κρατήστε το χώρο εργασίας καθαρ . Οι γεµάτοι αναφέρονται στις Οδηγίες Χειρισµού. χώροι και οι πάγκοι προκαλούν ατυχήµατα. 19.
- Page 77 ∂ÏÏËÓÈο Μην αφήσετε ξένα υλικά να µπουν στην τρύπα µπαταρίας µετά απ την φ ρτιση έχει γίνει πολύ σύνδεσης της επαναφορτιζ µενης µπαταρίας. µικρή για πρακτική χρήση. Μην πετάξετε την Ποτέ µην αποσυναρµολογήσετε την τελειωµένη µπαταρία. επαναφορτιζ µενη µπαταρία και το φορτιστή. Η...
- Page 78 ∂ÏÏËÓÈο 3. Μπαταρία (EB1414S, EB1414, EB14B, EB1426H, ∫∞¡√¡π∫∞ ∂•∞ƒ∆∏ª∞∆∞ EB1430H) (Για DS14DVB2) 1 Συν οδηγ ς λεπίδας (Αρ. 2 × 55L) ... 1 2 Φορτιστής (UC9SD, UC14YFA ή DS9DVB2 UC18YG) ........... 1 3 Πλαστική θήκη ......... 1 1 Συν οδηγ ς λεπίδας (Αρ. 2 × 55L) ... 1 2 Φορτιστής...
- Page 79 ∂ÏÏËÓÈο Αν συνεχίσετε να χρησιµοποιείτε το εργαλείο και διαφορετικές µπαταρίες εκτ ς απ τις αδειάστε το ηλεκτρικ ρεύµα, η µπαταρία µπορεί ενδεδειγµένες. Είναι δυνατ ν να βάλετε µέσα να πάθει ζηµιά και η ζωής της θα γίνει µικρ τερη. στο φορτιστή διαφορετικές µπαταρίες απ τις...
- Page 80 ∂ÏÏËÓÈο ¶›Ó·Î·˜ 1 Ενδείξεις δοκιµαστικής λάµπας Ανάβει για 0,5 δευτερ λεπτα. ∆εν ανάβει για 0,5 Πριν τη Αναβοσβήνει δευτερ λεπτα. (κλειστ για 0,5 δευτερ λεπτα) φ ρτιση (ΚΟΚΚΙΝΟ) Κατά τη Ανάβει Ανάβει συνεχώς φ ρτιση (ΚΟΚΚΙΝΟ) Ανάβει για 0,5 δευτερ λεπτα. ∆εν ανάβει για 0,5 Ολοκλήρωση...
- Page 81 ∂ÏÏËÓÈο ¶›Ó·Î·˜ 4 Επαναφορτιζ µενα διαστήµατα των ¶Ò˜ Ó· οÓÂÙ ÙȘ ̷ٷڛ˜ Ó· ·Ô‰›‰Ô˘Ó µπαταριών ÂÚÈÛÛfiÙÂÚÔ ¯ÚfiÓÔ Θερµοκρασίες στις (1) Επαναφορτίστε τις µπαταρίες πριν αδειάσουν Επαναφορτιζ µενες οποίες η µπαταρία τελείως. µπαταρίες µπορεί να φορτιστεί ταν αισθανθείτε τι η ισχύς του εργαλείου γίνεται ασθενέστερη, σταµατήστε...
- Page 82 ∂ÏÏËÓÈο ρυθµίσετε τη θέση του καλύµµατος σύµφωνα µε ¶Ò˜ Ó· οÓÂÙ ÙȘ ̷ٷڛ˜ Ó· ·Ô‰›‰Ô˘Ó την διάµετρο της βίδας. ÂÚÈÛÛfiÙÂÚÔ ¯ÚfiÓÔ. (2) Ένδειξη της ροπής σφίξης (1) Επαναφορτίστε τις µπαταρίες πριν αδειάσουν Η ροπή σφίξης διαφέρει ανάλογα µε τον τύπο της τελείως.
- Page 83 ∂ÏÏËÓÈο 5. ¶Ò˜ Ó· ÂÈϤÍÂÙ ÙËÓ ‰‡Ó·ÌË ÛÊ›Í˘ Î·È ÙËÓ Ù·¯‡ÙËÙ· ÂÚÈÛÙÚÔÊ‹˜ ¶›Ó·Î·˜ 7 Επιλογή ταχύτητας περιστροφής (Θέση του κουµπιού αλλαγής) Θέση Χρήση καλύµµατος LOW (Χαµηλή ταχύτητα) HIGH (Υψηλή ταχύτητα) Για 4 mm ή µικρ τερες Για 6 mm ή µικρ τερες Μηχανική...
- Page 84 ∂ÏÏËÓÈο 10. §ÂÈÙÔ˘ÚÁ›· ‰È·ÎfiÙË ¶ƒ√™√Ã∏: ταν η σκανδάλη τραβηχτεί, το εργαλείο Η λεπίδα µπορεί να χαλαρώσει απ τον γάντζο και περιστρέφεται. ταν η σκανδάλη ελευθερώνεται να προκαλέσει σωµατικ τραυµατισµ ταν το εργαλείο σταµατά. αντιστραφεί η διεύθυνση της λεπίδας πως φαίνεται Η...
- Page 85 ∂ÏÏËÓÈο ™À¡∆∏ƒ∏™∏ ∫∞π ∂§∂°Ã√™ 1. ŒÏÂÁ¯Ô˜ ÂÚÁ·Ï›Ԣ Επειδή η χρήση εν ς αµβλύ εργαλείου θα χαµηλώσει την αποδοτικ τητα και θα προκαλέσει την πιθανή δυσλειτουργία του µοτέρ, ακονίστε ή αντικαταστήστε το εργαλείο µ λις παρατηρηθεί φθορά. 2. ŒÏÂÁ¯Ô˜ ÙˆÓ ‚ȉÒÓ ÛÙÂÚ¤ˆÛ˘ Τακτικά...
- Page 87 English Nederlands GARANTIEBEWIJS GUARANTEE CERTIFICATE 1 Modelnummer 1 Model No. 2 Serienummer 2 Serial No. 3 Datum van aankoop 3 Date of Purchase 4 Naam en adres van de gebruiker 4 Customer Name and Address 5 Naam en adres van de handelaar 5 Dealer Name and Address (Stempel a.u.b.
- Page 89 English Nederlands Only for EU countries Alleen voor EU-landen Do not dispose of electric tools together with Geef elektrisch gereedschap niet met het huisvuil household waste material! mee! In observance of European Directive 2002/96/EC Volgens de Europese richtlijn 2002/96/EG inzake on waste electrical and electronic equipment and oude elektrische en elektronische apparaten en de its implementation in accordance with national...
- Page 90 Representative office in Europe Hitachi Power Tools Europe GmbH 27. 2. 2004 Siemensring 34, 47877 Willich 1, F. R. Germany Head office in Japan Hitachi Koki Co., Ltd. K. Kato Shinagawa Intercity Tower A, 15-1, Konan 2-chome, Board Director Minato-ku, Tokyo, Japan Hitachi Koki Co., Ltd.
Need help?
Do you have a question about the DS 9DVB2 and is the answer not in the manual?
Questions and answers