Table of Contents
Advertisement
Available languages
Available languages
Quick Links
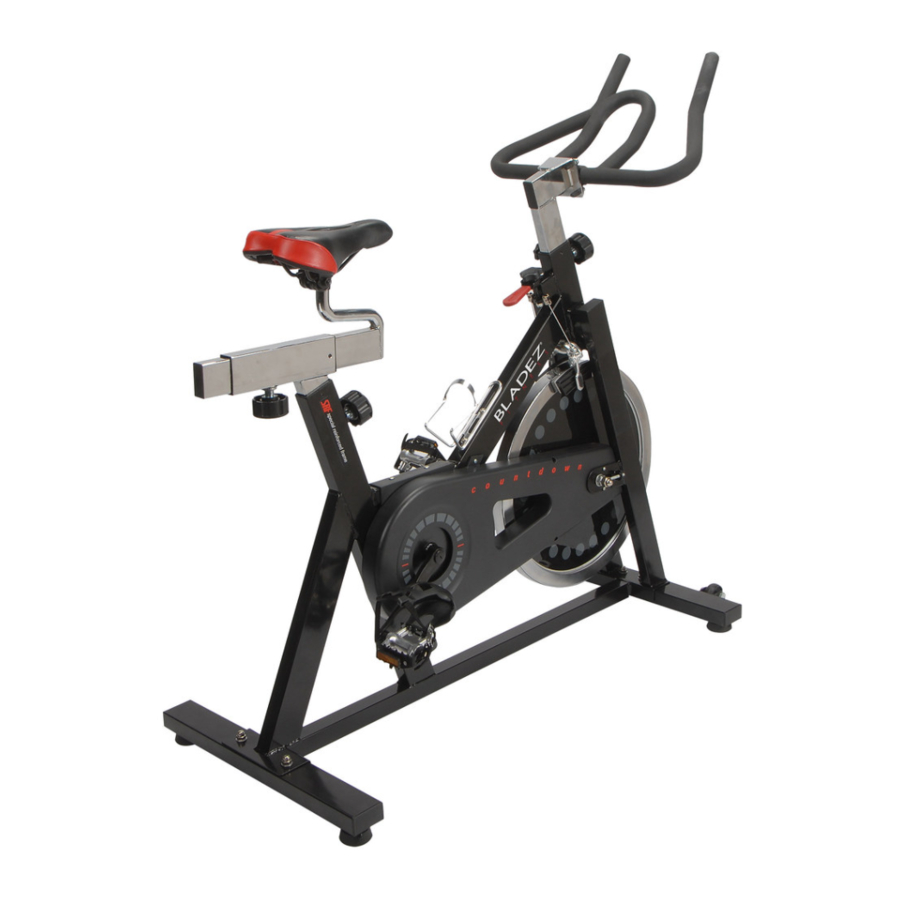
Countdown Bike
OWNER'S MANUAL
CAUTION:
Exercise of a strenuous nature, as is customarily done on this equipment, should not be
undertaken without first consulting a physician. No specific health claims are made or implied as they
relate to the equipment.
IMPORTANT:
Read all instructions carefully before using this product. Retain this owner's
manual for future reference.
BH North America
Foothill Ranch, California 92610
Advertisement
Chapters
Table of Contents

Related Manuals for BLADEZ Countdown


Summary of Contents for BLADEZ Countdown
- Page 1 Countdown Bike OWNER’S MANUAL CAUTION: Exercise of a strenuous nature, as is customarily done on this equipment, should not be undertaken without first consulting a physician. No specific health claims are made or implied as they relate to the equipment.
-
Page 2: Table Of Contents
TABLE OF CONTENTS Safety……………….…........1 Hardware Package Contents………....3 Pre-Assembly……...........4 Assembly Instructions…………………..5 Maintenance…………………………....9 Troubleshooting……..………………………10 Exploded View ………........11 Parts List …………………......12 Warranty……..………………………....13... - Page 3 IMPORTANT SAFETY ADVICE PRECAUTIONS This bike has been designed and constructed to provide maximum safety. Nevertheless, certain precautions should be taken when using exercise equipment. Read the whole manual before assembling and using the bike. The following safety precautions should also be observed: 1.
- Page 4 KEEP THESE INSTRUCTIONS SAFE FOR FUTURE USE FOR WARRANTY REPAIR PLEASE DO NOT TAKE YOUR BIKE BACK TO THE RETAIL STORE! CONTACT BLADEZ FITNESS FIRST BH North America Corporation 20155 Ellipse Foothill Ranch, CA 92610 Toll Free: (866) 325-2339 Phone: (949) 206-0330 Fax: 949 206-0013 Email: fitness@bhnorthamerica.com...
-
Page 5: Pre-Assembly
6. Use suitable clothing and footwear. Make sure all laces/cords are tied correctly. FOR WARRANTY REPAIR PLEASE DO NOT TAKE YOUR BIKE BACK TO RETAIL STORE CONTACT BLADEZ FITNESS FIRST BH North America Corporation 20155 Ellipse Foothill Ranch, CA 92610... - Page 6 ASSEMBLY If you are missing parts or require information on how to operate this product please call 1-949-206-0330...
-
Page 7: Assembly Instructions
ASSEMBLY INSTRUCTIONS STEP 1 Secure front stabilizer (2) to main frame (1) and attach it with carriage bolts (43), washers (44), and dome nuts (45). STEP 2 Secure rear stabilizer (3) to main frame (1) and attach it with carriage bolts (43), washers (44), and dome nuts (45). - Page 8 ASSEMBLY INSTRUCTIONS (cont’d) STEP 3. Slide the handlebar post (6) into the main frame (1) and tighten the plastic adjustable knob (54) to secure STEP 4 Attach the handlebar (7) to the main frame (1) and attach it with bolts (57), washers (29).
- Page 9 ASSEMBLY INSTRUCTIONS (cont’d) STEP 5. Slide the seat post (4) into the main frame (1) and attach it with the plastic adjustable knob (54). STEP 6 Securely attach the seat (36) to the seat bar (5). Slide the seat bar (5) into the seat post (4) and tighten the plastic adjustable knob (54) to secure...
- Page 10 ASSEMBLY INSTRUCTIONS (cont’d) STEP 7. Tightening Direction Tightening Direction Failure to follow the directions can result in damage to either the crank or the pedal threads. The right-hand pedal, marked with the letter (R),screws onto the right-hand crank, also marked with an (R), in a clockwise direction till tight. The left-hand pedal, marked with the letter (L),screws onto the left-hand crank, also marked with an (L), in a counter clockwise direction till tight.
-
Page 11: Maintenance
MAINTENANCE INSTRUCTIONS CLEANING Care has been taken to assure that your bike has been properly adjusted and lubricated at the factory. It is not recommended that the user attempt service on the internal components. Instead, seek service from an authorized service center. However, from time to time, the outer surfaces may appear dull or dirty. -
Page 12: Troubleshooting
TROUBLESHOOTING RESISTANCE ADJUSTMENT: Pedaling resistance is controlled by the tension knob. Properly adjusting the seat will help reduce the risk of injury and ensure maximum exercise efficiency and comfort. The appropriate position while using this bike is when one pedal is in the bottom position, the other leg is slightly bent at the knee. - Page 13 PARTS LIST KEY NO. KEY NO. DESCRIPTION SIZE DESCRIPTION SIZE MAIN FRAME BB PARTS FRONT CRANK STABILIZER PEDALS REAR STABILIZER ADJUSTABLE FOOT SEATPOST ADJUSTABLE NUT SEATBAR CARRIAGE BOLT M8X40 FRONT POST WASHER Φ8 HANDLEBAR M12X1 NYLON NUT CHAIN ADJUSTABLE WASHER Ø10 SCREW MOVING WHEEL...
-
Page 14: Exploded View
EXPLODED VIEW... -
Page 15: Warranty
NINETY (90) days from the date of purchase. Any component that is a customer point of assembly will only be replaced; labor is not covered. COMMERCIAL OR RENTAL USE If a Bladez product is used for commercial or rental purposes the warranty is void. THIS WARRANTY DOES NOT COVER · Pre-delivery set-up ·... - Page 16 Countdown Cardiovélo Guide de l'utilisateur PRUDENCE : Un exercice fatigant, comme on le fait ordinairement sur un cardiovélo, ne doit être entrepris sans d’abord consulter un médecin. Aucune prétention à l’égard de la santé n’est énoncée ou sous-entendue à l’égard de l’appareil.
- Page 17 TABLE DES MATIÈRES Sécurité……………………….……….……......1 Contenu de l'emballage de la quincaillerie…………..3 Préassemblage……………………........4 Directives pour assembler………………………………..5 Entretien……………………………........9 Dépannage……..……………………………………………10 Dessin éclaté …………............11 Liste des pièces ……………………........12 Garantie……..…………………………........13...
-
Page 18: Sécurité
IMPORTANT CONSEILS DE SÉCURITÉ MESURES DE PRÉCAUTION Ce cardiovélo a été conçu et construit de manière à offrir une sécurité maximale. Néanmoins, des mesures de précaution doivent être prises lorsqu’on s’en sert pour s’entraîner. Lisez le présent guide en entier avant d’assembler et d’utiliser le cardiovélo. Les mesures de précaution ci-dessous doivent être observées : Tenir les enfants et les animaux éloignés de cet appareil en tout temps. - Page 19 VEUILLEZ CONSERVER CE GUIDE POUR LE CONSULTER PLUS TARD POUR LES RÉPARATIONS GARANTIES, VEUILLEZ NE PAS RAPPORTER VOTRE CARDIOVÉLO À MAGASIN DE DÉTAIL! CONTACTEZ D’ABORD BLADEZ FITNESS BH North America Corporation 20155 Ellipse Foothill Ranch, CA 92610 Téléphone : 949 206-0330 Télécocpieur : 949 206-0013...
-
Page 20: Contenu De L'emballage De La Quincaillerie
6. Veuillez toujours porter des vêtements et des chaussures convenables. Assurez-vous tous les lacets soient lacés comme il faut. POUR LES RÉPARATIONS GARANTIES, VEUILLEZ NE PAS RAPPORTER VOTRE CARDIOVÉLO À MAGASIN DE DÉTAIL! CONTACTEZ D’ABORD BLADEZ FITNESS BH North America Corporation 20155 Ellipse Foothill Ranch, CA 92610 Téléphone : 949 206-0330 Télécocpieur : 949 206-0013... - Page 21 ASSEMBLAGE Si des pièces sont manquantes ou si vous avez besoin de renseignements sur le fonctionnement de ce produit, veuillez téléphoner au 1 949-206-0330...
-
Page 22: Directives Pour Assembler
DIRECTIVES POUR ASSEMBLER ère ÉTAPE Fixez solidement le stabilisateur (2) au châssis principal (2) et fixez-le avec des boulons de carosserie (43), des rondelles (44) et des écrous borgnes à calotte (45). ÉTAPE Fixez solidement le stabilisateur arrière (3) au châssis principal (2) et fixez-le avec des boulons de carosserie (43), des rondelles (44) et des écrous borgnes à... - Page 23 DIRECTIVES POUR ASSEMBLER (suite) ÉTAPE Faites glisser le montant du guidon (6) au châssis principal (1) et serrez le bouton réglable en plastique (54) pour bien fixer. ÉTAPE Fixez le guidon (7) au châssis principal (1) et fixez-le avec des écrous (57), des rondelles (29).
- Page 24 DIRECTIVES POUR ASSEMBLER (suite) ÉTAPE Faites glisser le montant du siège (4) dans le châssis principal (1) et Fixez-le avec le bouton de plastique réglable (54) ÉTAPE Fixez solidement le siège (36) à la barre du siège (5). Faites glisser le montant (4) et serrez solidement le bouton de plastique réglable (54).
- Page 25 DIRECTIVES POUR ASSEMBLER (suite) ÉTAPE Direction de Serrage Direction de Serrage Le défaut d’observer ces directives pourrait endommager soit la manivelle, soit le filetage des pédales. La pédale de droite, marquée de la lettre (R), se visse dans la manivelle de droite, aussi marquée d’un (R), dans le sens des aiguilles d’une montre jusqu’à...
-
Page 26: Entretien
DÉPANNAGE RÉGLAGE DE LA RÉSISTANCE Le réglage de la résistance est contrôlé par le bouton de tension. Le réglage approprié de la selle aide à réduire le risque de blessure et assure Le maximum d'efficacité et de confort pendant les exercices (la position la plus appropriée pour utiliser ce cycle-exerciseur est de placer une pédale vers le bas, tout en fléchissant l'autre jambe au niveau du genou. - Page 27 DIRECTIVES POUR L'ENTRETIEN ET LE NETTOYAGE Nous nous sommes assurés que votre cardiovélo soit correctement réglé et lubrifié à l’usine. Nous recommandons à l’utilisateur de ne pas tenter d’entretenir lui-même les composantes internes et d’obtenir plutôt les services d’un centre de service autorisé. Toutefois, les surfaces externes peuvent parfois paraître ternes ou sales.
- Page 28 VUE ÉCLATÉE...
-
Page 29: Liste Des Pièces
LISTE DES PIÈCES DU N° DESCRIPTION DIM. Nombr e CHÂSSIS PRINC IPAL STABILISATEUR AVANT N° DESCRIPTION DIM. STABILISATEUR ARRIÈRE Nombre MONTANT DU SIÈGE PIÈCE BB MANIVELLE BARRE DU SIÈGE PÉDALES MONTANT AVANT PIEDS RÉGLABLES GUIDON ÉCROUS RÉGLABLES ÉCROUS M12 X 1 BOULONS DE CAROSSERIE M8X40 VIS RÉGLABLE DE LA CHAÎNE... -
Page 30: Garantie
UTILISATION COMMERCIALE OU DE LOCATION La garantie est annulée si un produit Bladez est utilisé à des fins commerciales ou de location. CETTE GARANTIE NE COUVRE PAS ·...
Need help?
Do you have a question about the Countdown and is the answer not in the manual?
Questions and answers