Table of Contents
Advertisement
Quick Links
Quick Start Guide
GV-Camera Reader
Thank you for purchasing GV-Camera Reader. This guide is designed to assist
new users in getting started on the GV-Camera Reader. For detailed information
on how to use the GV-Camera Reader, please refer to GV-Camera Reader User's
Manual on the supplied software DVD.
© 2013 GeoVision Inc. All rights reserved.
GV-CR420
2013/02
English
CR420V101-QG-A
1
Introduction
Welcome to the GV-Camera Reader Quick Start Guide. The quick start
guide covers the basic installations and configurations of GV-Camera
Reader. For the detailed user's manual, see the GV-Camera Reader
User's Manual on the supplied software DVD.
Packing List
● GV-CR420 x 1
● Standard Screw x 2
● Security Screw x 1
● DC 12V Power Adapter x 1
● GV-Camera Reader Quick Start Guide x 1
● Software DVD x 1
● Mounting Plate x 1
● Plastic Screw Anchor x 2
● Torx Wrench x 1
Advertisement
Table of Contents

Subscribe to Our Youtube Channel
Related Manuals for GeoVision GV-CR420


Summary of Contents for GeoVision GV-CR420
- Page 1 GV-Camera Reader. For detailed information on how to use the GV-Camera Reader, please refer to GV-Camera Reader User’s 2013/02 Manual on the supplied software DVD. English © 2013 GeoVision Inc. All rights reserved. CR420V101-QG-A...
- Page 2 Compatible GV-AS Controller Versions Limitations and Optimal Installation for Face Detection ● GV-AS100 / 110 / 120 / ASBox / ASNet: Firmware version 1.05 or Camera Reader Installation Height: later ● Building gate: about 1.4-1.5 meters above the ground. ● GV-AS210: Firmware version 1.1.0 or later ●...
-
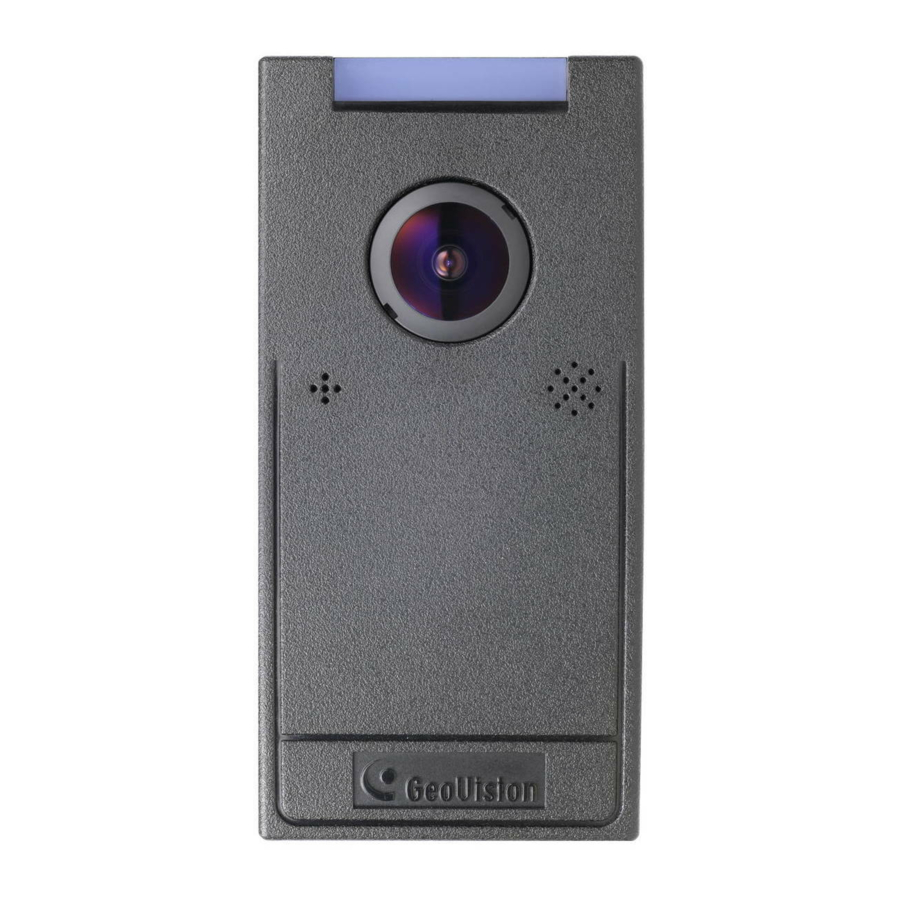
Page 3: Hardware Installation
Overview Hardware Installation Follow the steps below to install the camera reader. Function 1. Place the mounting plate on the wall with the oval-shaped hole toward LED Indicator the top. Lens Microphone Speaker Beeper Network status LED Ready status LED Load Default Ethernet Power Cable... - Page 4 Wiegand 1. Wire GV-CR420 to GV-AS Controller a. Connect a wire to the Wiegand pins of the GV-CR420 and the other end to the Wiegand pins on the controller. b. Connect a wire to the GND pin of the camera reader in addition to the existing black GND wire for power cable, and connect the other end to the GND pin on the controller.
- Page 5 Controller 1. Wire GV-CR420 to GV-AS Controller a. Access the Web interface of the GV-AS Controller. Connect the RS-485 pins of the GV-CR420 to the RS-485 interface on b. In the left menu, click Wiegand Setting. the controller. +12 V...
- Page 6 Readers section and the Web-Based Configurations section in the GV-AS Controller User’s Manual. Network Each GV-CR420 can only be connected to one AS Controller at a time. 1. Enable network connection to AS Controller on GV-CR420 a. Access the Web interface of the GV-CR420. Refer to section 6 in the Quick Start Guide for details.
- Page 7 This section covers how to add GV-AS Controller to GV-ASManager, set up Note: The default values of GV-AS Controller are: IP address an access control schedule, and receive live view from GV-CR420 on 192.168.0.100; username admin; password admin; Crypto key (3DES GV-ASManager.
- Page 8 ● Card and PIN Code Mode: For GV-CR420, a card needs to be Setting Up Access Control Schedule presented and a face needs to be detected before access is 1. Click the Door/Gate tab in the Controller Setup dialog box.
-
Page 9: Establishing Network Connection
Establishing Network Connection 4. Expand the Host folder listed in the DVR List, select a camera reader Once installed, your GV-Camera Reader is accessible on a network. Make and click OK. sure your PC has good network connection, and meet this system requirement: 5. -
Page 10: The Web Interface
6. To allow updating of images in Microsoft Internet Explorer, you must set your browser to allow ActiveX Controls and perform a one-time installation of GeoVision’s ActiveX component onto your computer. IMPORTANT: ● If Dynamic IP Address or PPPoE is enabled, you need to know which IP address the camera reader will get from the DHCP server or ISP to log in. -
Page 11: Upgrading System Firmware
Upgrading System Firmware Restoring to Factory Default Settings GeoVision periodically releases updated firmware on the website. Follow You can restore the camera reader to factory default settings using the the steps below to load the new firmware into the camera reader. - Page 12 Load default 3. Wait until the ready LED blinks twice to release the Load default button. The process takes about 35 seconds. Ready LED 9F, No. 246, Sec. 1, Neihu Rd., Neihu District, Taipei, Taiwan Tel: +886-2-8797-8376 Fax: +886-2-8797-8335 support@geovision.com.tw http://www.geovision.com.tw...
Need help?
Do you have a question about the GV-CR420 and is the answer not in the manual?
Questions and answers