
Related Manuals for Horizon Hobby E-flite P-51D Mustang 1.5m


Summary of Contents for Horizon Hobby E-flite P-51D Mustang 1.5m
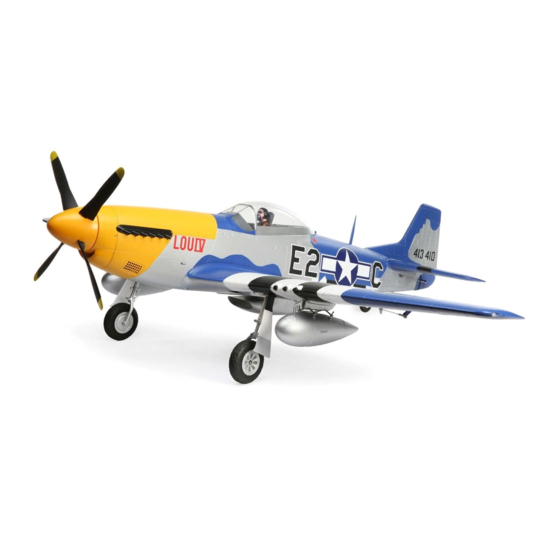
- Page 1 P-51D Mustang 1.5m Instruction Manual Bedienungsanleitung Manuel d’utilisation Manuale di Istruzioni ® SAFE Select Technology, Optional Flight Envelope Protection...
- Page 2 NOTICE All instructions, warranties and other collateral documents are subject to change at the sole discretion of Horizon Hobby, LLC. For up-to-date product literature, visit www.horizonhobby.com or towerhobbies.com and click on the support or resources tab for this product. MEANING OF SPECIAL LANGUAGE:...
-
Page 3: Table Of Contents
Box Contents Quick Start Information 1. Blank (Acro) Model 2. Wing Type: 1 Aileron, 1 Flap Transmitter Setup 3. Servo Reversing: Set all to normal 4. Travel Adjust (All Surfaces): 100% High Rate Low Rate = 15mm = 12mm Aileron = 15mm = 12mm Dual Rates*... -
Page 4: Prefl Ight
Prefl ight Remove and inspect contents. 10 Test the retract operation. Read this instruction manual thoroughly. 11 Test the fl ap operation. Charge the fl ight battery. 12 Perform the Control Direction Test with the transmitter. Setup Transmitter using transmitter setup chart. 13 Perform the AS3X Control Direction Test with the aircraft. -
Page 5: Model Assembly
Model Assembly Horizontal Tail Installation 1. Slide the horizontal tail into the tail opening in the rear of the fuselage. Ensure the control horn faces down. 2. Center the horizontal tail and then secure into place using the 3 included (3x40mm) screws (A). - Page 6 Model Assembly Continued Wing Installation 1. Align the hands-free servo connector and press the wing into the wing saddle. 2. Secure the wing into position using the included 4 screws (3x40mm) (A). 3. Align the wing tip with the main wing and press them together until they click.
- Page 7 Model Assembly Continued Radio Antenna Installation 1. Use medium CA to glue the Radio Antenna (A) in the slot in the top of the fuselage halfway between the canopy and the tail. Propeller Installation WARNING: Do not install the propeller until all system setups are complete.
-
Page 8: Optional Drop Tank Installation
Optional Drop Tank Installation Drop Tank Slide the optional drop tanks (A) into the rails (B) on the bottom of the left and right outer wing panels. TIP: The drop tanks are labeled (L) for left and (R) for right. Check the Center of Gravity with the drop tanks installed. -
Page 9: Battery Installation And Esc Arming
Battery Installation and ESC Arming Battery Selection We recommend the 5000mAh 22.2V 6S 30C Li-Po battery (SPMX50006S30). Refer to the Optional Parts List for other recommended batteries. If using a battery other than those listed, the battery should be within the range of capacity, dimensions and weight of the Spektrum Smart Li-Po battery packs to fi t in the fuselage. -
Page 10: Control Surface Centering And Adjusting A Ball Link
Control Surface Centering and Adjusting a Ball Link IMPORTANT: Perform the Control Direction Test before performing control surface centering. While SAFE is inactive (before advancing the throttle), mechanically center the control surfaces. IMPORTANT: Correct operation of the SAFE system requires sub-trim and trim at 0. -
Page 11: Binding
Binding General Binding Tips • The included receiver has been specifi cally programmed • Once bound, the receiver will retain its bind settings for operation of this aircraft. Refer to the receiver manual for that transmitter until you re-bind. for correct setup if the receiver is replaced. •... -
Page 12: Select Switch Designation
® SAFE Select Switch Designation Once SAFE Select is enabled, you can choose to fl y in SAFE mode full-time, or Assigning a Switch assign a switch. Any switch on any channel between 5 and 9 can be used on 1. -
Page 13: Control Direction Test
Control Direction Test Switch on the transmitter and connect the battery. Use the transmitter to Transmitter Control Surface operate the aileron, elevator and rudder controls. View the aircraft from the rear command Response when checking the control directions. Elevators 1. Pull the elevator stick back. The elevators should move up, which will cause the aircraft to pitch up. -
Page 14: As3X Control Direction Test
AS3X Control Direction Test ® This test ensures that the AS3X control system is functioning properly. Aircraft AS3X Reaction Assemble the aircraft and bind your transmitter to the receiver before movement performing this test. 1. Raise the throttle just above 25%, then lower the throttle to activate AS3X. CAUTION: Keep all body parts, hair and loose clothing away from a moving propeller, as these items could become entangled. -
Page 15: Flying Tips And Repairs
Flying Tips and Repairs Consult local laws and ordinances before choosing a fl ying location. Once on the ground, avoid sharp turns until the plane has slowed enough to prevent scraping the wingtips. Range Check your Radio System WARNING: Always decrease throttle at propeller strike. Before you fl y, range check the radio system. -
Page 16: Post Flight
Post Flight Disconnect the fl ight battery from the ESC (Required for Safety and Repair or replace all damaged parts. battery life). Store the fl ight battery apart from the aircraft and monitor the battery Power OFF the transmitter. charge. Remove the fl ight battery from the aircraft. -
Page 17: Troubleshooting Guide
Troubleshooting Guide Problem Possible Cause Solution Throttle not at idle and/or throttle trim too high Reset controls with throttle stick and throttle trim at lowest setting Aircraft will not Throttle servo travel is lower than 100% Make sure throttle servo travel is 100% or greater respond to throttle but responds to Throttle channel is reversed... -
Page 18: Replacement Parts
Replacement Parts Recommended Parts Part # Description Part # Description EFL01251 Canopy/Hatch: P-51D 1.5m SPMR8000 DX8 Transmitter Only MD2 EFL01252 Fuselage Hatch Pin: P-51D 1.5m SPMR9910 DX9 Black Transmitter Only MD2 EFL01253 Fuselage: P-51D 1.5m SPMX50006S30 5000mAh 6S 22.2V Smart 30C; IC5 EFL01254 Horizontal Tail: P-51D 1.5m SPMXC1010... -
Page 19: Ama National Model Aircraft Safety Code
AMA National Model Aircraft Safety Code Effective January 1, 2014 A. GENERAL B. RADIO CONTROL A model aircraft is a non-human-carrying aircraft capable of sustained fl ight 1. All pilots shall avoid fl ying directly over unprotected people, vessels, in the atmosphere. It may not exceed limitations of this code and is intended vehicles or structures and shall avoid endangerment of life and property exclusively for sport, recreation, education and/or competition. -
Page 20: Limited Warranty
Limited Warranty What this Warranty Covers – Horizon Hobby, LLC, (Horizon) warrants to the original the event that you may need any assistance. For questions or assistance, please visit purchaser that the product purchased (the “Product”) will be free from defects in our website at www.horizonhobby.com, submit a Product Support Inquiry, or call the... -
Page 21: Fcc Information
EFL P-51D PNP (EFL01275) EFL P-51D BNF Basic (EFL01250) Horizon Hobby, LLC hereby declares that this product is in compliance with the Horizon Hobby, LLC hereby declares that this product is in compliance with essential requirements and other relevant provisions of the EMC Directive. - Page 22 E-fl ite, Plug-N-Play, Bind-N-Fly, BNF, the BNF logo, DSM, DSM2, DSMX, Spektrum AirWare, EC5, IC5, AS3X, SAFE, the SAFE logo, ModelMatch, and the Horizon Hobby logo are trademarks or registered trademarks of Horizon Hobby, LLC. The Spektrum trademark is used with permission of Bachmann Industries, Inc.
Need help?
Do you have a question about the E-flite P-51D Mustang 1.5m and is the answer not in the manual?
Questions and answers