Table of Contents
Advertisement
Quick Links
Advertisement
Table of Contents

Subscribe to Our Youtube Channel
Related Manuals for Xoro HRS 8670 LAN


Summary of Contents for Xoro HRS 8670 LAN
- Page 1 HRS 8670 LAN HD DVB S2 Receiver HRS 2670 LAN DVB S2 Receiver...
- Page 2 Current device software and manuals can be found in the download area on www.xoro.de...
-
Page 4: Table Of Contents
Table of Contents (DE) Safety instructions Customer service and environment Scope of delivery/connections and controls Remote control Connection to the TV Connection to the network Connection to the satellite reception system Connection to the Hi-Fi system Connecting USB devices Installation Antenna and search run Sendersuche Daily operation... - Page 5 *This manual describes how to operate multiple device models. Functions that are not available on all models are marked with the words "Only certain model le". See the device specifications at the end of the guide for an overview of the features available per model .
- Page 6 • The power cable is sheathed and insulates the current. Please do not place any objects on the cable as this could cause the protection function to be lost. Avoid heavy loads on the cable, especially on sockets and connectors. •...
-
Page 7: Customer Service And Environment
• Use original spare parts. Incorrect spare parts can lead to short circuits + fire or other malfunctions. Contact XORO Customer Service: By phone:04161 - 800 24 24 (Mon-Fri, 11am to 5pm) For eMail:support@ersservice.de ERS GmbH Electronic Repair Service Weidegrund 3/Halle1... -
Page 8: Scope Of Delivery/Connections And Controls
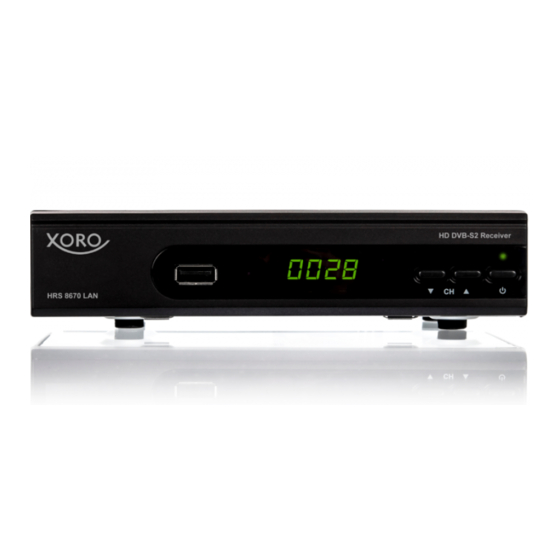
This device meets the relevant requirements and relevant regulations of the EUEcodesignGuidelines. Scope of delivery/connections scope of delivery Please make sure that the following parts are included in the packaging: • XORO Satellite Receiver • remote control • Batteries Notes: •... - Page 9 Connections and controls - front Front USB port(see page 12) Receiver for remote control signals LED Display: Shows status, transmitter number or time Switch to the previous transmitter (A) Switch to the next transmitter (A) Switch on/off (standby, corresponds to the POWERbutton on the remote control) Operating LED (green: switched on,red: Standby/Standby) of 9...
- Page 10 Connections/Remote Control Connections and controls - back Antenna input (F-female) Top: Network port (RJ45 jack), Bottom:USB port back (see page 12) C) Digital audio output (S/PDIF coaxial) HDMI output SCART output power cord remote control Insert the batteries (1.5V size AAA) into the compartmentent •...
- Page 11 remote control Tastenbeschreibung POWER (Device on/turnoff) Mute (pause sound) GOTO (Jump to a certain playback time, turn SAT-IP server on/off) RPT/REPEAT ( Change playback mode when playing ) SUB-T ( Call subtitles ) AUDIO (Change audio tracks) (Image search backward/forward) I (Previous/next file) ( Start/resumeplayback ) || ( Pause playback /Timeshift*)
-
Page 12: Connection To The Tv
connect Connection to the TV Connections: • Make sure that all devices are turned off and disconnected from the power supply. • Read the operating instructions for the TV and other accessories and follow the safety instructions. • Finally, connect the power cord to an easily accessible power outlet. -
Page 13: Connection To The Network
Connection to the network (LAN/Ethernet) Use a high- Quality Network cable, to connect the receiver to your Internet router of 13... -
Page 14: Connection To The Hi-Fi System
connect Connection to the satellite reception system Connect the cable of your satellite reception system to the antenna input LNB IN of the receiver. Notes: • Screw the so-called F-plug hand-fixed with the LNB IN input. • Make sure that no short circuits are on the Fplug. •... -
Page 15: Connecting Usbdevices
XORO HWL 155N USB Wi-Fi Stick Notes: • The USB Wi-Fi stick XORO HWL 155N is not included in the scope of delivery of the receiver and must be purchased separately. Read on page 30 how to set up the receiver to use a Wi-Ficonnection. -
Page 16: Installation
33 (recording device) and page 22 (media player). Installation In the case of First commissioning of the receiver Appears on the TV-screen the XORO Installations menü*. this menu comprises following options: OSD language Land Sendersuche Pre-prog. Load list You can use the arrow keys to switch between the four menu items. If the menu item is colored, you can customize it with the keys . - Page 17 "Antenna and Search" will appear on the screen. * If the device does not display the menu "XORO Installation" after the first power on, please read on page 30 how to return the device to the delivery state. of 17...
- Page 18 Initial Antenna and search - preparation Preparation: In order to successfully perform a channel search, you need to know some information about your receiving system: • Which satellite is their antenna aimed at? UK Freesat is at 28.2east • If you have multiple antennas or an antenna with several LNB you need to know what kind of switcher (Toneburst DiSEqC)you are using...
- Page 19 Initial DiSEqC 1.0/11 Motor: Antenna and search - procedure On the left side of the on-screen menu, you can see a list of satellites for which the receiver pre-orders lists On the right, you can see the settings for satellite , which you are working on the left side of the Have chosen.
- Page 20 Initial • With the Taste GOTO you display the transponders stored for the selected satellite. RED button allows you to add new transponders. The OK button is used to select transponders for a search. Antenna and search - explanation of the parameters LNB Type Select...
-
Page 21: Sendersuche
Initial DiSEqC DiSEqC switches have two to 16 inputs, allowing multiple antennas or LNBs to be connected to the receiver. If you have such a switch, you must choose to which of the connections the satellite selected on the left is connected. Please refer to the manual of your switch, which version (1.0, 1.1) is supported. - Page 22 Initial The Receiver cannot decrypt pay-TV channels. Select "FTA only." You get a shorter list of channels and save time sorting the channels. Sendertyp: • All: The search saves TV and radio stations • TV.: The search only SAVES TV stations •...
-
Page 23: Daily Operation
Important buttons and their functions Daily operation TV List You can change the transmitter by using the CH/CH) buttons. You can also enter the transmitter number directly using the 0- 9 buttons. Channel Go to the channel list by pressing the OK button. Select the transmitter Calling the selected transmitter... - Page 24 Important buttons and their functions Sound Audio soundtrack/language choose Some TV stations broadcast multiple audio tracks. Use the AUDIO button to show the menu for changing the audio track. the keys to select the desired language or audio format. Confirm your selection with OK.
- Page 25 Important buttons and their functions Aspect Ratio (ASPECT) During television you have the option to change the aspect ratio without accessing the menu. To do this, press the ASPECT (GELB) button, the aspect ratio changes with each push of a button (see also page 27).
-
Page 26: Epg (Electronic Program Guide)
Important buttons and their functions daily service Electronic program guide EPG button, the electronic program- Press the guide is displayed. Hours for selected shipment pro- grammieren Displays the timer list Select shipment ▲/▼ Switching transmitters ◄/► EXIT Hide EPG Timerprogrammierung If you select the EPGdisplay to OK Button after Off- select a shipment,... - Page 27 Important buttons and their functions *only certain models of 27...
-
Page 28: Recorder
Note:The receiver has only one receiver part (tuner). Therefore, it is not possible to switch other transmitters at will during recording. If you want to switch during recording, you need a XORO receiver with TWIN tuner(two receivers)and a correspondingly upgraded receiver. Timeshift (Time-shifted TV) If you want to use the Timeshift feature, first connect a USB memory to the USB port, and then press the || button. -
Page 29: Usb Media Player
MENU button. Press the "USB and Apps" menu as many times as you press the "USB and Apps" menu. Press the button until the "XORO Media Player" option highlighted. the OK button to confirm the selection. Note: The media player can also be called during television by pressing the same buttons . - Page 30 Jump to a specific playback position (not when playing picture) RPT/REPEAT i/INFO Display file information (not when playing music) XORO Media Player playback - photograph Enlarge or. reduce the size of the Image GREEN rotation of the image by 90° against...
- Page 31 Video: Various codecs are supported. They must/ should have been created according to the recognized standards. For MPEG-2 ISO/IEC 13818 applies, for MPEG-4 ISO/IEC-14496 applies. Otherwise, there may be errors in the display. XORO Media Player Video Codec resolution profile...
-
Page 32: Settings
settings main menu The main menu of the receiver can be called via the MENU button. The submenus are: transmitte • video display • • AV Settings • time • Preferences System • USB and apps • transmitte Note: The default PIN is 000000. If you have changed the PIN and forgotten it, enter the master PIN 888888 . - Page 33 settings transmitter lock The receiver asks for the PIN before a locked transmitter can be viewed. • the buttons to select a transmitter/ channel that you want to lock. • Press the YELLOW button, the transmitter is marked for locking. •...
- Page 34 settings • With the GOTO button you can list channels of all or a specific satellite. • The changes to the channel list are saved when you leave the "EditSender List" menu with the EXIT button. transmitter sort This option allows you to send the TV List according to the specifications (encryption, frequency, etc.) within the list .
-
Page 35: Sendersuche
settings Signal type (SCART) Use this option to determine which type of signal is available on the SCART jack. RGB offers the best image quality. Also note the manual of your TV. video display Information This setting determines long information display (transmittername/-number, etc.) displayed after the transmitter change. - Page 36 settings time zone You can set the time zone here, if "Time Setting" has been set to "Manual ". For Germany it is MGZ +1, during daylight saving time it is MGZ+2. Auto-Standby Saving energy according to an EU directive (EuP). The receiver switches oft after the selected time if no user activity is detected.
- Page 37 This option allows you to view information about software and hardware. Updating software If necessary, current firmware is provided on www.xoro.de along with an update guide. Please not install firmware that you have downloaded from other websites. Network The Receiver can connect to one Network (LAN) or wireless (WLAN) with their network- Router connected become.
- Page 38 settings In the "ConnectionType" line, select how the receiver will be connected to the network IPsettings (Only available for connection type "LAN" ) Normally, the receiver gets all necessary IP settings from your router. Most customers do not need and should not make any settings.
-
Page 39: Sat-Ip
(for smartphone, PC or tablet PC) that are compatible with the SAT>IP protocol can then detectt he receiver. Follow the instructions for your SAT>IP compatible device/app to connect to the receiver. Example: Network Tablet or XORO ‐Receiver Router Network WLAN smartphone with SAT>IP‐App Please also note the following information about the SAT-IPfunction of the receiver: •... - Page 40 • XORO does not provide SAT>IP apps. Please note that XORO Customer Service cannot assist in installing and operating third-party apps. Please contact the Provider of the SAT>IP app if you have any problems. • Transmitters with high bit rates (4K transmitters, etc.) the receiver cannot stream over SAT- IP .
-
Page 41: Usb And Apps
USB and apps aspect ratio Determines how image files are displayed. • Retain (Images are displayed undistorted ) • Discard (images are adapted to the screen, but there may be distortions) type size Determines the font size of subtitles in the media player. background Determines the background on which subtitles are displayed in the media player . - Page 42 Internet and networkapps are pre-installed the receiver. It is not possible to install more apps. New apps may be available as part of a firmware update . Visit www.xoro.de/downloads to learn about Firmware updates. Weather/RSS-Reader When using the apps, observe the displays and operating instructions on the TV screen.
- Page 43 USB and apps settings DMR (Renderer) The "Digital Media Renderer" reproduces multimedia files from a DLNA-compatible device (PC software, smartphone, tablet PC, etc.) transferred to the receiver The files are selected on the play device and transferred to the receiver via functions such as "W i.e."...
-
Page 44: Troubleshooting
Note page 29 for digital audio output Settings S/PDIF and HDMI Audio. HDchannels • The HRS 8670 LAN has not been developed for the reception of HD channels. Please switch to the SD version of the transmitter. Incorrect language: • Press the AUDIO button to select from available audio tracks. - Page 45 USB and apps USBdevice is not • Please refer to the instructions on page 12, USB port detected Device shows the • Please refer to the notes on page 28, time zone setting wrong time The receiver goes • See page 28, setting EuP Auto-Stand By out after 3 hours Image is too small •...
-
Page 46: Specifications /Models And Functions
< 90% ( non-condensing) * Depending on the power requirement of the connected USBdevices and antenna system up to 20W. Error and technical changes reserved. Models and functions HRS 2670 LAN HRS 8670 LAN Designed for HD TV of 46... -
Page 47: Warranty Conditions
For a proper and smooth handling of warranty cases/ repairs you need an RMA number. You can find them on the Internet at http://www.xoro.de/service/ or by phone (seebelow.) Please send the device in its original packaging, including all accessories with a copy of the... - Page 48 04161 800 24 24 (Mon - Fri 11:00 am - 17:00) Fax: 04161 800 24 61 MAS Electronics AG Weidegrund 3 21614 Buxtehude Germany Phone:04161 800 24 24 (Mon-Fri 11:00 a.m. - 5:00 p.m.) Fax: 04161 800 24 61 www.xoro.de FROM: of 48...
Need help?
Do you have a question about the HRS 8670 LAN and is the answer not in the manual?
Questions and answers