
Related Manuals for Xoro HRS 8664


Summary of Contents for Xoro HRS 8664
- Page 1 HD DVB-S2 Receiver HRS 8664 HRS 8660 HRS 8659 HRS 8658 HRS 8566v2 HRS 8556v2 SD DVB-S2 Receiver HRS 2610 User Manual...
-
Page 3: Table Of Contents
Table of Content (ENG) Safety information Content of the service Notes Recycling Information Accessories Control Elements Front Panel Rear Panel Remote Control Insert battery and operation Buttons Connection Connecting to the TV Connection to satellite dish Connection to a Hi-Fi system Connecting to USB storage Initial Installation Initial Installation... - Page 4 Table of Content Recorder Recording Record programming Recording List Rename recorded files Delete recorded files USB Media Player Supported file formats Supported Media Photos Music Movie Supported Formats Settings Main Menu Program Picture Channel Search Time Option System USB and Apps Troubleshooting Specifications Warranty...
-
Page 5: Safety Information
All operating and use instructions should be followed. Satellite dish XORO DVB Receiver is designed for the connection to a regular satellite dish. Please have the satellite dish installed by a technician to insure a perfect function and avoid damage. - Page 6 Declaration of conformity Hereby, MAS Elektronik AG declares that the following radio equipment types are in compliance with Directive 2014/53/EU: XORO HRS 8664 XORO HRS 8660 XORO HRS 8660/01 XORO HRS 8659...
- Page 7 SAFETY INFORMATION Position Do not connect accessories on the player which are not defined by the manufacture. Do not place this product on an unstable cart, stand, tripod, brack- et, or table. The product may fall, causing serious injury to a child or adult, and serious damage to the product.
-
Page 8: Content Of The Service
Nicotine can damage the electronic components. In case of service regarding too much nico- tine, than the warranty/guarantee expired. Contact of the XORO customer service Phone: +49 41 61 800 24 24 (Mo-Fr, 11.00am - 5.00pm, German/English) E-Mail:support@ersservice.de... -
Page 9: Recycling Information
Recycling & Environment Disposal of electrical and electronic products (waste equipment) This crossed-out dustbin on the product, the accompanying materials and/or on the packaging means that electrical and electronic equipment must not be disposed of in general household waste. Consumers are required by law to dispose of such equip- ment separately from general household waste. -
Page 10: Notes
Notes Accessoires Please make sure that the following accessories are included: XORO DVB-S2 Receiver Remote Control User Manual Notes: Please employ only the original accessories. Shall any item be damaged or missing, please contact directly the shop where you bought this product. -
Page 11: Control Elements
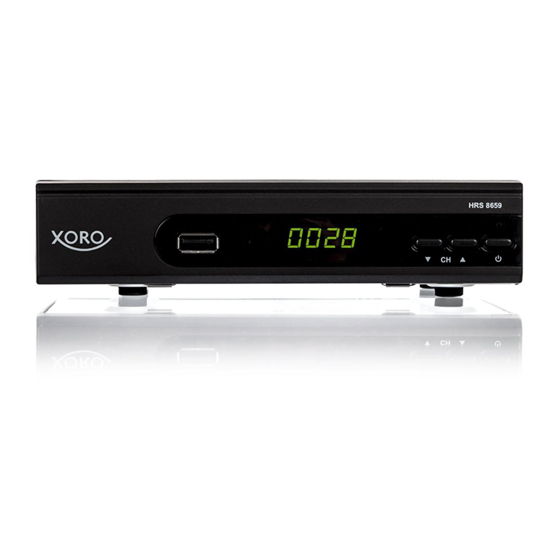
CONTROL ELEMENTS Front Panel USB 2.0 port IR receiver LED Display: Shows the program number, clock or status information CH- key: switch to previous channel CH+ key: switch to next channel Power button LED indicator (Green: Power On, Red: Standby) Rear Panel Aerial Input (LNB IN) Network Connector (RJ45) -
Page 12: Remote Control
Remote Control Insert batteries and operationradius Insert the battery into the receptacle of the remote. For the best results, aim the remote towards at the player. Stay within 5 meter and angles of 60 degrees or less. Remove battery during storage or when you are not using the device for a long time. -
Page 13: Buttons
Remote Control Buttons Buttons of the remote control Power (on/off) SUB-TITLE (subtitle) AUDIO (change sound track) MUTE (sound on/off) GOTO (start play back from a certain point defined by time) PAGE (page up/down) TTX (videotext) REPEAT (Repeat) MENU (to access main menu) CH+/CH-(change channel, select menu up/down) EXIT (quit menu, to the higher menu) VOL+/VOL-(change volume, select menu right/left) -
Page 14: Connection
Connection Connecting to the TV General information Assure that the device is switched off and unplugged. Read the manual of your TV and at- tend to the safety instructions. Connect the power cable at last with a electronic socket. The DVB-S2 receiver could be connected either through HDMI or SCART to TV. Please connect the receiver through HDMI if possible. -
Page 15: Connection To Satellite Dish
Connection Connection to satellite dish Connect the cable of your satellite dish to the Antenna input LNB IN of the Receiver. Notes: Screw the so-called F plug together with the LNB IN. Please make sure to avoid short circuit at the F plug. ... -
Page 16: Initial Installation
Initial Installation Initial Installation The XORO installation menu will be displayed by initial operation of the DVB Receiver. This menu contains four options: OSD Language Country Channel search Load the pre-inst. Navigate with the arrow keys CH+ and CH– to high light the option and make the selection with the VOL–... -
Page 17: Dish Setup-Preparation
Initial Installation Dish Setup-preparation Preparation: You will have to be informed of following points to make a successful channel scanning. Towards which satellite does your antenna ori- ent? If you have more than one antenna or one anten- na with more than one LNB, you will have to know which type of switch (Toneburst or DIS- EqC) is employed and to which port is each An-... -
Page 18: Dish Setup-Procedure
Initial Installation Dish Setup-Procedure On the left side of the screen there is a list of satellites for which the DVB Receiver is pre pro- grammed. Settings of the chosen satellite is displayed on the right side. Process: Select the first satellite to be set up with CH+/CH ... -
Page 19: Dish Setup-Explanation Of The Parameters
Initial Installation Dish Setup-explanation of the parameters LNB Typ: define the oscillator frequency for your LNB . Please take the correct value from the manual of your LNB (standard:09750/10600) If you have a Unicalbe/SCR EN50494, select LNB type Unicable (A or B, A is generally the correct choice by a Unicable system for satellite reception). -
Page 20: Channel Search
FTA (free): The channel scan saves only free programs. The XORO DVB Receiver can not decrypt Pay-TV programs. Please select “FTA” (free programs), so that you will get a shorter program list and save some time in sorting the pro- grams. -
Page 21: Daily Use
Daily Use Important keys and their functions Switch Channel To switch program please press the CH+/CH- buttons or input the number of the wished program with the numerical buttons 0-9 on the remote control. Channel List Access the Channel List by pressing OK ▲/▼... -
Page 22: Audio Settings Of Tv Programs
Daily Use Important keys and their functions Audio settings of TV programs Access the audio settings by pressing AUDIO. Select a language and a audio track with ▲/▼. To confirm, press Press EXIT to exit this menu. Teletext The teletext is activated via the TTX button. You may use the numerical buttons 0-9 on the remote control for a direct entry of the wished page. -
Page 23: Epg
Daily Use Important keys and their functions Press the EPG button to display the program guide. the marked program will be taken over in the Timer programming INFO display the Timer list ▲/▼ select a TV program ◄/► switch program EXIT quit EPG Timer Programming on EPG... -
Page 24: Recorder
Recorder* Immediate recording and Timer programming, Recording list Recording* If you want to record the current TV program simply and quickly, first connect a USB memory to the USB port and then press the ● button. Press the ● button once more to define the concluding time of the recording. -
Page 25: Usb Media Player
USB Media Player USB Media Player The USB media player plays back movie, photos, and music files. There are two ways of accessing the media player. Open the main menu with the MENU button. Press ◄/► repeatedly until USB menu is shown on the screen. -
Page 26: Photos
USB Media Player Photos After initializing the USB media the directory structure is shown. Choose the directory with ▲/▼ and enter with OK. If there are pictures in this directory, they are listed in the file browser and the preview of the first pic- ture is shown on the right. -
Page 27: Music
USB Media Player Music After initialising the USB media the directory struc- ture is shown. Choose the directory with ▲/▼ and enter with OK. If there are music files in this directory, they are listed in the file browser. OK / PLAY Playback a music file STOP Stop the playback... - Page 28 USB Media Player Movies After initializing the USB media, the directory structure is shown. Choose the directory with ▲/▼ and enter with OK. ▲/▼ Next/Previous folder/file Playback a file / Open a directory Full screen display to a higher directory EXIT back to multimedia menu If you have selected a movie and started the playback with OK, the movie is shown in the preview...
-
Page 29: Supported Formats
USB Media Player Supported Formats Extension Container Video Maximal Reso- Audio Profile Codec lution Codec MPG, MPEG MPG, Mpeg 1,2 1920x 1080/30P MP2,MP3 Main MPEG MPEG2-TS, MPEG2, 1920x 1080/30P MP2,MP3 Main H264-TS H.264 AVI, MP4 MPEG4, 1920x1080/30P H264: Main Profile Xvid 1.00, and High Profile Xvid 1.01,... -
Page 30: Settings
Settings Main Menu Press MENU for the main menu. The submenu are: Program Picture Channel Search Time Option System USB and Apps Program Notes: The standard password is 000000. Program Edit You can sort, edit, delete, rename the program and build favourite groups here. - Page 31 Settings Program Lock channels The receiver will ask for the password before display a locked program. Select a program with ▲/▼ to be locked. Press the YELLOW button. The chosen channel is highlighted with a lock symbol. Press the YELLOW button again to unlock the channel.
-
Page 32: Picture
Settings Program Sort Channels This option sorts the channels on the channel list according to criteria as encryption, Frequency, etc. Picture The previous sort is replaced. Aspect Ratio This setting define the picture format of your TV and how the content with different Aspect Ratio be adapted for your TV. -
Page 33: Channel Search
Settings Channel Search Dish Setup See page 17 Save/load channel list With this option you can save the channel list on a USB (export) or load the channel list from the USB storage (import). Import: The receiver lists all available data. Choose the file to be installed and confirm with OK. - Page 34 Settings Option OSD / Subtitle Language Define the OSD / subtitle language. Note: Many broadcasts do not contain subtitle infor- mation. Audio Language Define the language to be spoken. Digital Audio You can define here the format of audio signals at SPDIF (COAX) and /or HDMI output. PCM: Digital audio output (HDMI and SPDIF COAX) RAW:...
-
Page 35: System
If an update is necessary, the update software and the update instruction are to be found on www.xoro.de. Please install only the suitable XORO firmware. Installation of a false firmware may make the receiver unusable and void your claim on warranty. -
Page 36: Usb And Apps
Settings USB and Apps USB Media Player Opens the multimedia Player (see page 25). Photo Configure Configure the playback and Slideshow of picture files Slide Time Define the duration for every picture in the slide mode. Aspect Ratio Keep (display without distortion) ... -
Page 37: Troubleshooting
Troubleshooting Troubleshooting Symptom Correction No DVB-S reception / No DVB-S reception in your region. serious distortion by Realign the dish. Please pay attention to the direction of the mosaics or artefacts/ satellite. freeze pictures Please use a bigger dish. ... -
Page 38: Specifications
Specifications Specifications General Voltage ~ 220 - 240V 50/60Hz Consumption < 6W* (average) / < 0.5W (Standby) Size 168 x 40 x 118 mm Receiver Frequency 950 - 2150 MHz Impedance 75 Ohm Video Decoder Standards MPEG4 AVC/H.264 HP@L4/MPEG 2 MP@HL Aspect Ratio 4:3 / 16:9 Resolution... -
Page 39: Warranty
RMA No. You may obtain a RMA on the inter- the customer is responsible to backup his data net at www.xoro.de or by telephone. before sending the device. MAS Elektronik AG is not liable for any data loss on returned devic- Please send the device in its original packing es. - Page 40 XORO by MAS Elektronik AG Weidegrund 3 21614 Buxtehude Germany www.xoro.de ENG:...
Need help?
Do you have a question about the HRS 8664 and is the answer not in the manual?
Questions and answers