Table of Contents
Advertisement
Advertisement
Table of Contents

Related Manuals for Baumatic B725SS


Summary of Contents for Baumatic B725SS
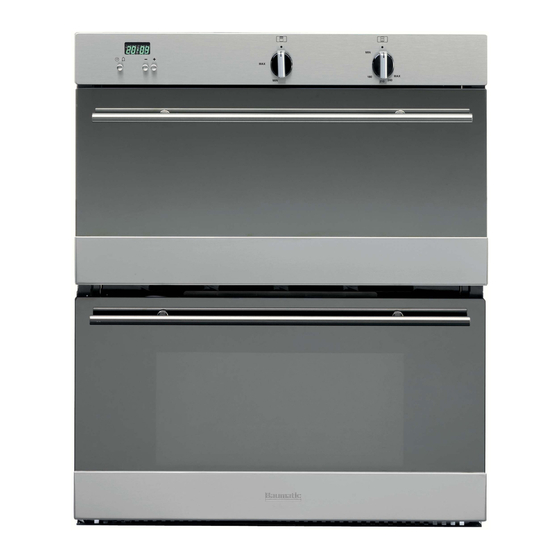
- Page 1 B725SS/B726SS 60 cm Built-under twin cavity gas oven...
-
Page 2: Gas Ovens
GAS OVENS GAS OVEN AND GRILL USER AND INSTALLATION INSTRUCTIONS B725SS/B726SS DD 27/09/07... -
Page 3: Serial Number
For future reference please record the following information which be found on the Rating Plate and the date of purchase which can be found in the invoice: Model Number ……………………. Serial Number……………………. Date of Purchase……………………. -
Page 4: Table Of Contents
CONTENTS General Information Warning and Safety Instructions Instructions for Use Instructions for Installation Cooking Guide Electrical Requirements Gas Requirements Gas Connection Electrical Connection Maintenance Technical Data Condition of Guarantee pages 3-4 pages 5-6 pages 7-12 pages 13-16 pages 17-18 page 19 page 20 pages 20-22 page 23... -
Page 5: General Information
Baumatic Ltd will not take any responsibility if installing the appliance adjacent to cabinet materials closer than 4mm or in contravention of the guidance set out in the Installation Instructions. - Page 6 Your new appliance is guaranteed against electrical or mechanical defects subject to certain exclusions noted in Baumatic Ltd Conditions of Guarantee. The foregoing does not affect your statutory rights. The Warranty applies to Great Britain and Northern Ireland only. In the event that you require any After Sales Service or advice, please contact the Baumatic Service Department on telephone number –...
- Page 7 IMPORTANT NOTE – WARNING and SAFETY INSTRUCTIONS This appliance complies with all current European safety legislation, however Baumatic do wish to emphasise that compliance does not remove the fact that the appliance surfaces will become hot during use and retain heat after operation.
- Page 8 For gas installations, the Installer must be Corgi registered (all Baumatic Engineers are Corgi registered) and for electrical installation, NICEIC registration is recommended. Baumatic Ltd declines any responsibility for injury or damage to persons or property as a result of improper use or installation of this appliance.
-
Page 9: Using The Oven
INSTRUCTIONS FOR USE These User Instructions should be retained for future reference and for use by a person who is unfamiliar with the appliance. Caution: When you are cooking, keep children away from the vicinity of the oven. The following models are covered by these instructions: - B 725 USING THE OVEN The oven temperature is controlled by the thermostat switches... -
Page 10: Helpful Hints
WARNING If the cooling fan fails to start or operate during cooking, turn the Thermostat Selector back to the OFF position and call the Service. Do not use the appliance without the cooling fan in operation. During cooking ensure that grids or drip trays don’t be site over the burner. - Page 11 USING THE GRILL To ignite the Grill Burner (GRILL MODE) Caution: Accessible parts may be hot when the grill is used, young children should be kept away. 1. The door must be in the fully open position. The solenoid is active.
-
Page 12: Cooking Guidelines
If the flame should go out, the automatic ignition will operate to attempt to relight the gas. In the event that the burner doesn’t light the supply of gas will be turned off to the burner after a short period of time. Check that the control knob is in the off position when you have finished grilling, The grill switches off after few minutes. -
Page 13: Electronic Clock
ELECTRONIC CLOCK The electronic clock has more than one function: Displaying the time of the day; Switching off the oven with the timer. Setting the time of the day Press button A. Set the right time using button B or button C. The function is activated seven seconds after your last action. -
Page 14: Cleaning The Appliance
CLEANING THE APPLIANCE Disconnect the oven from the electric net before operating on the oven. Always allow the appliance to cool down to avoid a burn injury. Do not use caustic or abrasive agents, coarse wire wool or hard tools as these can damage the surface finish. -
Page 15: Installation Premises
INSTALLATION PREMISES For correct operation of the appliance, sufficient natural ventilation must be provided in the room for combustion of the gas. Installation personnel must follow the safety regulations in force in the country. The room must be ventilated directly via inlets on the outside walls. -
Page 16: Ventilation Requirements
A 5-8mm ventilation gap must be allowed between the top of the appliance and the underside of the working top. Two systems can be used to fit your appliance to a chosen furniture layout: A) Between two side panels of two distinct cabinet units without the aid of a support shelf, by fitting four support steel brackets provided with the product. - Page 17 System A Fig. 1 System B Fig. 2...
-
Page 19: Cooking Guide
COOKING GUIDE The cooking times given below are only approximate, as personal preference will influence cooking time. Item Small cakes Whisked Sponge Swiss Roll Victoria Sandwich (2 x 205mm./8in. shallow tins) Semi rich fruit cake (230mm./9in.deep tin) Scones Meringues Shortcrusty Pastry Puff/Flake Pastry Choux Pastry Biscuits... -
Page 20: Oven Temperature Conversion Chart
For roasting joints of meat or poultry and for pot roast preheat the oven to 190°C-200°C and cook for 30 minutes, the adjust the oven control to 110°C-120°C for the remainder of the cooking time. Slow cooking times will be about three times as long as conventional cooking. -
Page 21: Electrical Requirements
ELECTRICAL REQUIREMENTS WARNING: THIS APPLIANCE MUST BE EARTHED. Electrical installation must comply with all relevant local and national regulations. Make sure that the voltage supply is the same as the rating given on the data plate positioned on the lower part of the front of the oven. -
Page 22: Gas Requirements
GAS REQUIREMENTS Burners Nominal rate Reduced rate Ø injector LPG - G30 28..30mbar G31 37mbar mm Natural Gas - G20 20mbar Ø by-pass: G30 28..30mbar G31 37mbar G20 20mbar Air adjustment G30 28..30mbar G31 37mbar G20 20mbar GAS CONNECTION – See Page 22 (Fig. 1 to 6). PLEASE NOTE THAT THIS APPLIANCE SHOULD BE FITTED BY A QUALIFIED CORGI REGISTERED INSTALLER... - Page 23 • Re-fix the burner assembly ensuring that the injector is within the cut out in the rear of the oven and adjust the position of the burner to achieve the primary air gap (Fig. 4). • For primary air gap settings see table page 20. Grill Burner •...
- Page 24 Fig 1 Fitting the flexible Plug-in hose and sealing washer Fig 3 Removing the oven burner shield. Fig 5 Replacing the injectors. Fig 6 Regulating thermostat bypass. Fig 4 Gas Regulation.
-
Page 25: Electrical Connection
ELECTRICAL CONNECTION Before connecting the appliance, ensure that the supply voltage marked on the Rating Plate corresponds with the mains supply voltage. WARNING – THIS APPLIANCE MUST BE EARTHED This appliance should be wired into a 13Amp double pole switched fused spur outlet having 3mm contact separation and the fuse rating reduced to 3Amps, and placed in an easily accessible position adjacent to the appliance. -
Page 26: Maintenance
Before carrying out any maintenance, disconnect the appliance from the electricity supply. During the guarantee period, in case of need all service interventions should be referred back to the Baumatic Ltd Service department. Please note that intervention or repair by any unauthorised personnel will invalidate such guarantee. -
Page 27: Electrical Details
TECHNICAL DATA DIMENSIONS Height 715mm (at front) Width 596mm (at front) Depth 524 mm (front to back) ELECTRICAL DETAILS Rated Voltage: 230V ac 50Hz Supply Connection: 3 A (double pole switched fused outlet with 3mm contact gap) Power Input: 0.09 kW Mains Supply Lead: 3 x 1.5mm ²... - Page 29 Baumatic appliance. * In addition, your appliance is covered by a 5 year parts warranty. Baumatic Ltd will provide free of charge the parts required to repair the appliance, only if they are fitted by a Baumatic engineer, for any defect that arises due to faulty materials or workmanship within a period of 5 years from the original purchase date.
- Page 30 Headquarters Baumatic Ltd. Baumatic Buildings, 6 Bennet Road, Reading, Berkshire RG2 0QX, United Kingdom Sales Telephone +44 118 933 6900 Sales Fax +44 118 931 0035 Service Telephone +44 118 933 6911 Service Fax +44 118 986 9124 Spares Telephone...
-
Page 31: Environmental Note
Environmental note o The packaging materials that Baumatic uses are environmentally friendly and can be recycled. o Please discard all packaging material with due regard for the environment.
Need help?
Do you have a question about the B725SS and is the answer not in the manual?
Questions and answers