Table of Contents
Advertisement
Advertisement
Table of Contents

Related Manuals for Baumatic BO620SS


Summary of Contents for Baumatic BO620SS
- Page 1 BO620SS 60 cm Gas fan-assisted oven...
- Page 2 User Manual for your Baumatic BO620SS 60 cm Gas fan-assisted oven NOTE : This User Instruction Manual contains important information, including safety & installation points, which will enable you to get the most out of your appliance. Please keep it in a safe place so that it is easily available for future reference;...
-
Page 3: Table Of Contents
Positioning the appliance Ventilation requirements 22-23 Gas connection Room ventilation requirements 24 - 25 Gas Safety (Installation and Use) Regulations Gas connection Gas adjustment (Conversion to LPG and gas adjustment) 27-30 My appliance isn’t working correctly 30-31 Baumatic consumables Contact details... -
Page 4: Environmental Note
Environmental note o The packaging materials that Baumatic uses are environmentally friendly and can be recycled. o Please discard all packaging material with due regard for the environment. -
Page 5: Important Safety Information
Baumatic’s Conditions Of Guarantee. The foregoing does not affect your statutory rights. o Repairs may only be carried out by Baumatic service engineers or their authorised service agent. - Page 6 Warning and safety instructions o This appliance complies with all current European safety legislation. Baumatic do wish to emphasise that this compliance does not remove the fact that the appliance surfaces will become hot during use and retain heat after operation.
- Page 7 o Do not place heavy objects on the oven door or lean on the oven door when it is open, as this can cause damage to the oven door hinges. Nobody should be allowed to sit or stand on any part of the oven.
- Page 8 Please see the specific section of this booklet that refers to installation. o Baumatic Ltd. declines any responsibility for injury or damage, to person or property, as a result of improper use or installation of this appliance.
-
Page 9: Specifications
Specifications (IMPORTANT: The above drawing does not show the ventilation requirements that are necessary for installing this appliance, please refer to the installation instructions for this information). Product Dimensions Aperture Dimensions Height: 591 mm Height: 580 mm– 583 mm Width: 597 mm Width: 560 mm... -
Page 10: Optional Extras
o LPG conversion jets Optional extra o BPS2 Pizza stone Electrical details Rated Voltage: 230 Vac 50 Hz Supply Connection: 13 A (double pole switched fused outlet with 3mm contact gap) Fuse rating: 3 amp Max Rated Inputs: 0.075 kW Mains Supply Lead: 3 x 1.0 mm Cooling fan... -
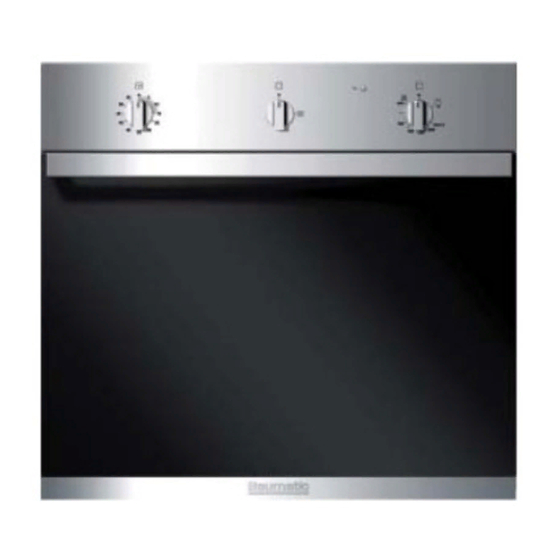
Page 11: Control Panel
Control Panel Using your gas oven Before first use o To remove any residue from the oven that may have been left from the manufacturing process, you should select the gas oven and set it to its maximum temperature setting. o It is perfectly normal for a smell to be produced during this process. -
Page 12: Switching The Gas Oven On
o We would recommend that an appropriate stainless steel cleaner and polish is regularly used on the stainless steel surfaces of this appliance. Switching the gas oven on The oven has automatic ignition, to light it you should do the following:- o Open the door of the appliance. -
Page 13: Switching The Gas Grill On
Switching the gas grill on The grill has automatic ignition, to light it you should do the following:- o Open the door of the oven and fit the grill deflector to the front of the appliance. You should then close the oven door until it rests against the grill deflector. -
Page 14: Operation Of The Fan
o IMPORTANT: You should allow the oven to cool completely before attempting to remove the grill deflector. If you attempt to remove the grill deflector before the oven is cool, it will be extremely hot. Operation of the fan o After igniting the oven and shutting the door of the appliance, check to make sure that the fan on the rear wall of the oven cavity is turning. -
Page 15: Warnings
o Try to open the door as little as possible to view the dishes. Warnings o Keep the oven door open when using the grill function and make sure that the grill deflector is fitted. o Do not use aluminium foil to cover the enamelled baking tray or heat items wrapped in aluminium foil under the grill. -
Page 16: Using The Minute Minder
o Your oven is a Continental style gas oven, which may require some adjustment in your cooking method, if you are used to a U.K. style gas oven. o We would recommend that you place the enamelled baking tray into the lowest shelf position. o This will deflect some of the fierce heat generated by the base burner away from the food that you are cooking. -
Page 17: Cleaning And Maintenance
Any damage that is caused to the appliance by a cleaning product will not be fixed by Baumatic free of charge, even if the appliance is within the guarantee period. -
Page 18: Replacing The Oven Bulb
Replacing the oven bulb IMPORTANT: The oven must be disconnected from your mains supply before you attempt to either remove or replace the oven bulb. o Remove oven shelves enamelled baking tray. o Remove the light cover by turning it anti-clockwise. -
Page 19: Installation
o IMPORTANT: You should make sure that the door is supported at all times and that you place the door on some padded material whilst cleaning it. o The oven door and door glass should only be cleaned using a damp cloth and a small amount of detergent. -
Page 20: Positioning
o To connect the oven power cord, loosen and remove the cover on the terminal block, in order to gain access to the contacts inside. Make the connection, securing the cord in place with the cable clamp provided and then immediately close the terminal block cover again. -
Page 21: Installing The Oven Into The Kitchen Cabinet
Installing the oven into the kitchen cabinet Positioning the appliance o Ensure that the aperture that you will be fitting the oven into is of the size given in the above diagram. o The oven must be fitted into an oven housing with the ventilation cut-outs shown in the “Ventilation requirements”... -
Page 22: Ventilation Requirements
Ventilation requirements o You should remove the rear panel of the housing unit before attempting to install the oven. o A minimum ventilation gap of 50 mm must be allowed between the rear of the support shelf and the rear of the housing unit. o A 400 cm (20 x 20 cm) ventilation cut out must be made in the support shelf. -
Page 23: Ventilation Requirements
Additional built under ventilation requirements o Remove the horizontal strengthening support at the upper front housing unit. o If your housing unit incorporates a domestic lower drawer, this must be made non-functioning with a ventilated false front. o A 5 mm ventilation gap must be allowed between the top of the appliance and the underside of the worktop. -
Page 24: Gas Connection
Conversion for use on LPG and other gases must only be undertaken by a qualified person. For information on the use of other gases, please contact the Baumatic Advice Line. o The oven must be installed by a qualified person, in accordance with the current edition of the Gas Safety (Installation and Use) Regulations and the relevant building/I.E.E. -
Page 25: Gas Safety (Installation And Use) Regulations
o Ensure that the room containing the oven is well ventilated, keep natural ventilation holes. o Prolonged intensive use of the appliance may call for additional ventilation. o This oven is not fitted with a device for discharging the products of combustion. -
Page 26: Gas Connection
Gas connection ALL INSTALLATION AND SERVICE WORK MUST BE CARRIED GASSAFE REGISTERED ENGINEER. o Prior to installation, ensure that the gas supply conditions (nature of the gas and gas pressure) and the adjustment conditions are compatible. The adjustment conditions for this appliance are stated on the rating plate which can be found on the back cover. -
Page 27: Gas Adjustment (Conversion To Lpg And Gas Adjustment)
Gas adjustment (Conversion to LPG and gas adjustment) IMPORTANT: Your appliance must be disconnected from the electric and gas supply before completing this process. Power inputs Natural Gas Oven 2.74 kW (injector size 115) 2.74 kW (injector size 80) Grill 2.40 kW (injector size 115) 2.40 kW (injector size 80) - Page 28 o Unscrew screw (A) which will allow you to remove the oven burner. o Unscrew the injector (B) and replace it with one suitable for LPG (see power inputs information page 29). recommended that the appropriate thread sealant is used; always check for gas tightness after assembly.
- Page 29 o Re-fix the grill burner, no further adjustments are necessary. o Remove control panel cover from the top of the appliance. o Remove oven control knobs then undo the two fixing rings that are exposed underneath, by turning them anti- clockwise.
-
Page 30: My Appliance Isn't Working Correctly
o Re-assemble the appliance, reinstall it and then carry out a full function test (this should include a gas tightness test). My appliance isn’t working correctly The gas oven burner or grill burner do not light. * Check that the oven is switched on at your mains supply. * Check that the fuse in the spur outlet doesn’t need replacing. - Page 31 Or any installation other than the one specified by Baumatic Ltd. has been completed. Please refer to the conditions of guarantee that appear on the...
-
Page 32: Baumatic Consumables
BC005 Stainless Steel Cleaner and Protector (250ml) o BC007 E-Cloth – General Purpose Cloth o BC008 Microwave Cover To order a Baumatic consumable product please call 0123 5437 244 and quote the product code. You can also order online from eshop.baumatic.co.uk... -
Page 33: Contact Details
Czech Republic United Kingdom Baumatic CR spol s.r.o. Baumatic Ltd., Lípovà 665 Baumatic Buildings, 460 01 Liberec 4 6 Bennet Road, Czech Republic Reading, Berkshire RG2 0QX +420 483 577 200 United Kingdom www.baumatic.cz Sales Telephone (0118) 933 6900 Slovakia Sales Fax Baumatic Slovakia, s.r.o.
Need help?
Do you have a question about the BO620SS and is the answer not in the manual?
Questions and answers