Advertisement
IV
. Control
1 When the light is connected to the transformer
)
directly, the on/off switch controls the colour
changes (Associating a light with a transformer
and an on/off switch is recommended; If you want
all the lights to change colour at the same time,
install a master switch, Figure 3).
2
If applicable, when the light is connected to the
)
transformer and the transformer to the optional
control box, the control panel on the control box
and its remote control controls the colour changes
(See the Control Box Manual for details).
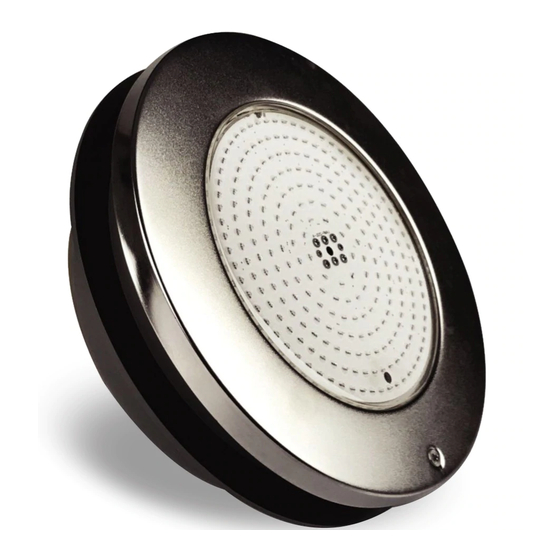
V. REPLACEMENT PARTS
Item
Part No.
Description
No.
1
03011123 M5*10 Screw for Lid
2
03017138 Lid for EL-H200 Lighits
3
03013004 Hexagonal Nut (M4)
4
01110028 Fastener
5
03011348 M4*22 Screw
04011153 Ultra-Thin 252 LED panel 20W,Warm white
04011151 Ultra-Thin 252 LED panel 20W,Cool white
04011152 Ultra-Thin 252 LED panel 20W,RGB
04011150 Ultra-Thin 252 LED panel 20W,Single Blue
04011107 Ultra-Thin 441 LED panel 35W,Warm white
04011105 Ultra-Thin 441 LED panel 35W,Cool white
6
04011106 Ultra-Thin 441 LED panel 35W,RGB
04011104 Ultra-Thin 441 LED panel 35W,Single Blue
04011181 Ultra-Thin 531 LED panel 50W,Warm white
04011179 Ultra-Thin 531 LED panel 50W,Cool white
04011180 Ultra-Thin 531 LED panel 50W,RGB
04011178 Ultra-Thin 531 LED panel 50W,Single Blue
7
03011360 M3*5 round head screw
8
02021085 Silica gel ring
9
01050105 Bottom cover
10
03011361 M4*10 round head self-tapping screw
11
02010285 NBR ring
2* 1.5mm * 2.5m( D8) Cable
2
12
04013004
13
03012125 M4*10 flat head self-tapping screw
14
01050100 Cable Clip
15
89041604 Wate Joint Fittings for Cable
16
01171101 EL-H200 Lighits niche
17
01171106 Joint for Wine & Pipe
Master Switch
ON/OFF Switch
ON/OFF Switch
Light
Light
Figure 3
Qty
1
1
4
4
4
12
1
13
14
2
1
1
5
2
1
2
3
1
1
1
www.emauxgroup.com
ON/OFF Switch
www.emauxgroup.com
Light
1
2
SAFETY WARNINGS
3
• Only qualified electrician is allowed to carry out the installation of this product.
4
• Avoid direct contact with electrical power.
5
• Respect all regulations in effect for preventing accidents.
6
• All units are required to be disconnected from the main electricity before any operation of maintenance.
7
• Never handle with wet hands and feet.
8
• This unit is design for use only when fully submerged in fresh water, connecting with a safety transformer
9
10
• Never operate this Underwater Light for more than 1 minute unless it is totally submerged in water.
11
• Be sure power is off before installing or removing LED plate. Allow LED plate to cool before replacing.
15
• This product should be installed according to your local electrical installation ordinances and regulations.
16
• Maximum Water Temperature Range for light operation 0 - 30 C
17
A) Electrical Specification : 1) Voltage : AC12V
B) Colour Options(For RGB version only) :
1
White
3
Blue
5
Red+Green
7
Mode A: Blue+ Gradual Red
9
Mode C: Blue+Gradual Green
11
Mode E: RGB Colour Sequence: Red>Green>Blue
Mode F: Four Colour Sequence: Red>Green>Blue>Purple
13
4-4
EL-H200
UNDERWATER LIGHT OPERATING MANUAL
EL-H200
Keep this manual for future reference
o
2) Frequency : 50/60Hz 3) Power : 20W / 35W / 50W.
2
Green
4
Green+Blue
6
Red+Blue
8
Mode B: Green+Gradual Red
10
Mode D: Blue+Gradual Red
12
Auto Colour Change
14
Rapid Auto Colour Change
www.emauxgroup.com
4-1
EMLI16082533
Advertisement
Table of Contents

Related Manuals for emaux EL-H200


Summary of Contents for emaux EL-H200
- Page 1 (See the Control Box Manual for details). V. REPLACEMENT PARTS Item Part No. Description 03011123 M5*10 Screw for Lid 03017138 Lid for EL-H200 Lighits 03013004 Hexagonal Nut (M4) 01110028 Fastener 03011348 M4*22 Screw 04011153 Ultra-Thin 252 LED panel 20W,Warm white SAFETY WARNINGS 04011151 Ultra-Thin 252 LED panel 20W,Cool white •...
- Page 2 Figure 1. • Warranty will be voided if the Emaux Underwater Light was dismantled by unauthorized NOTE: The pool or spa electrical system can be verified with a pool and Spa Electrical personnel.
Need help?
Do you have a question about the EL-H200 and is the answer not in the manual?
Questions and answers